Getting Started
In this section you will learn how to record your first script.
Recording your first test
After creating a new project you will be prompted to name it and then asked to provide a base URL.
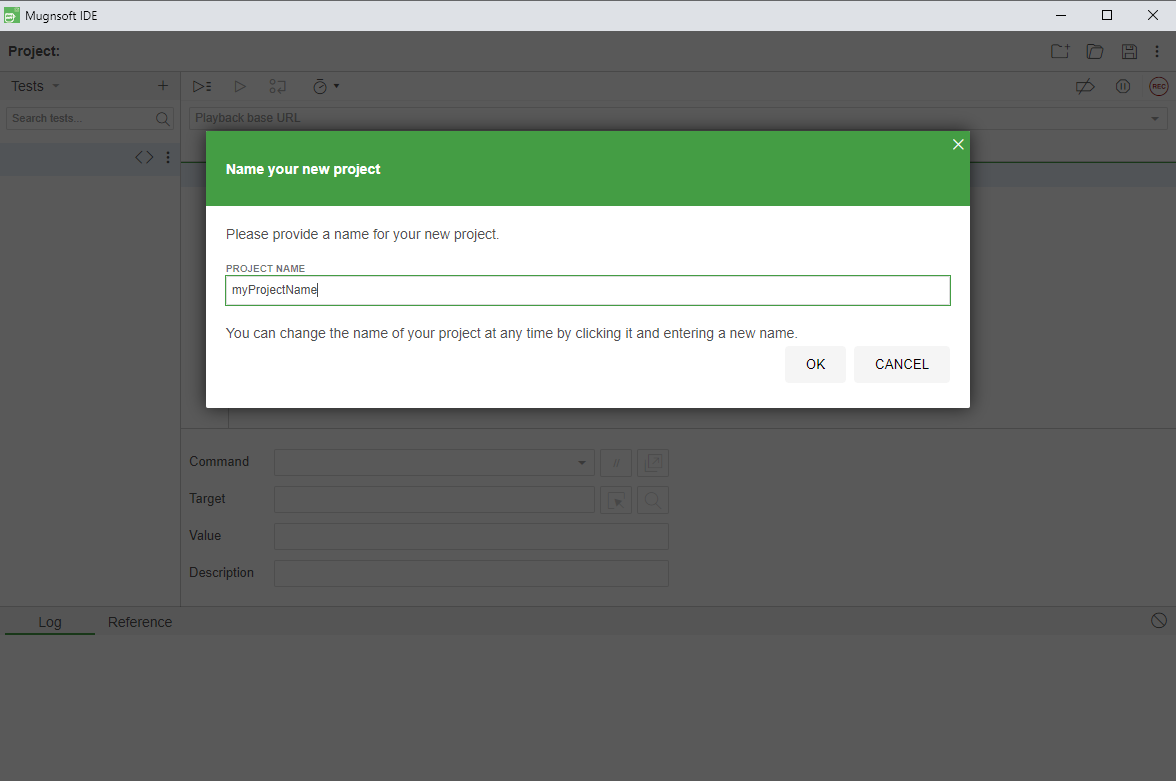
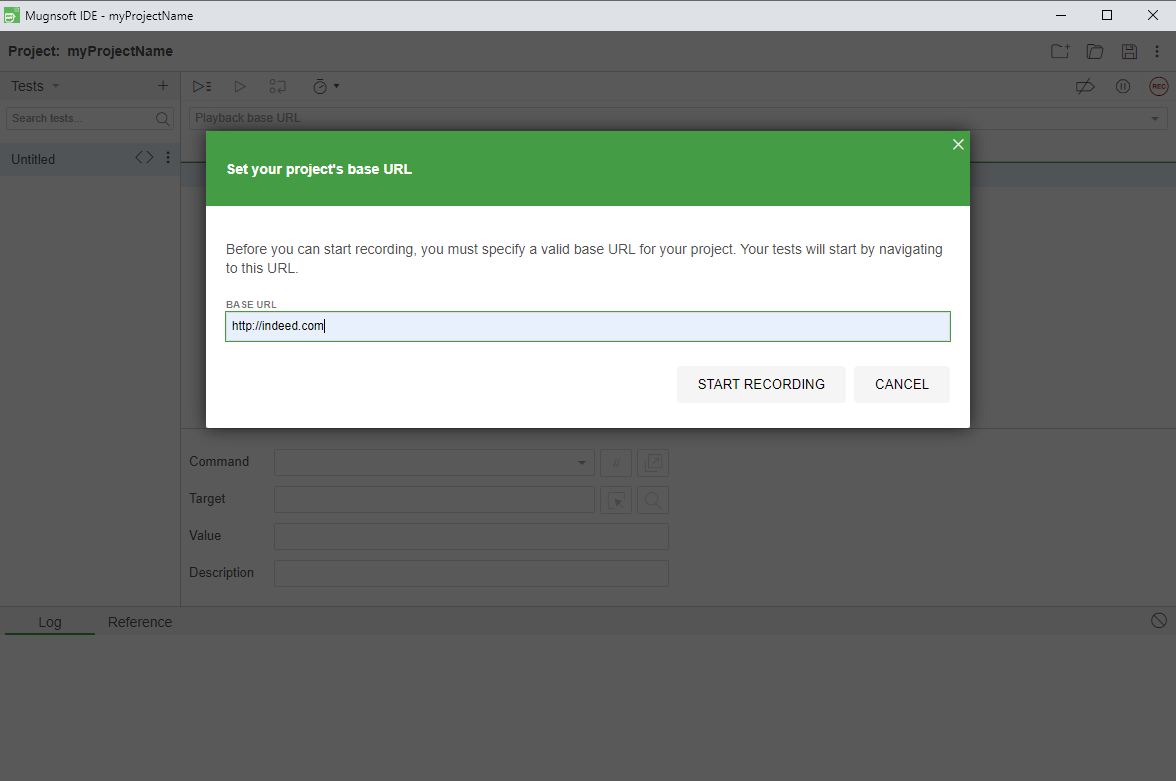
The base URL is the URL of the application you are testing. It’s something you set once and it gets used across all of the tests in this project. You can change it later if need-be.
After completing these settings, a new browser window will open, load the base URL, and start recording.
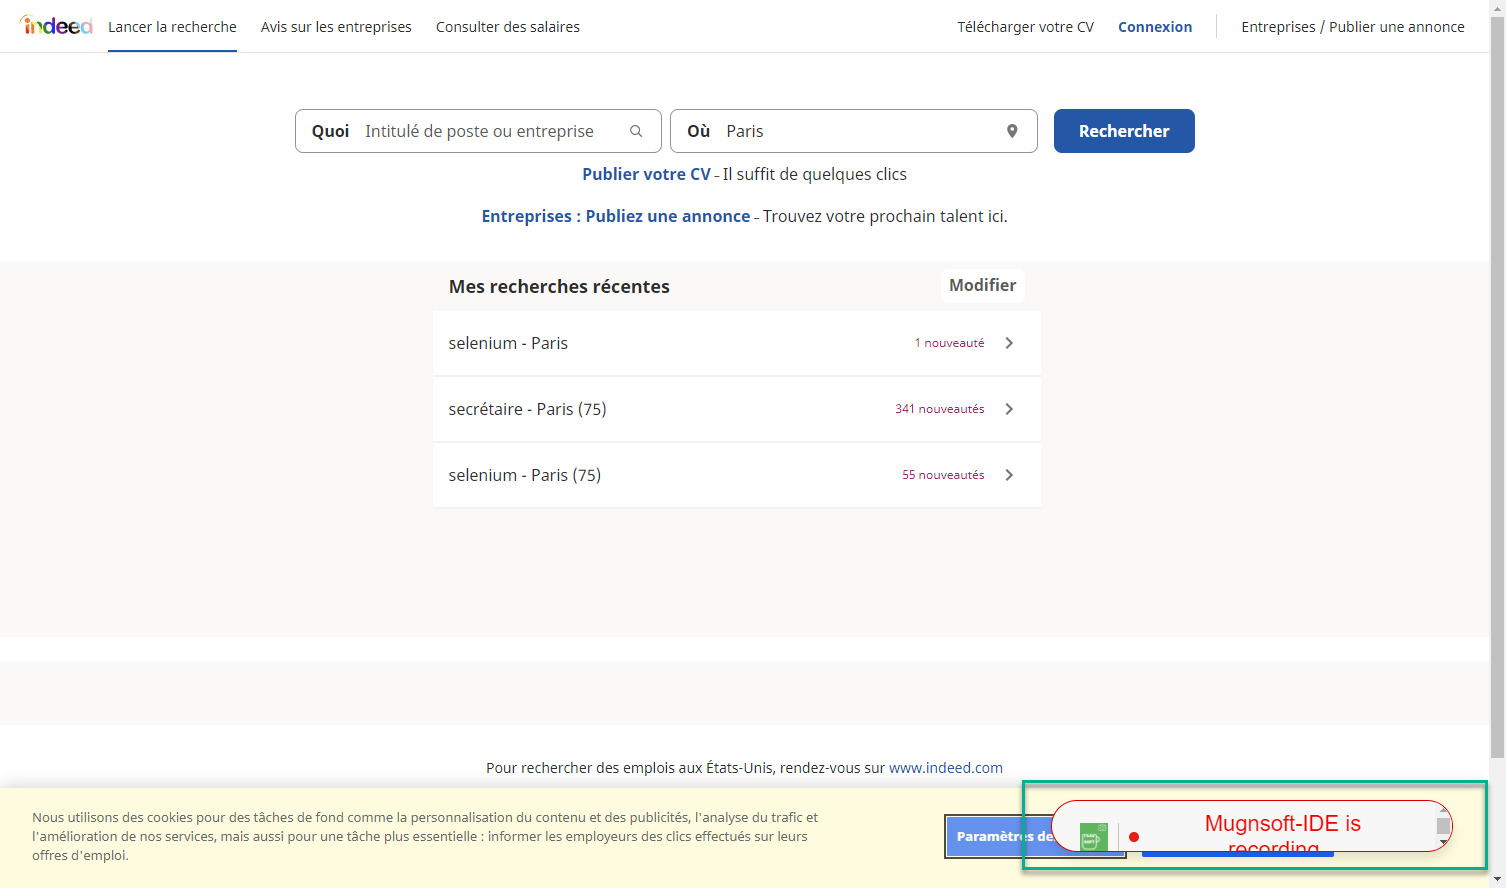
Interact with the page and each of your actions will be recorded in the IDE. To stop recording, switch to the IDE window and click the recording icon.
This test example can be downloaded here.
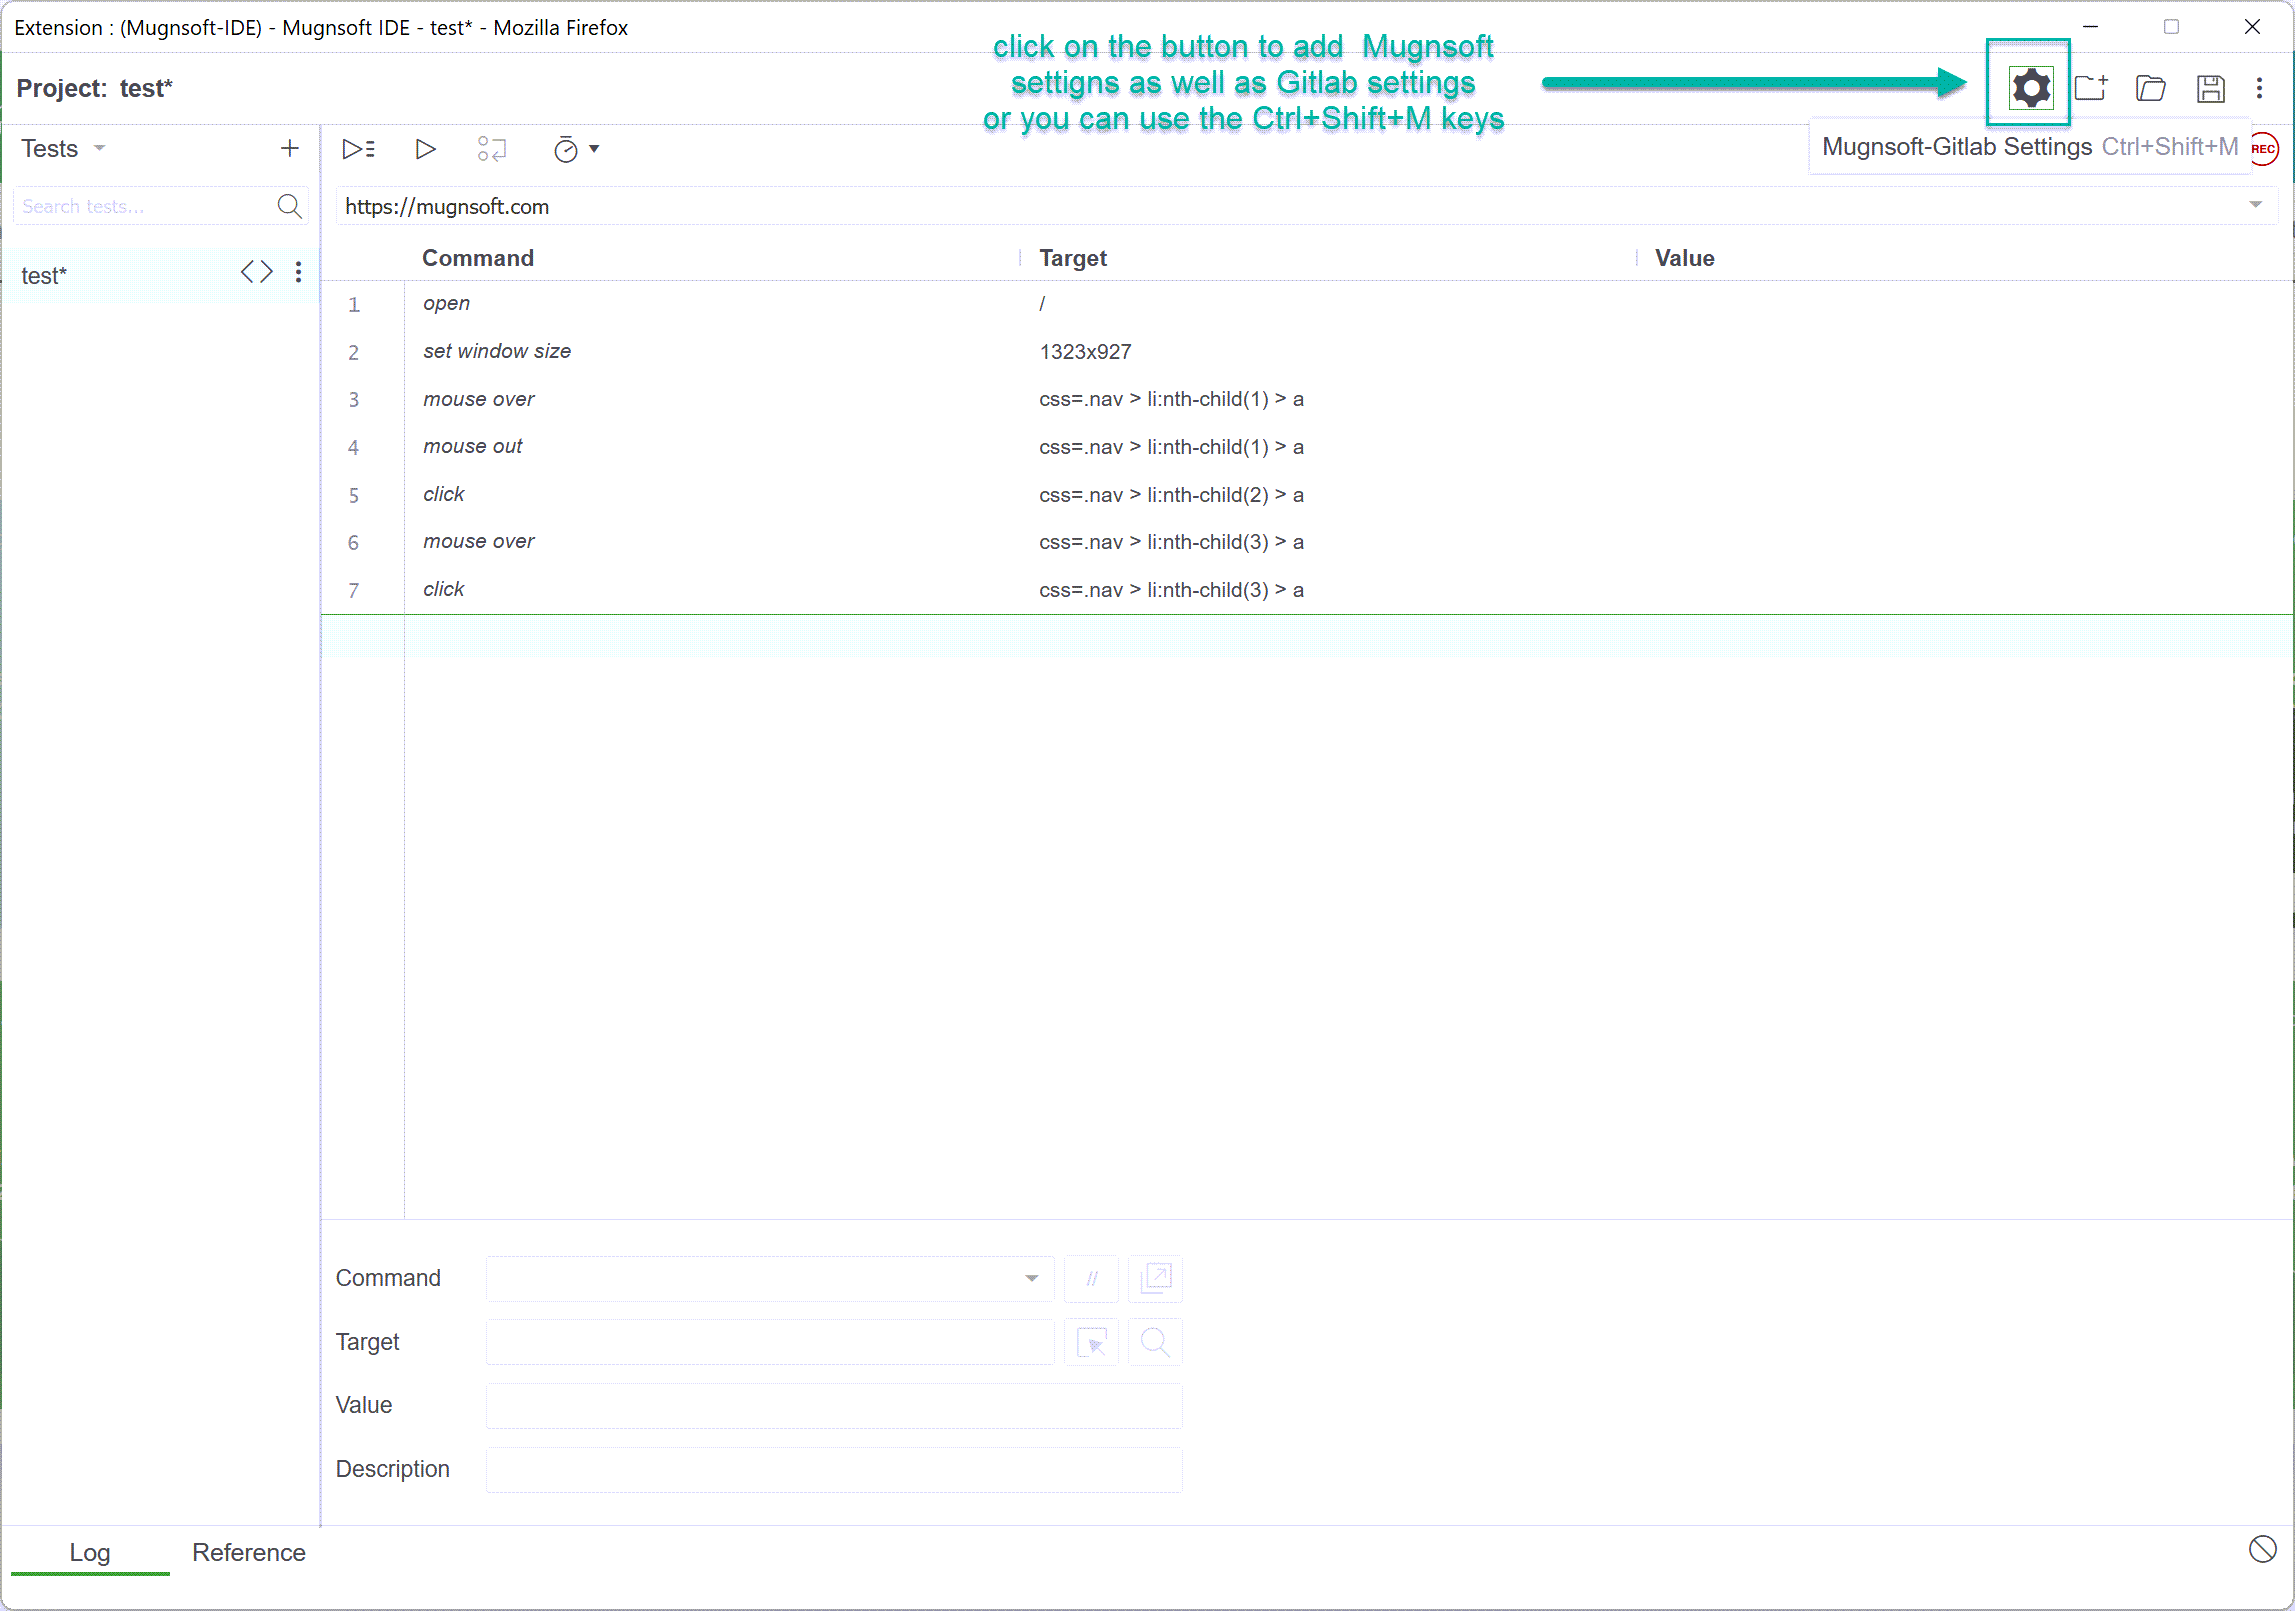
Configure Mugnsoft IDE to push to Mugnsoft and/or Gitlab
To be able to push the auto-generated code to Mugnsoft or to your Gitlab repository “Mugnsoft-monitors”, click on the cog icon button or use the crtl+shift+M keys.
Add Mugnsoft’s settings
You need to get first a Mugnsoft’s webserver token.
- Log in to your Mugnsoft' webserver and access the API Keys web page.
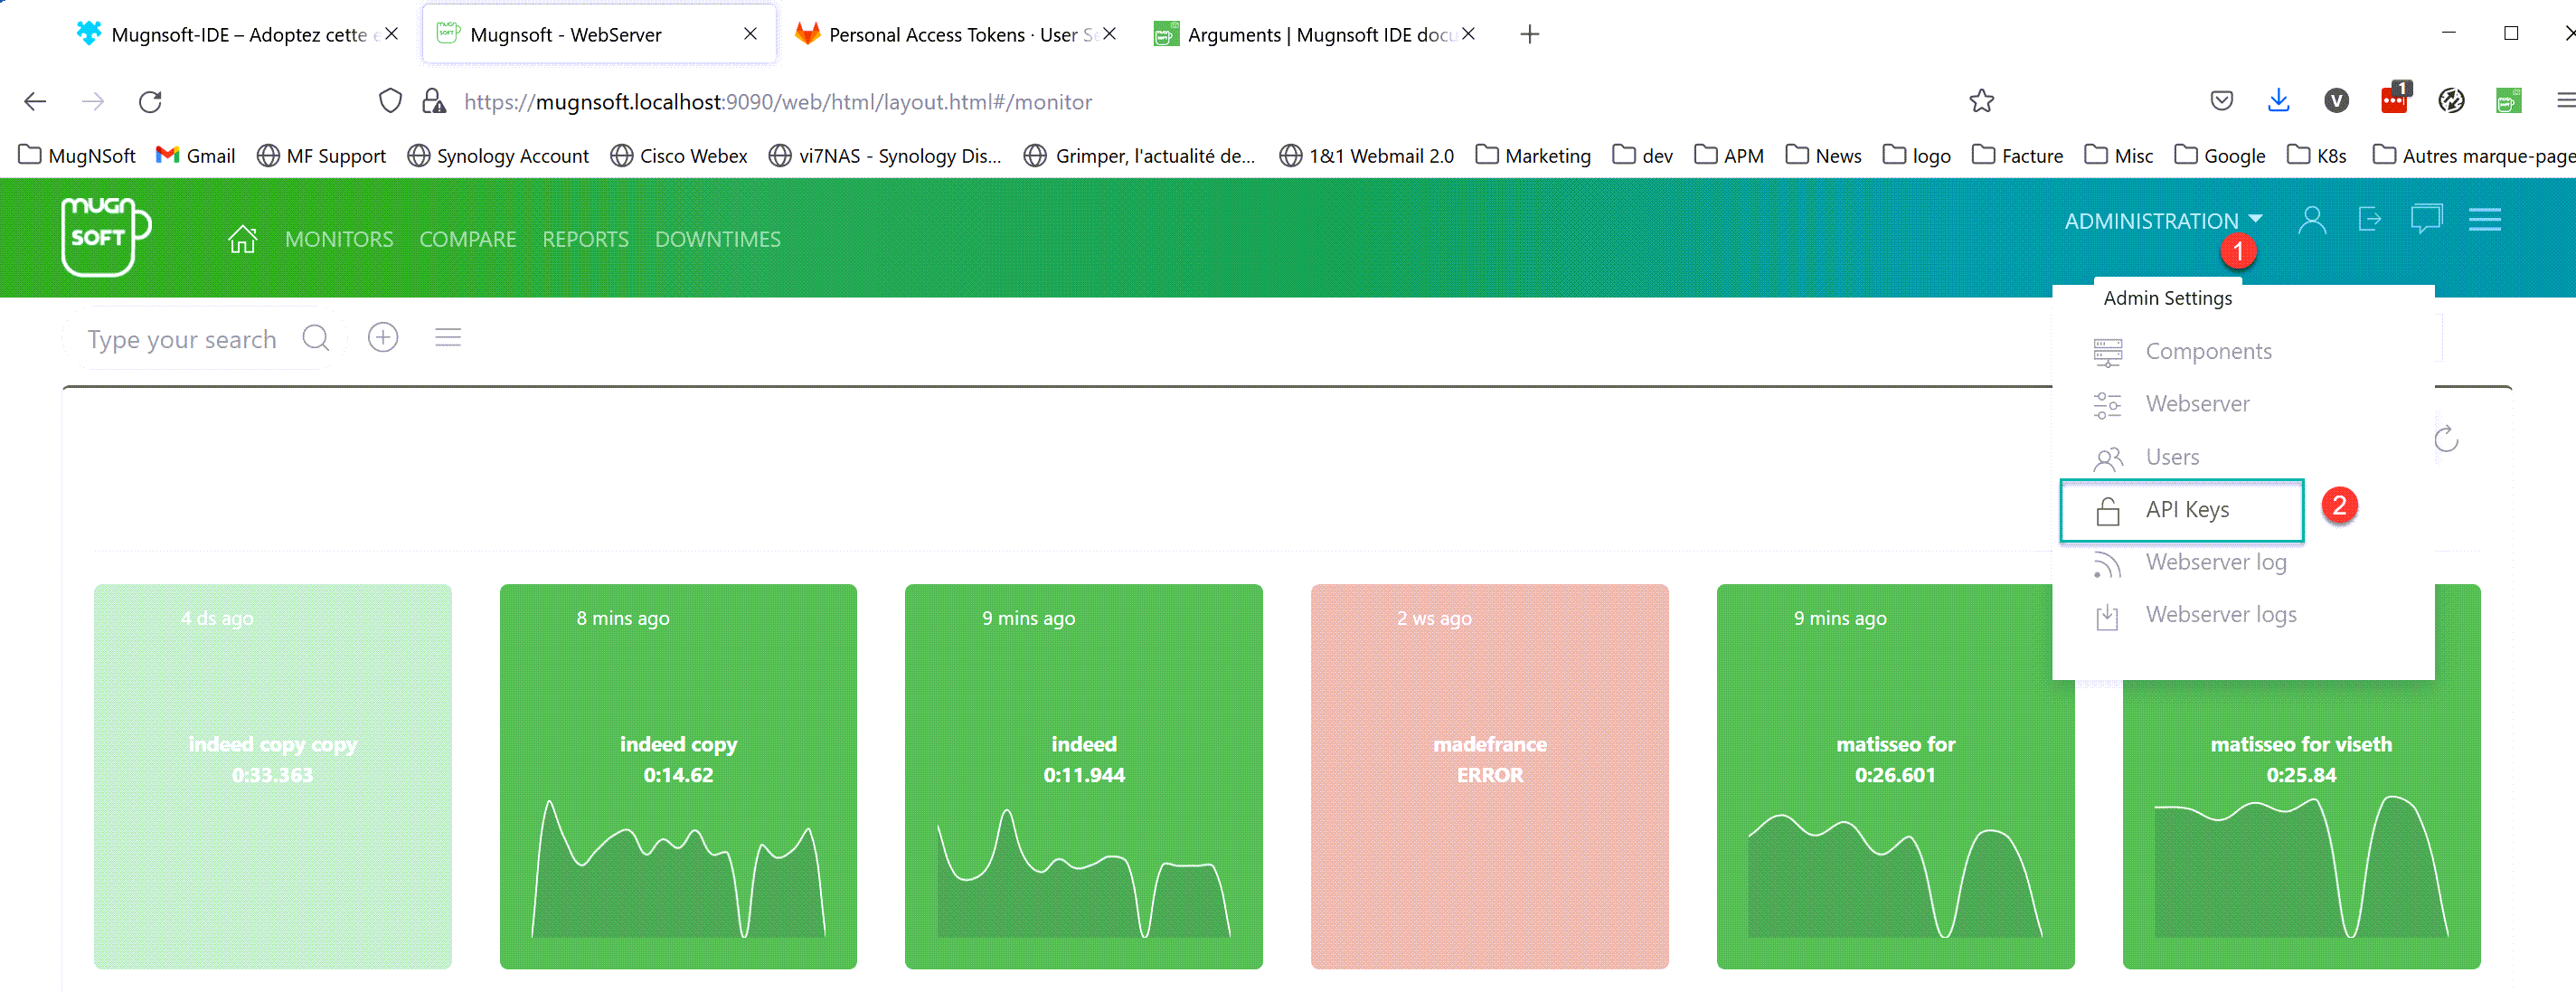
- Generate a new API key for the webserver components had the required validity for the token.
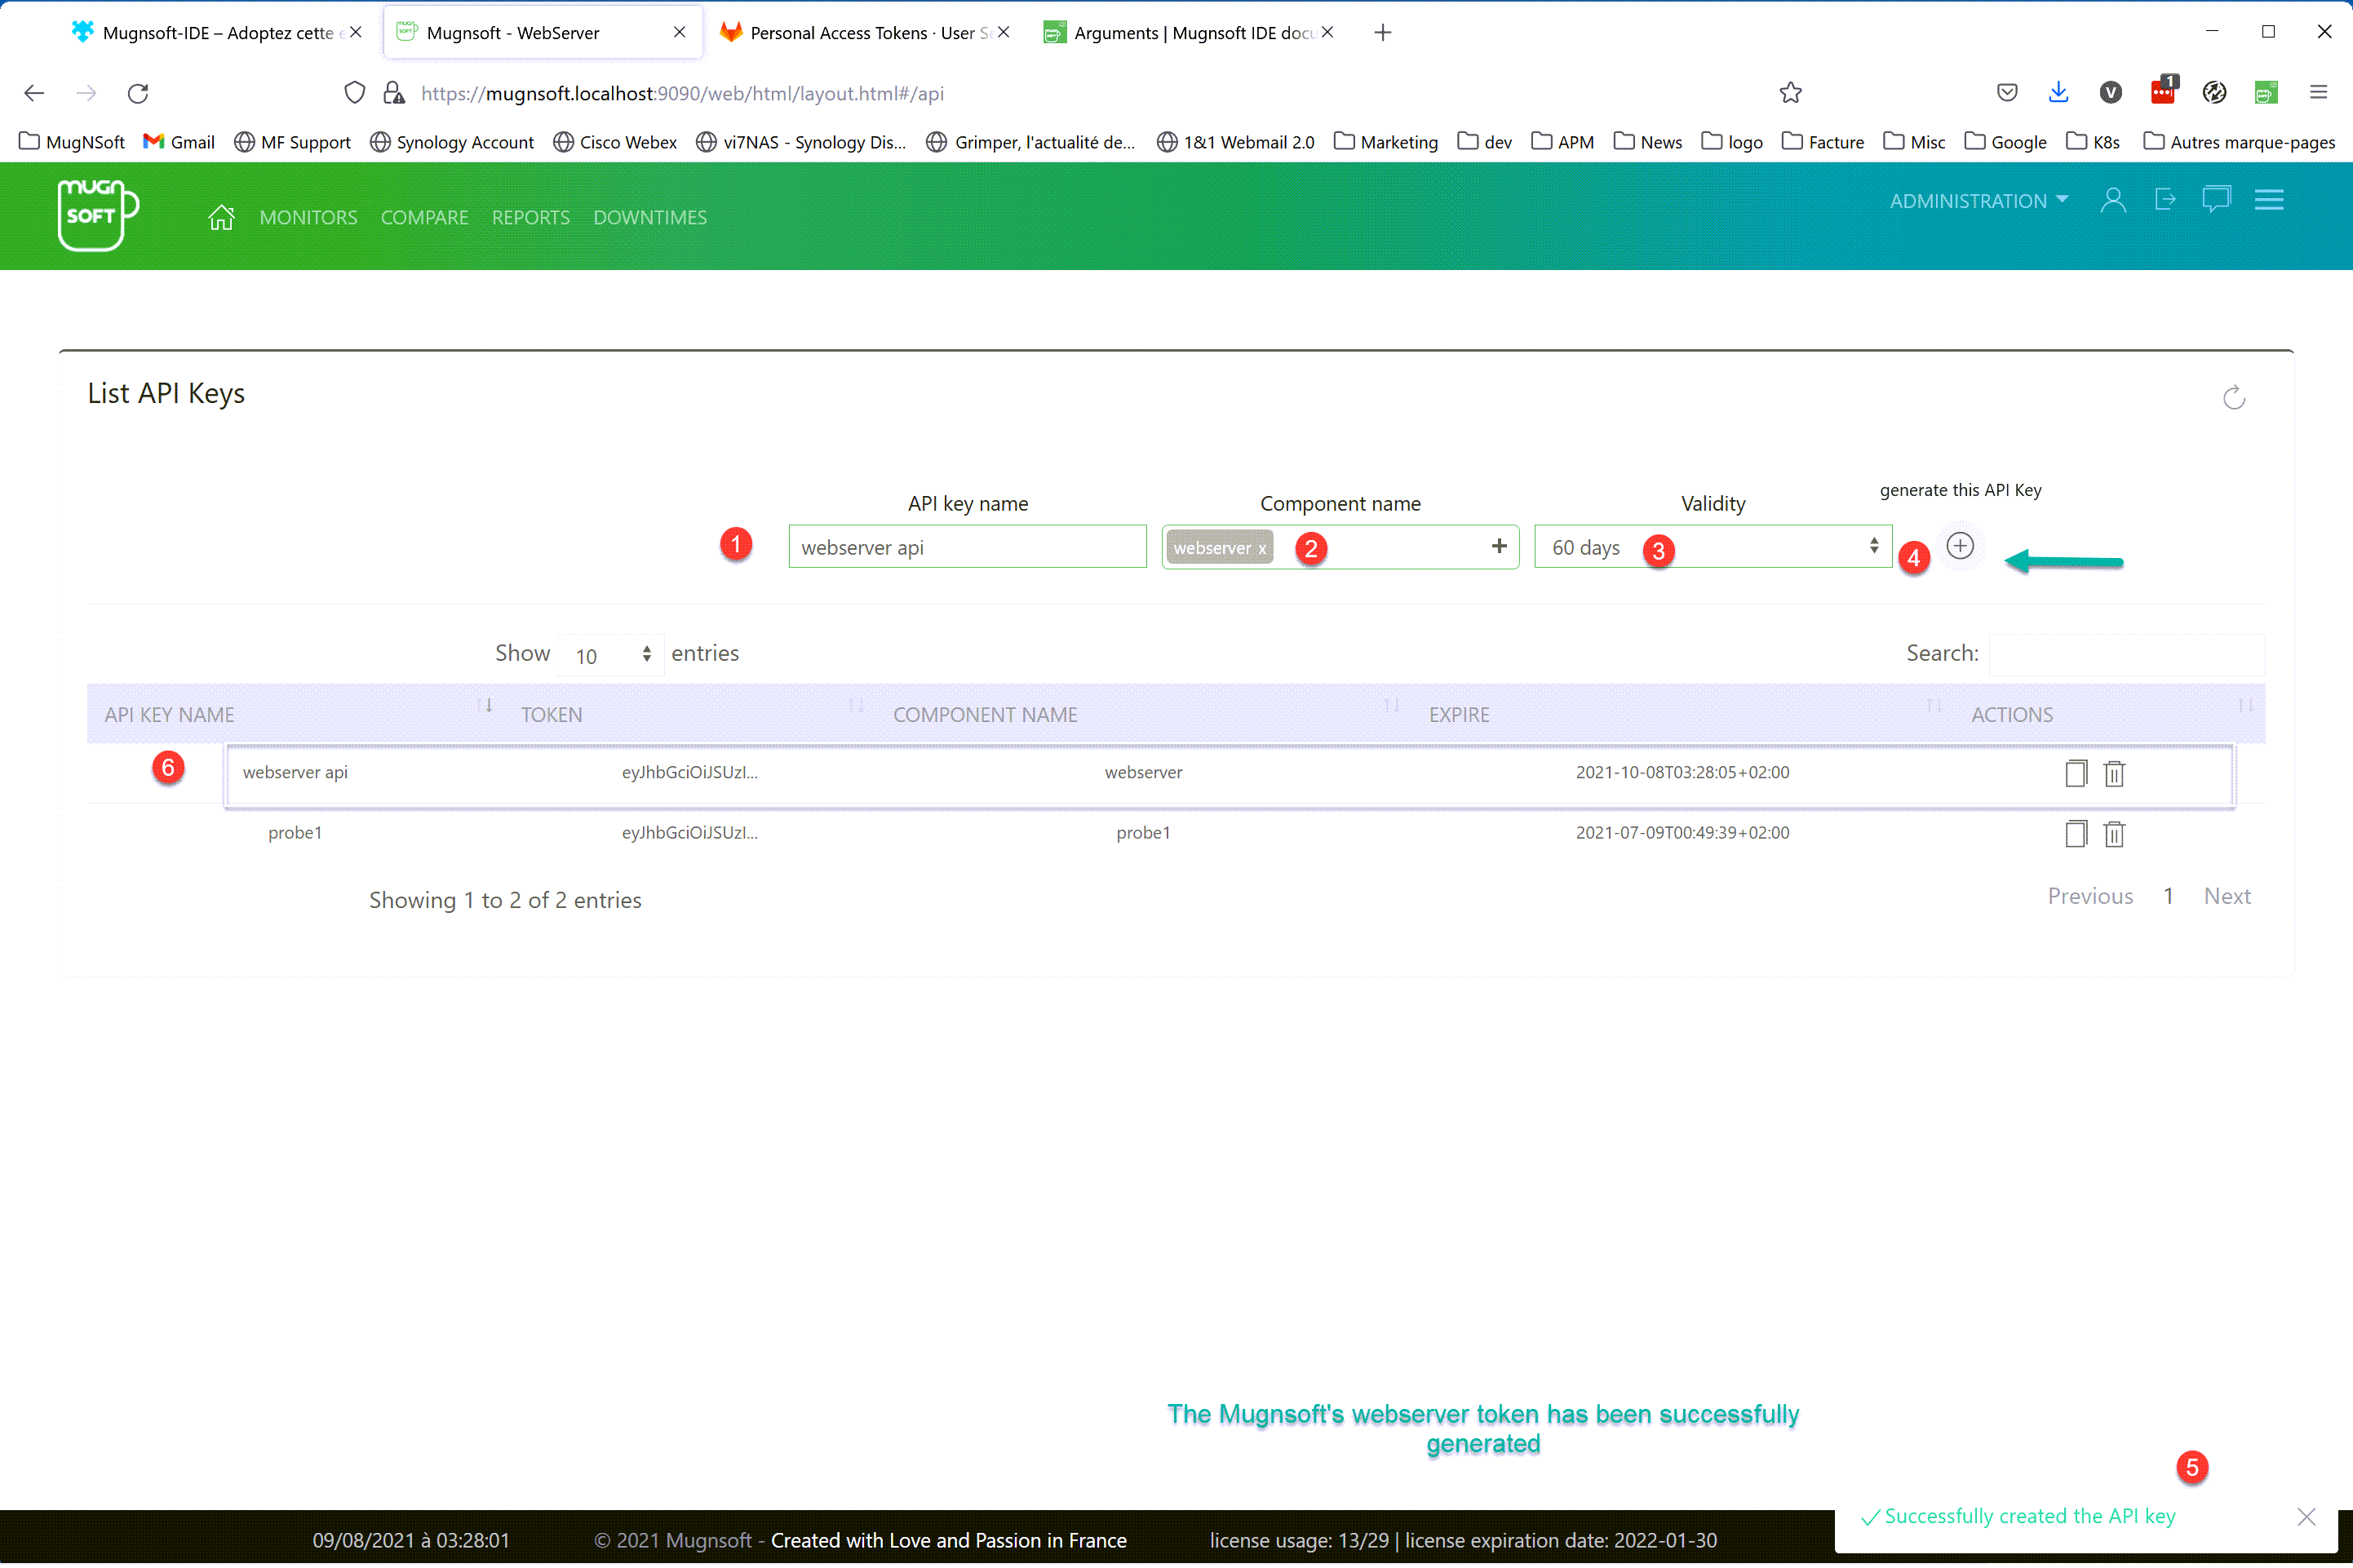
- Copy the token to clipboard
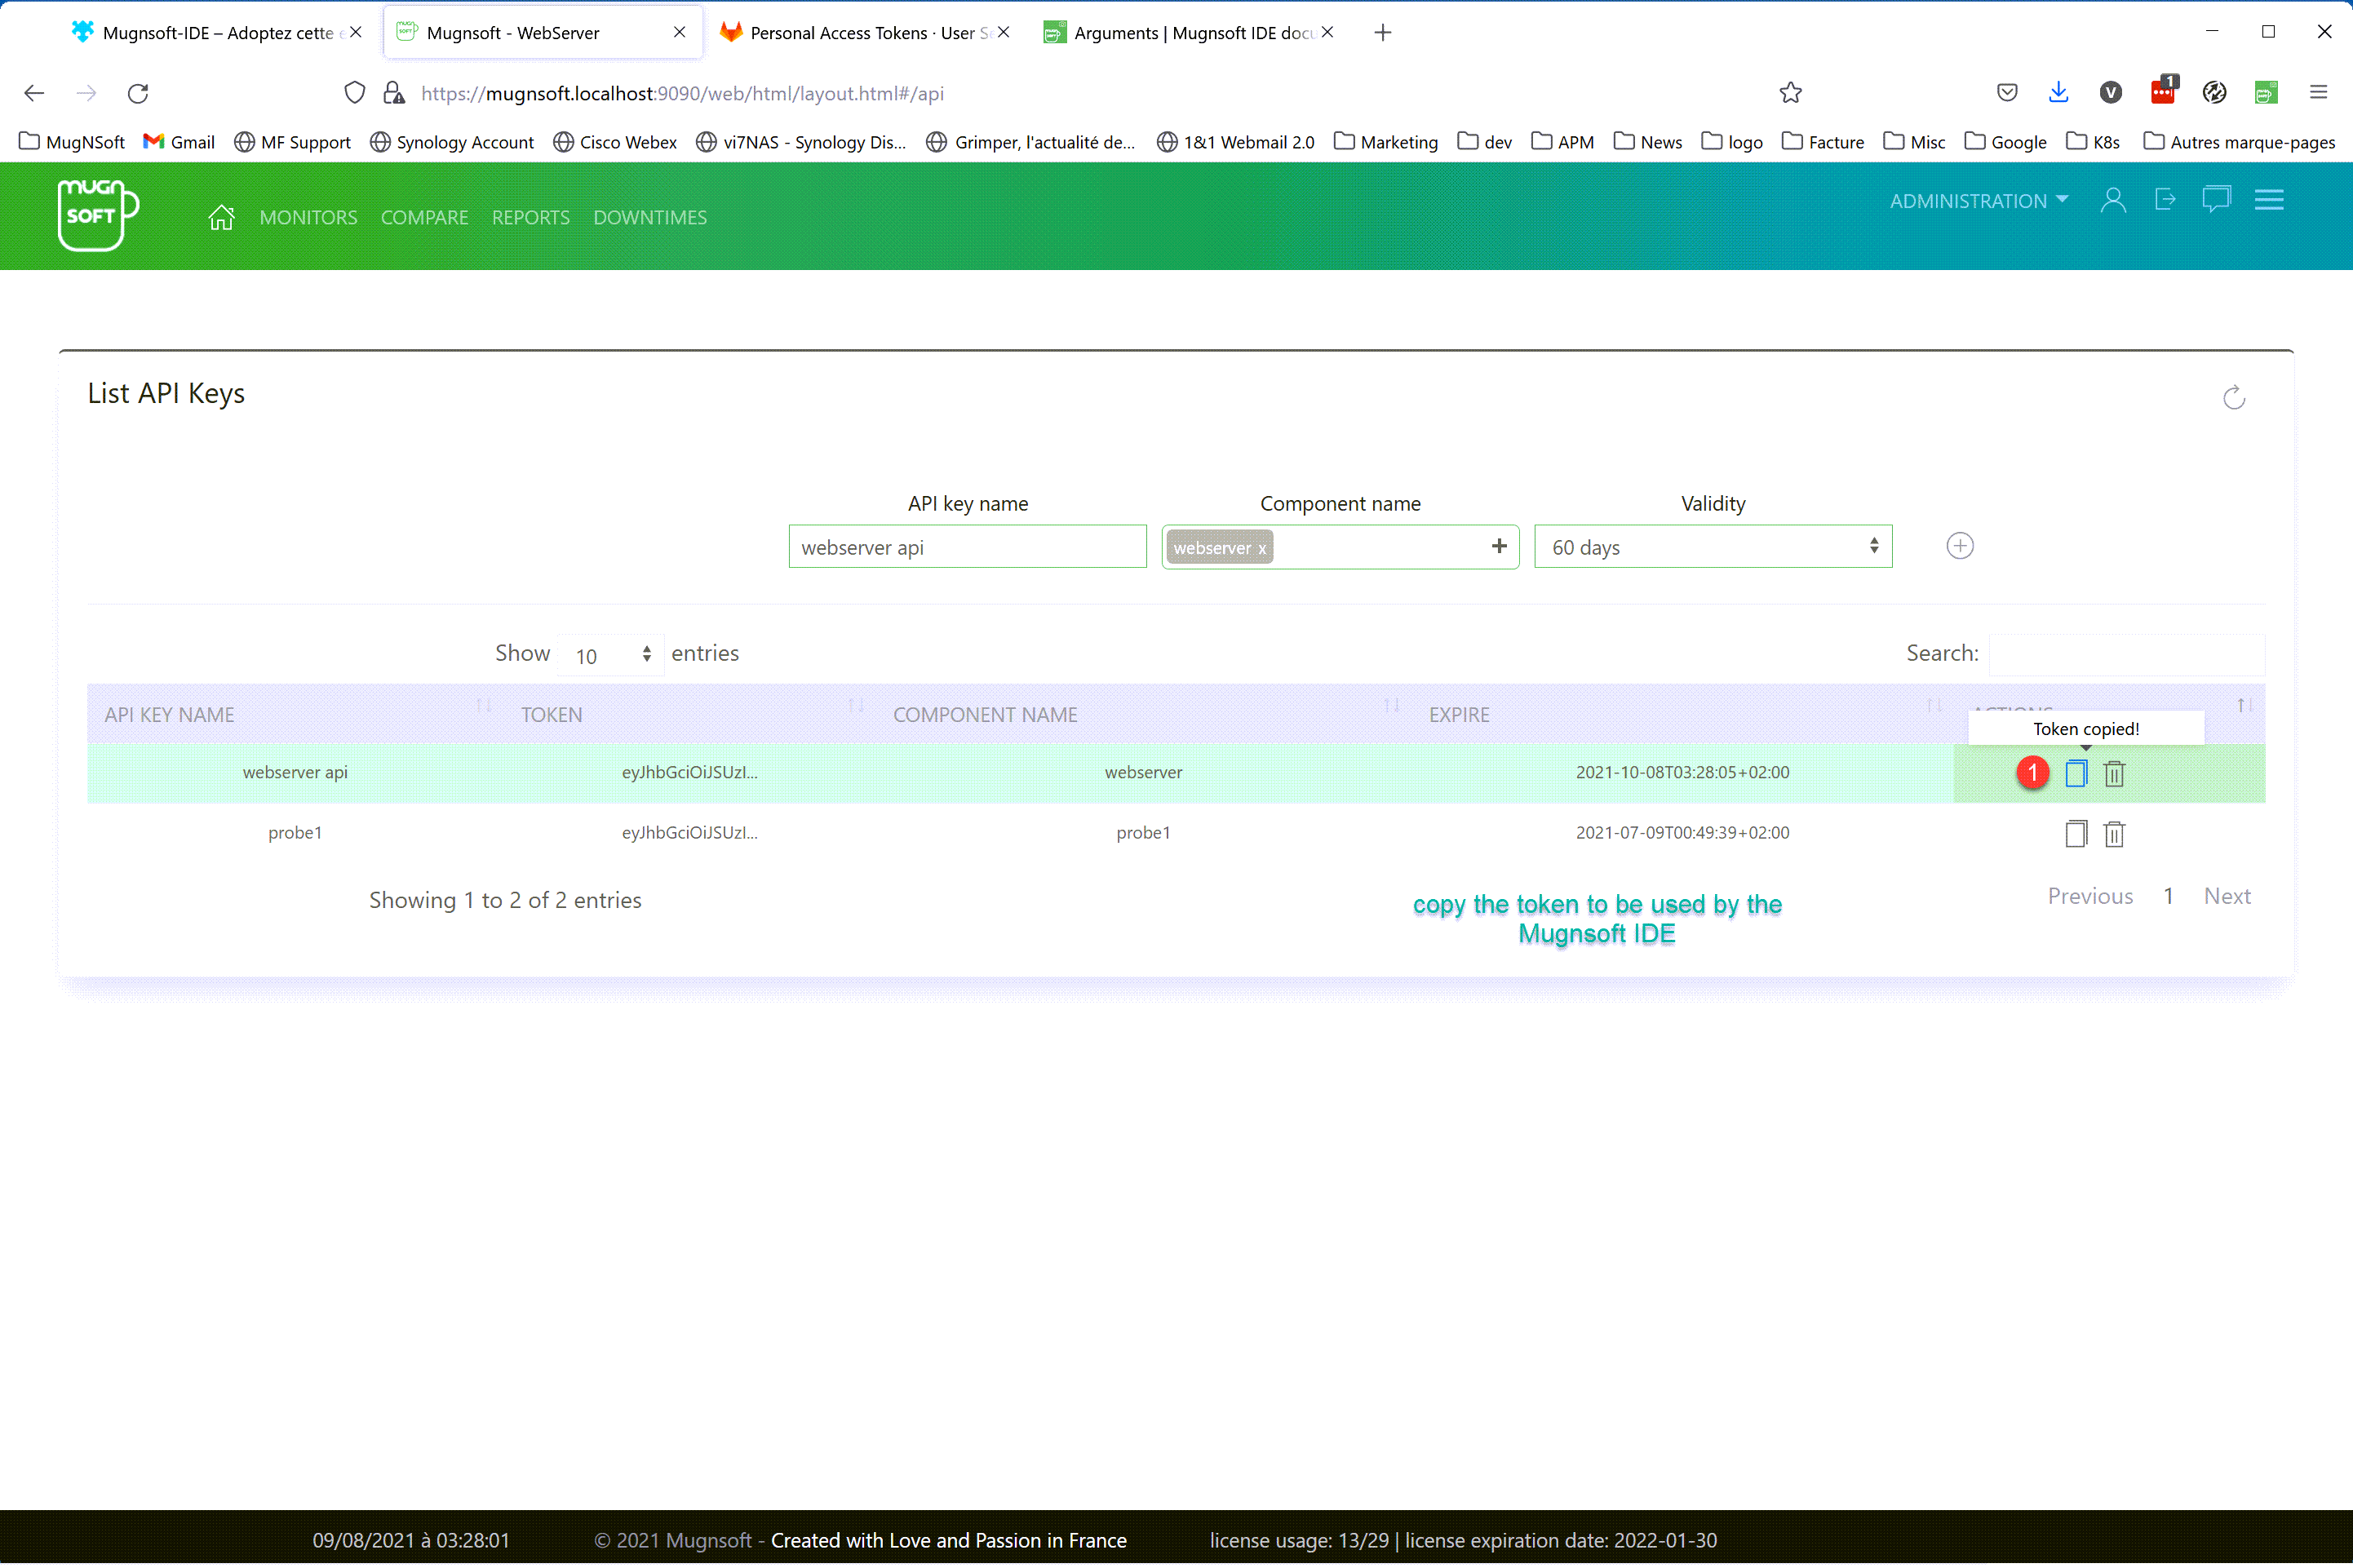
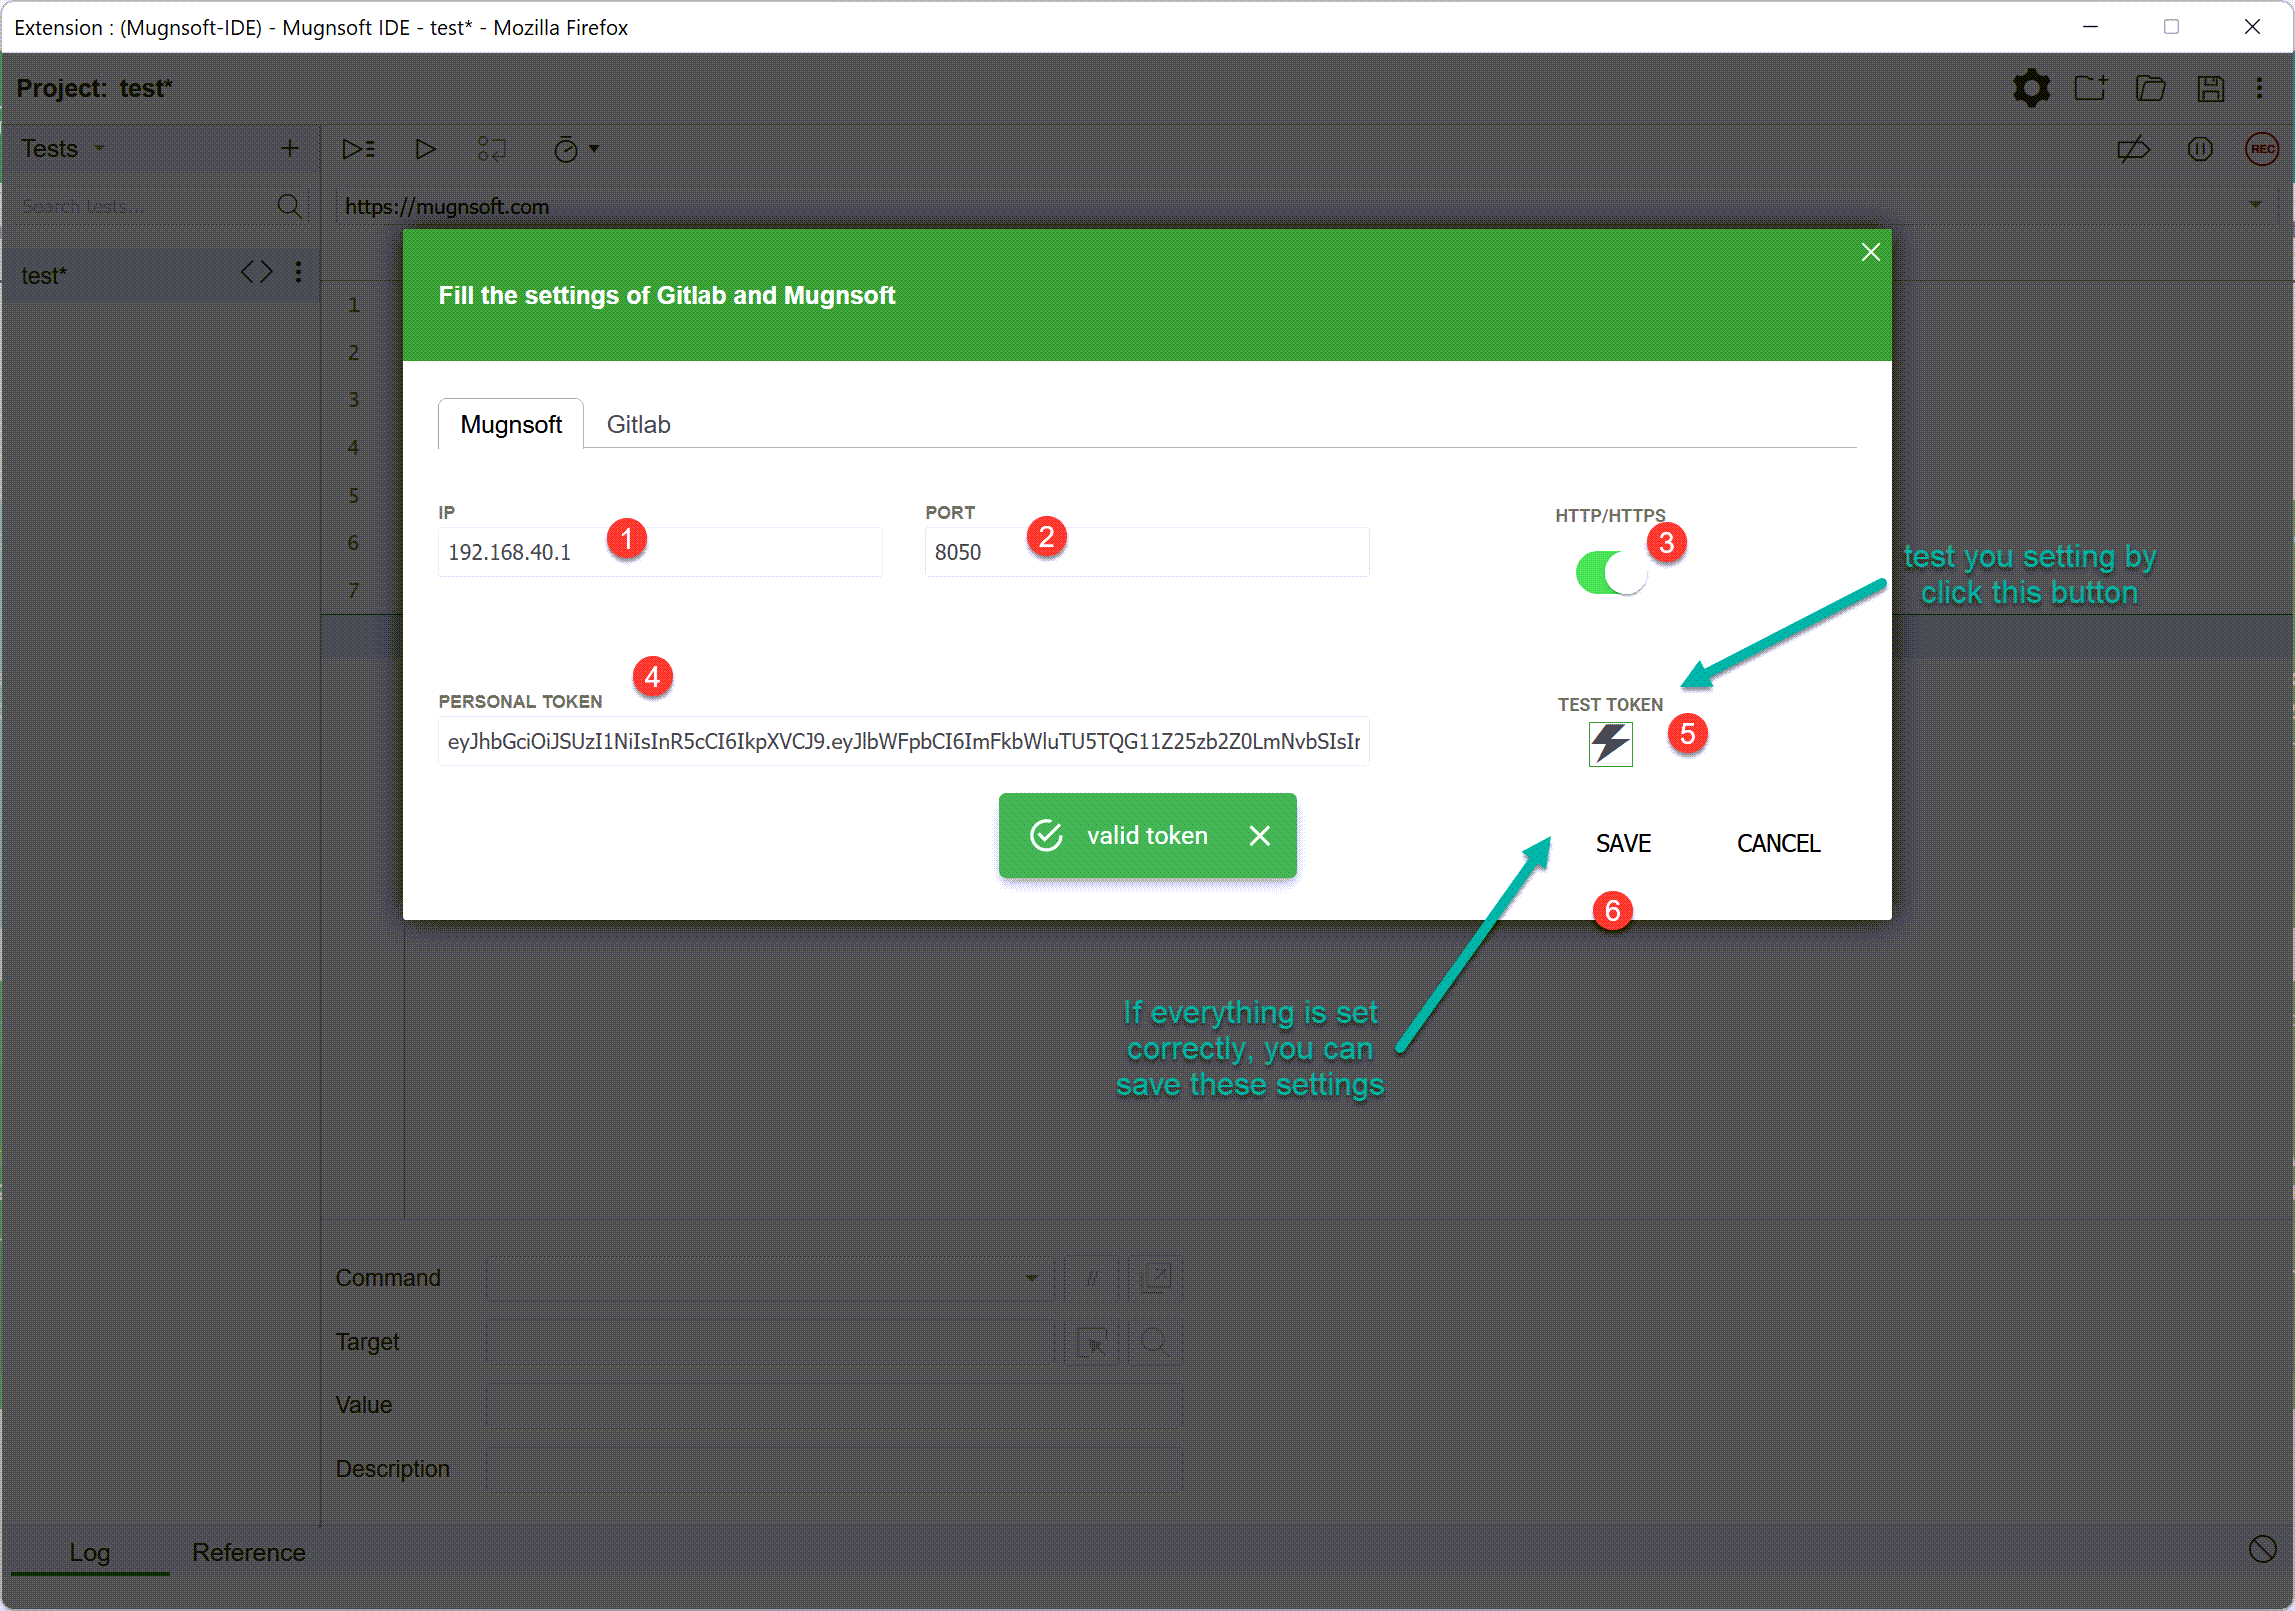
- Use the token and test the accessibility to Mugnsoft’s webserver API from Mugnsoft’s IDE
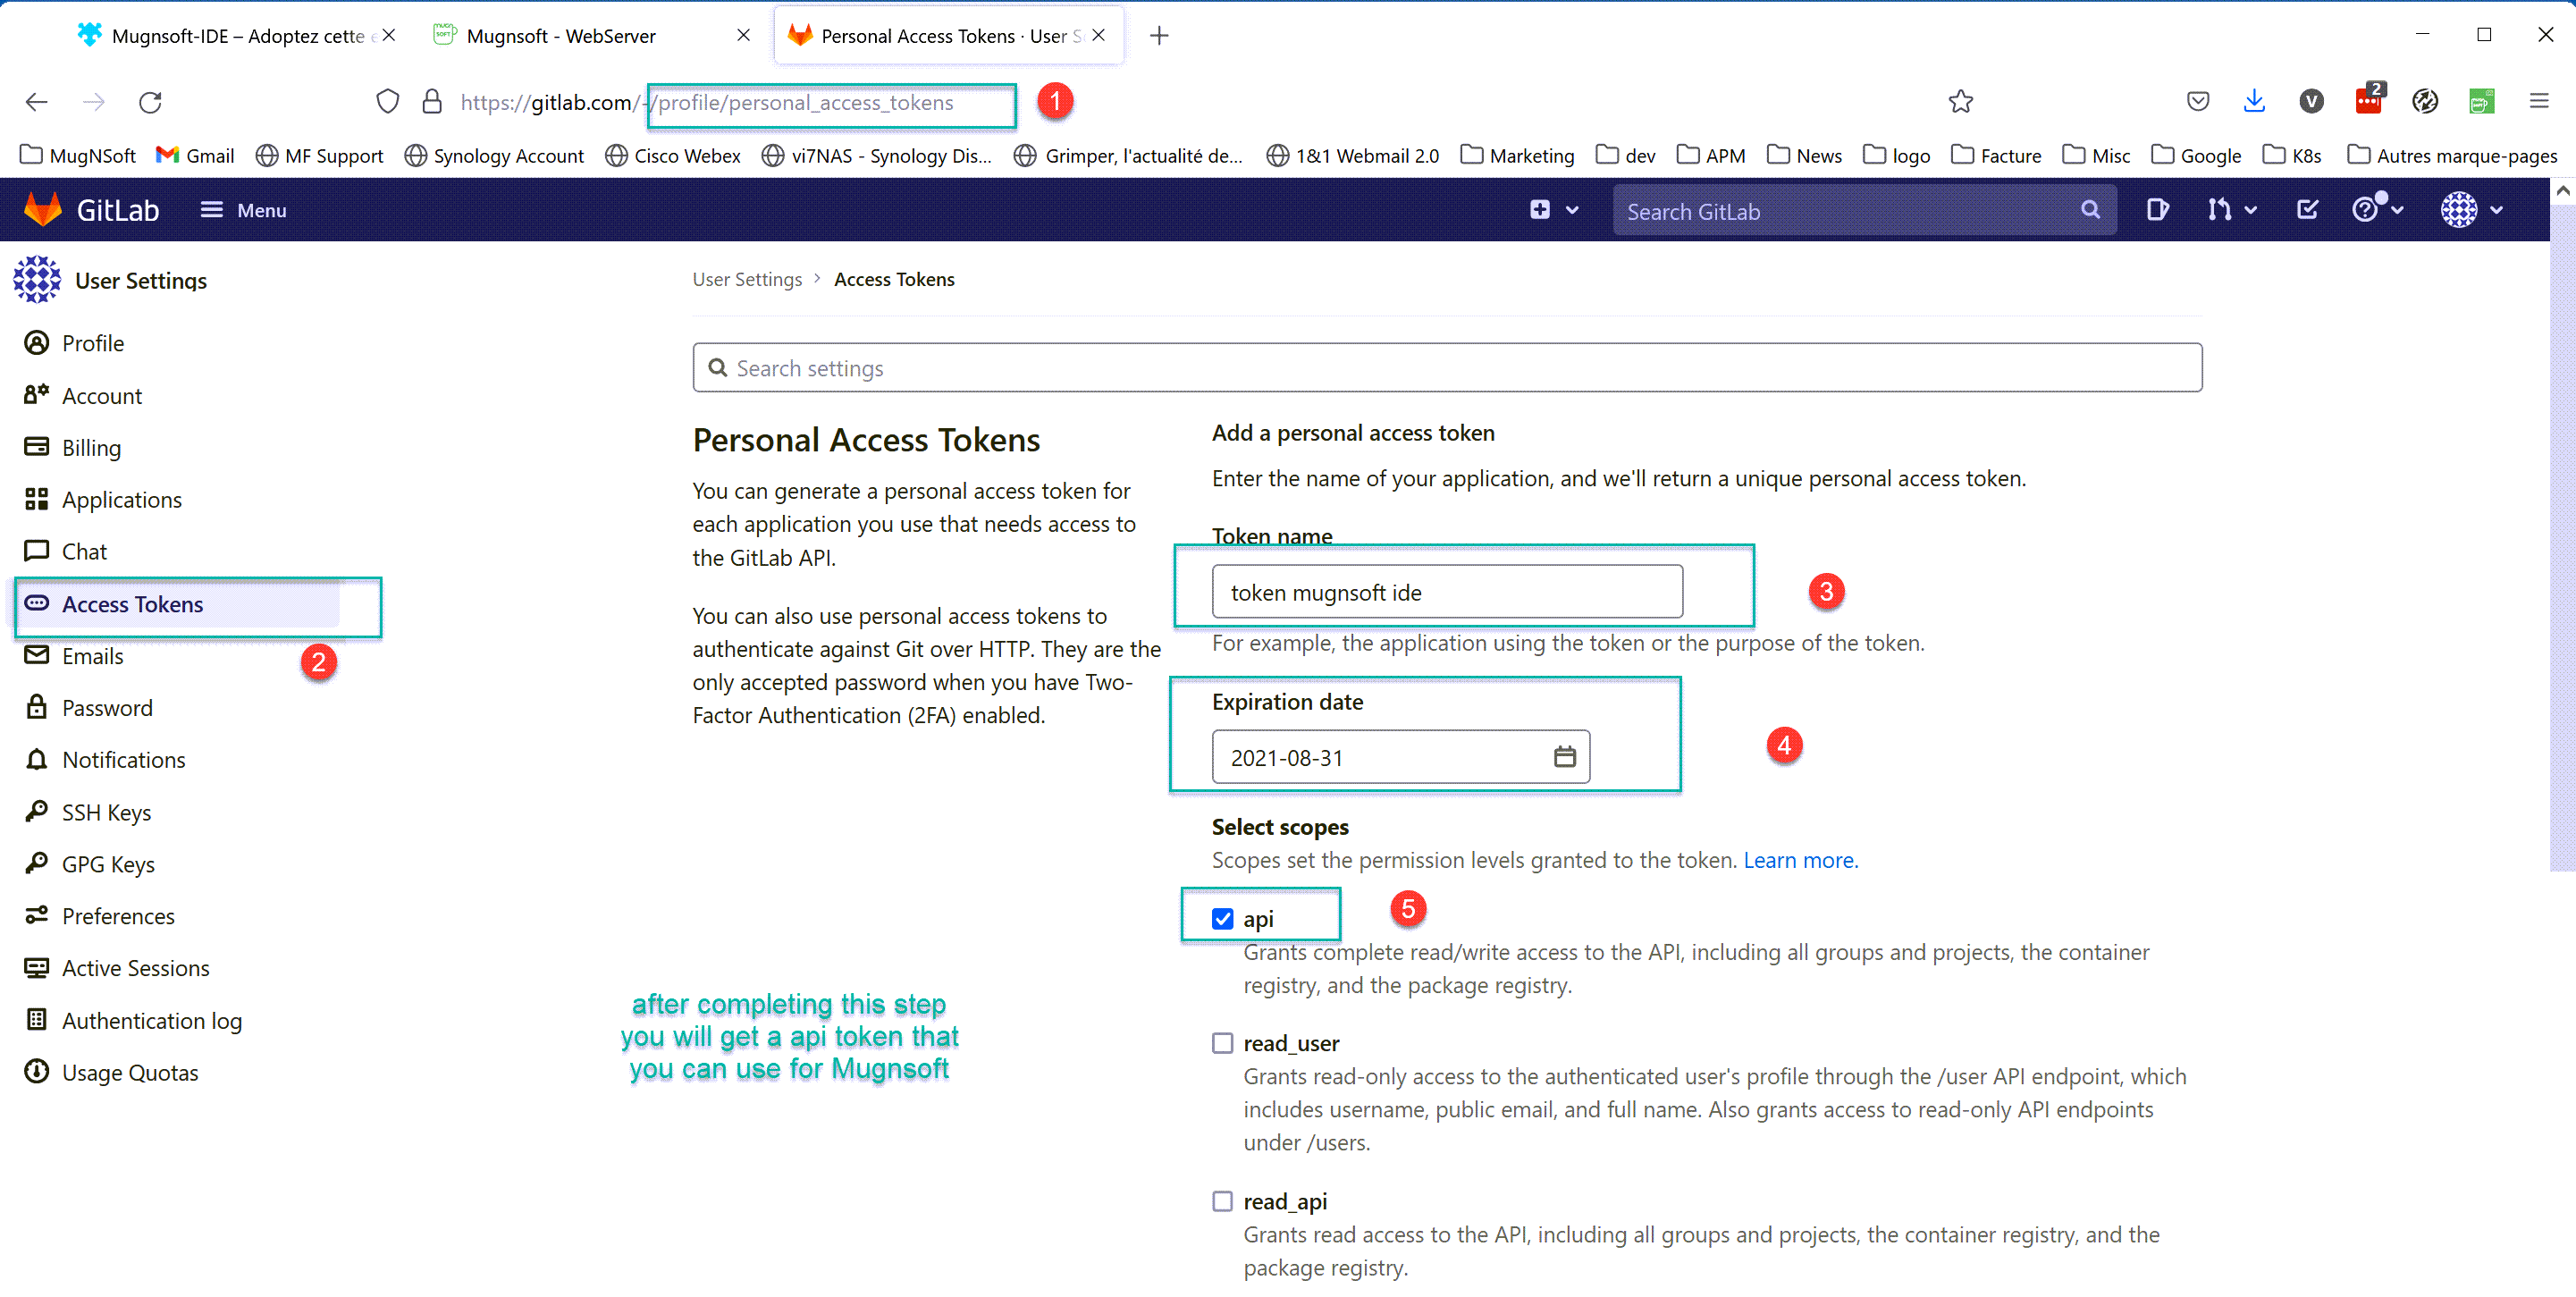
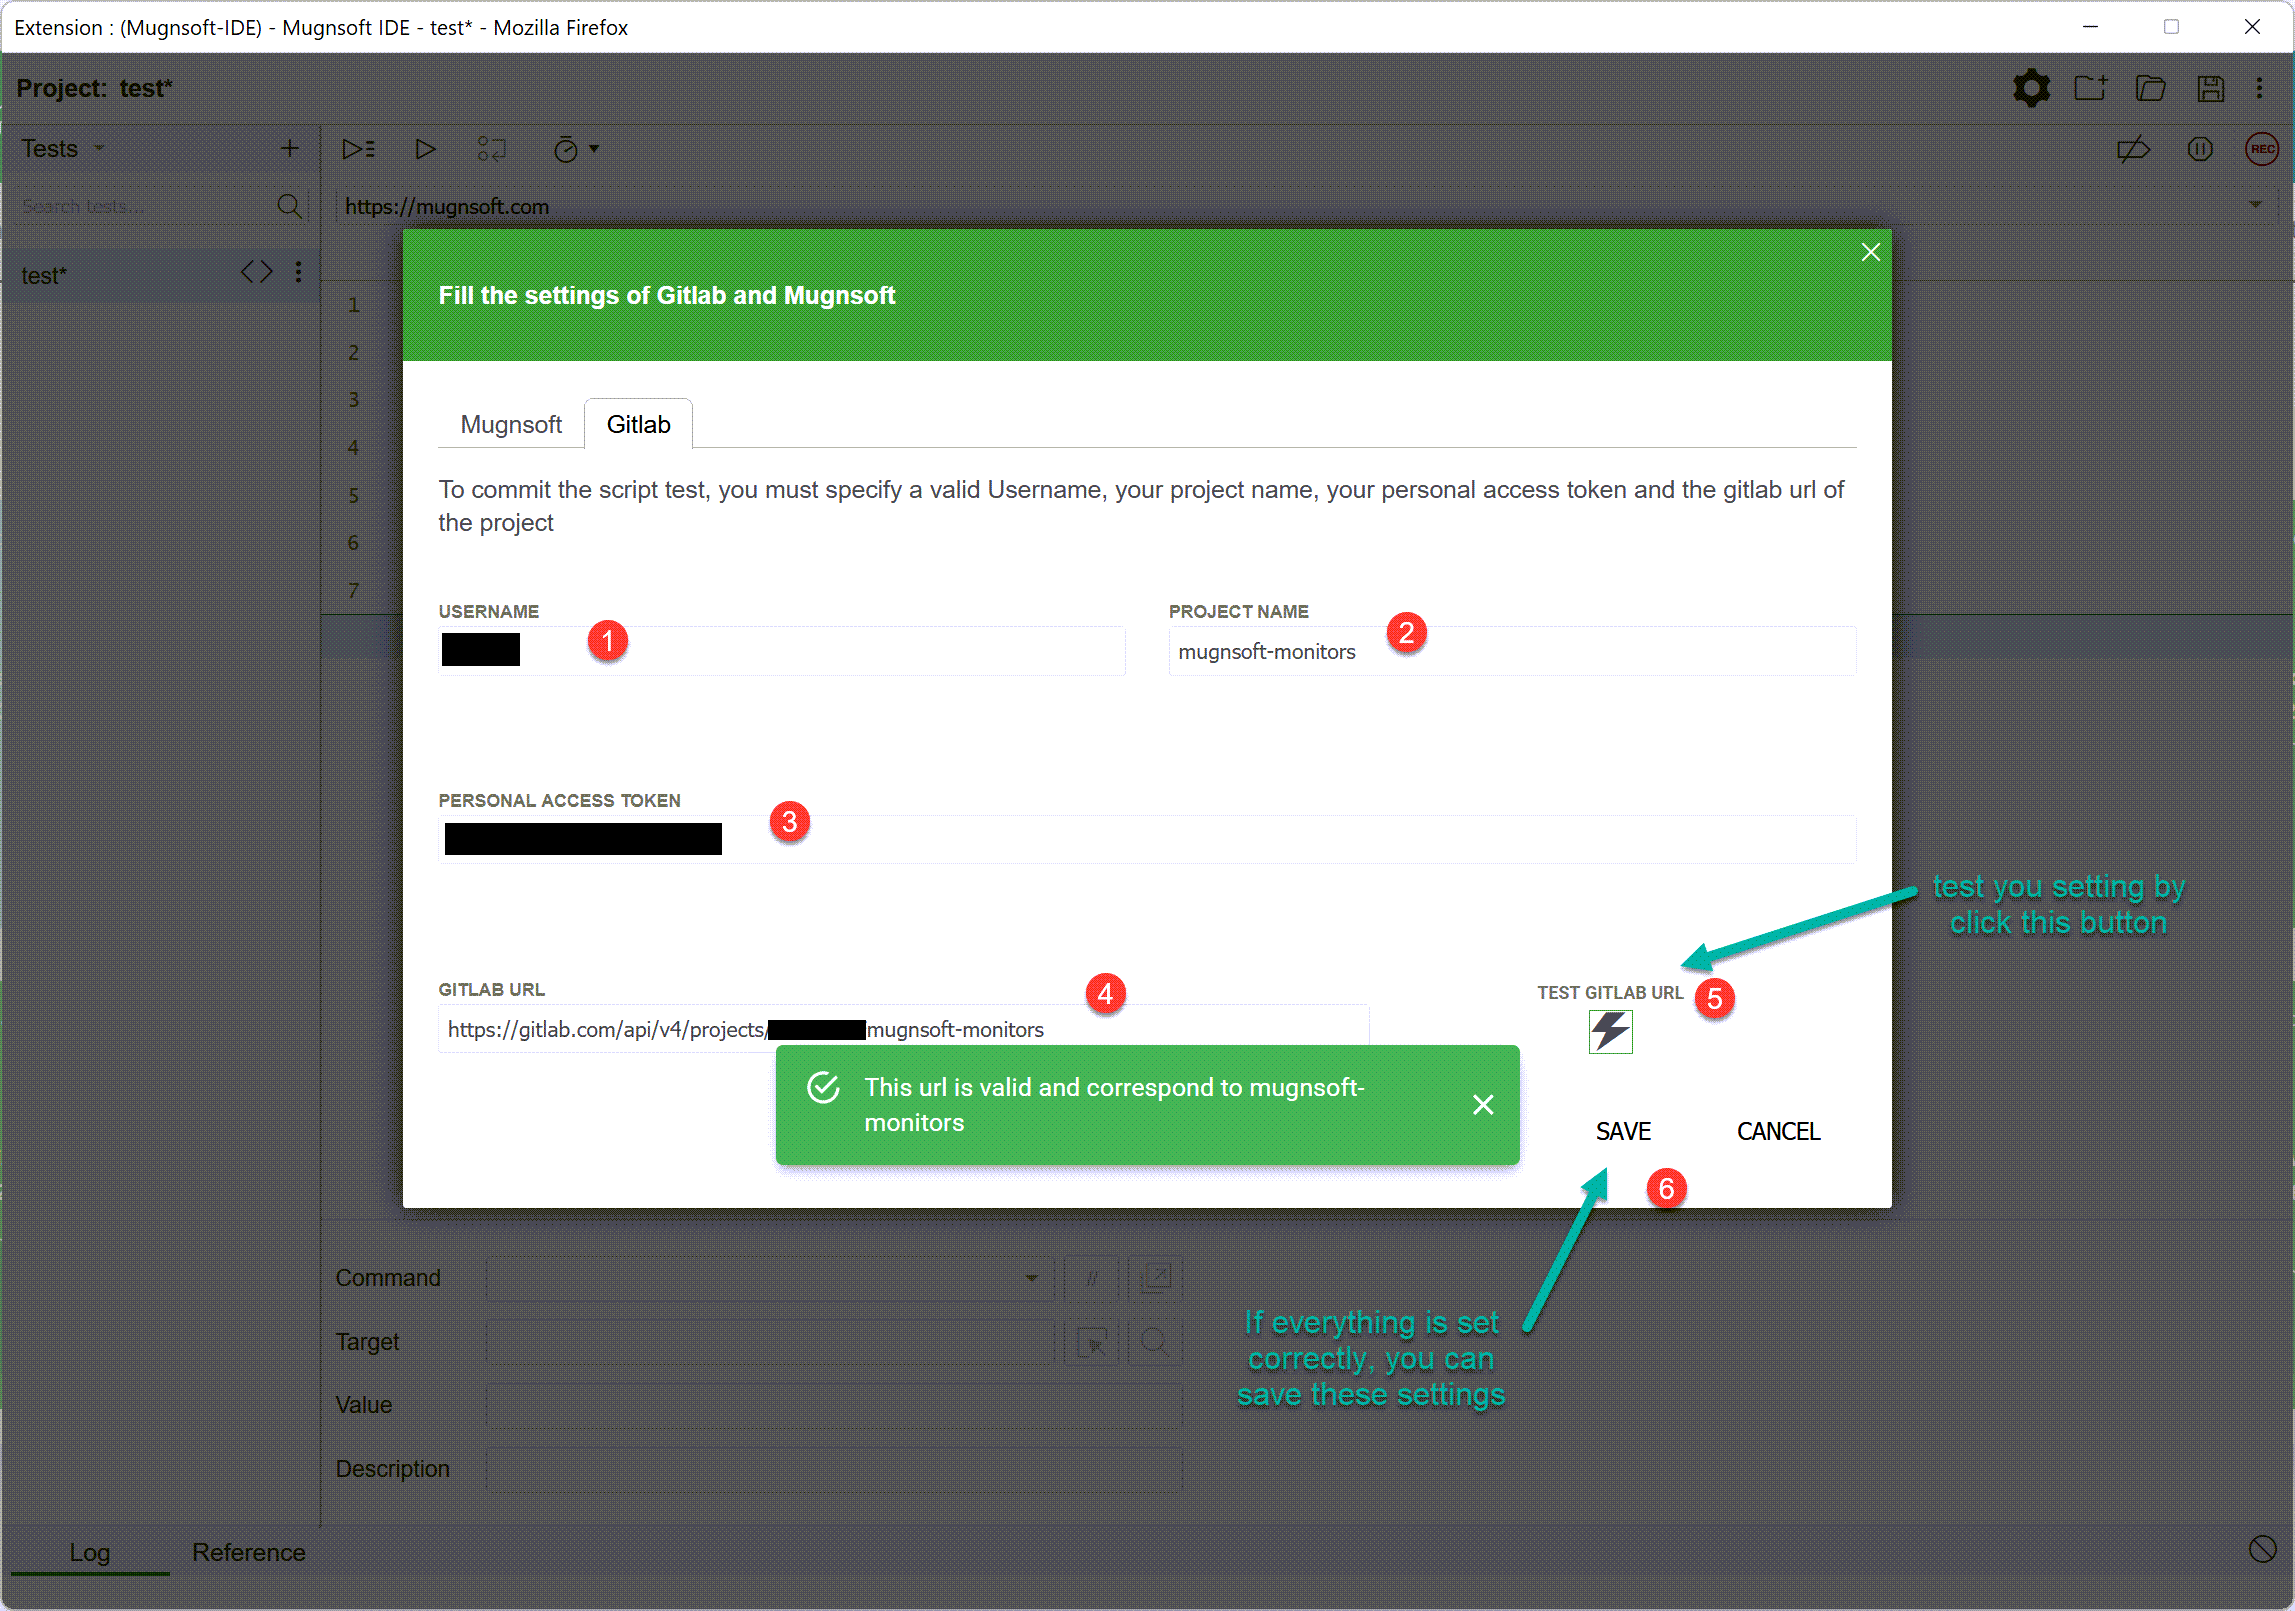
Add Gitlab’s settings
You need to get first a Gitlab token. Ideally create a specific account to store your Mugnsoft’s script
- Login to your Gitlab account and go to your profile to access your token web page. Generate the token saved it in a secure place.
- Use the token and test the accessibility to you GItlab repository from Mugnsoft’s IDE
Note:
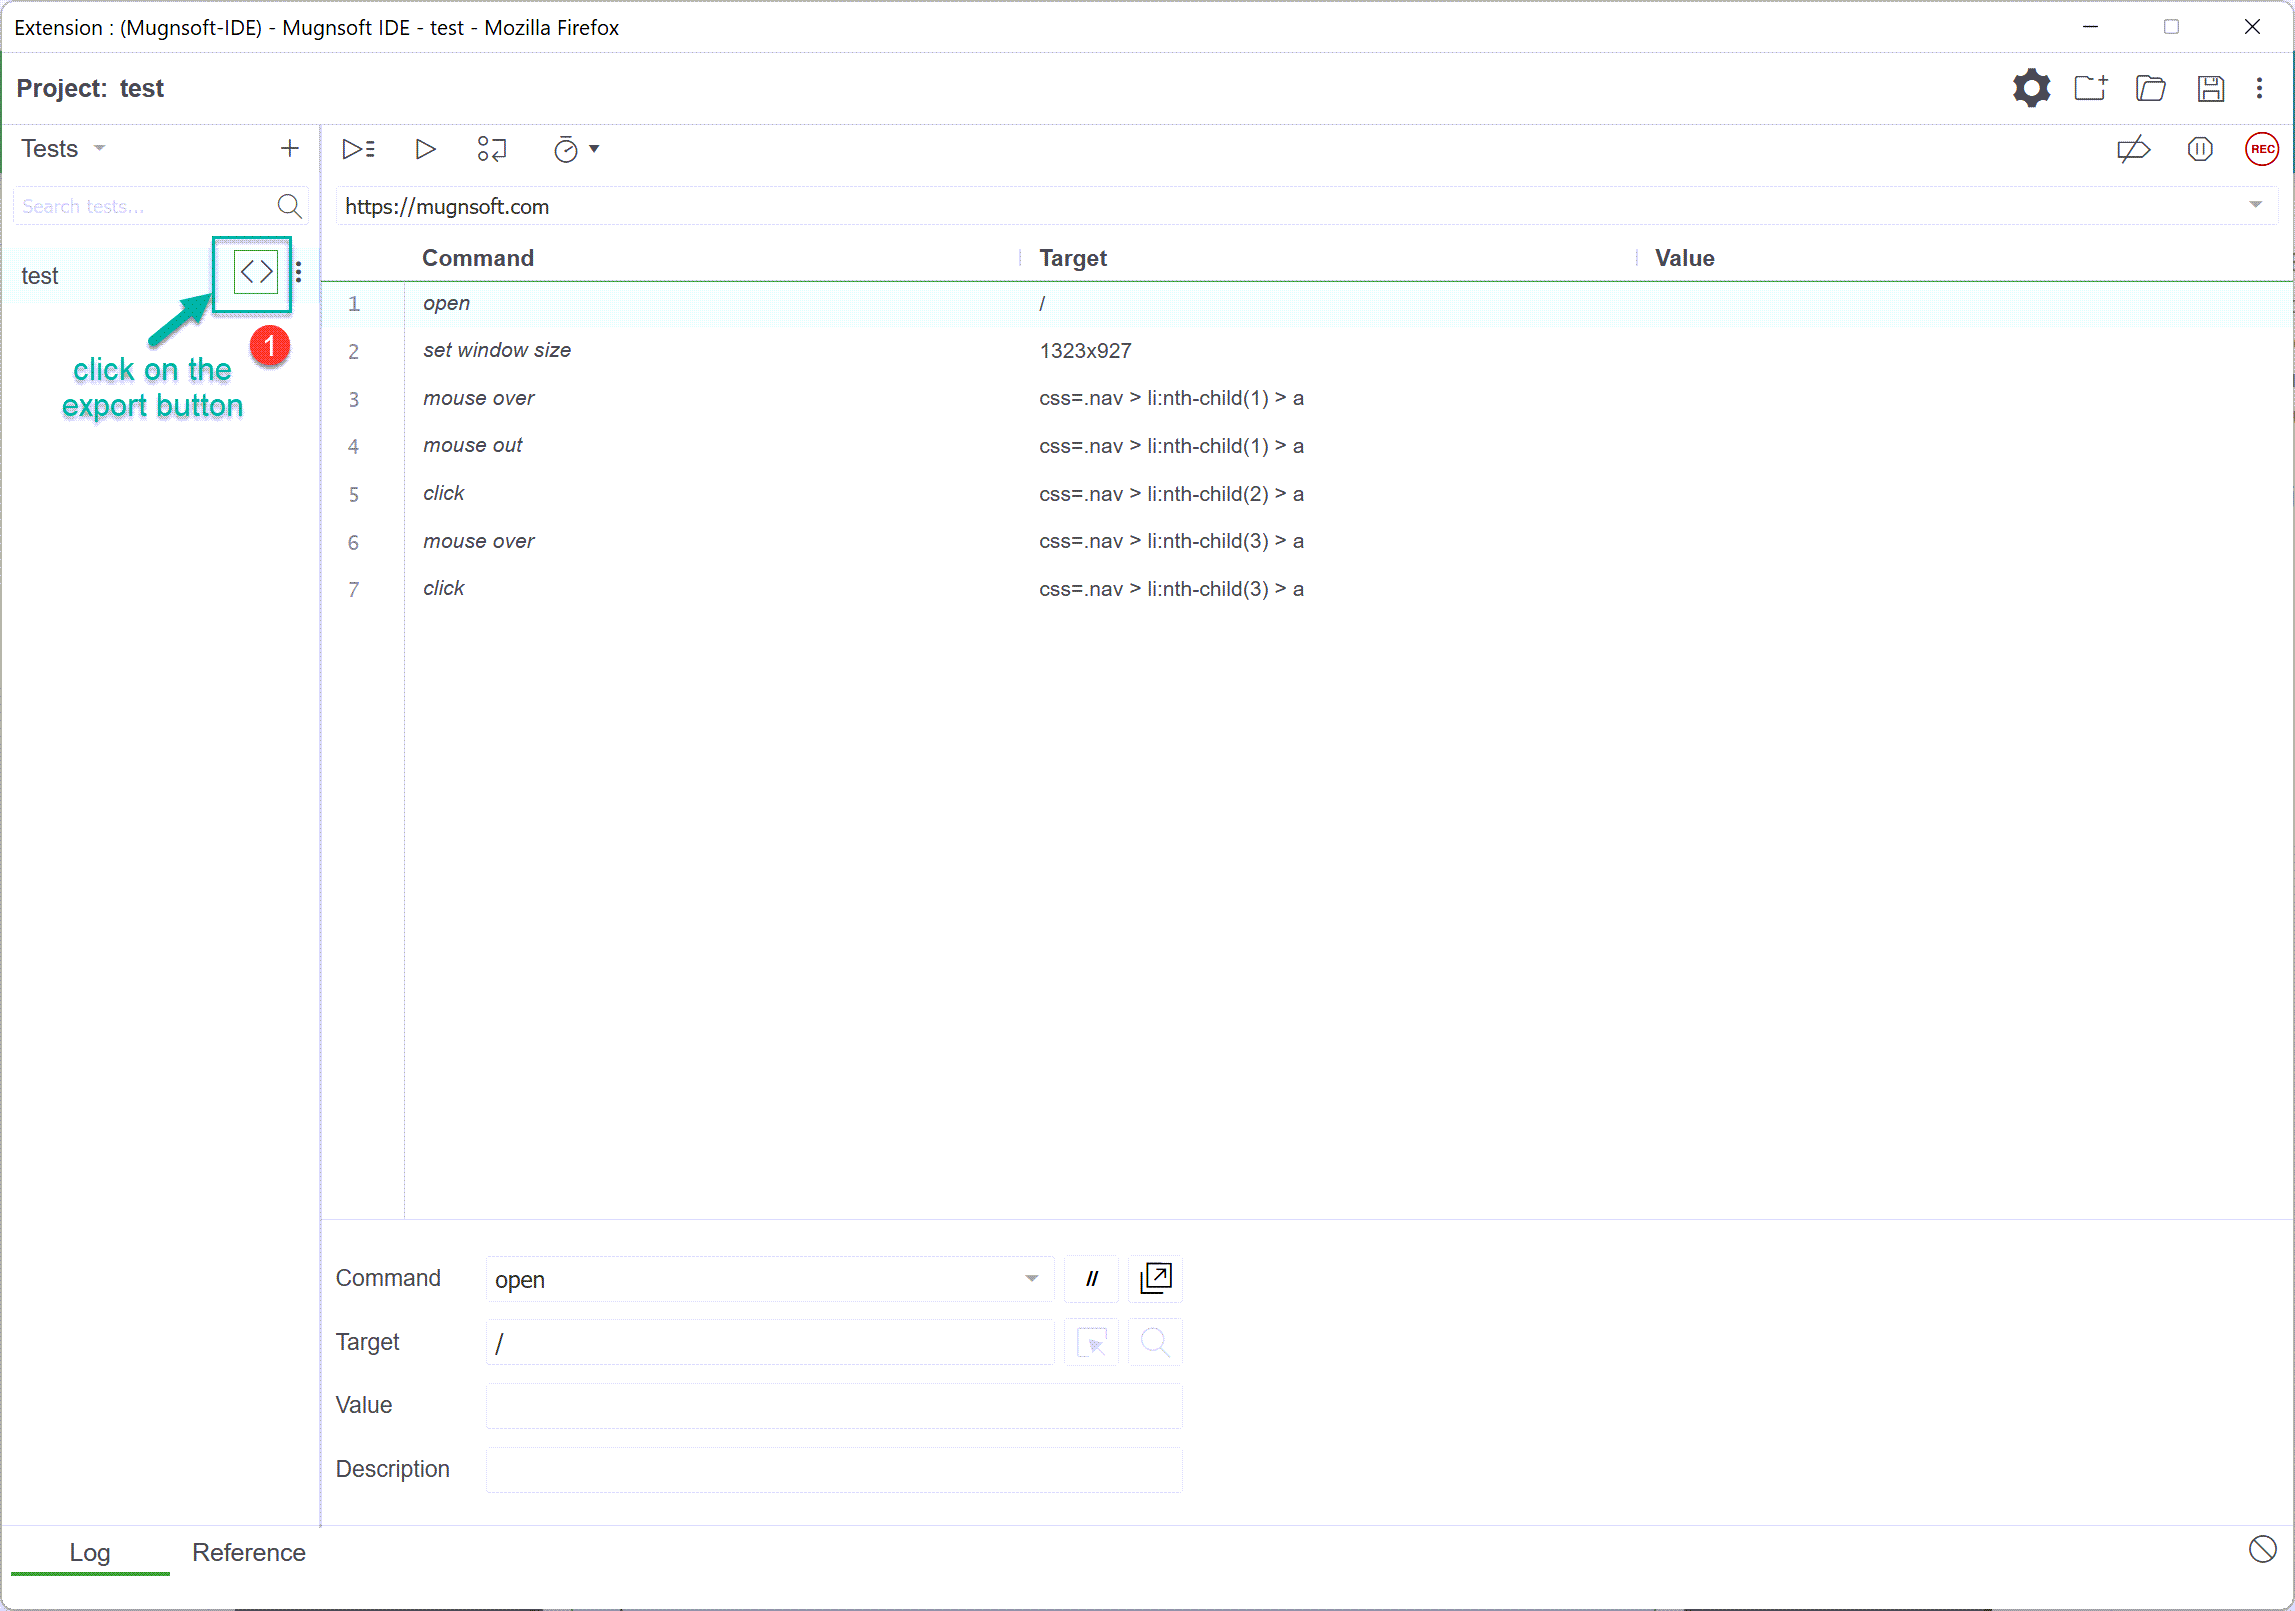
Export the auto-generated code
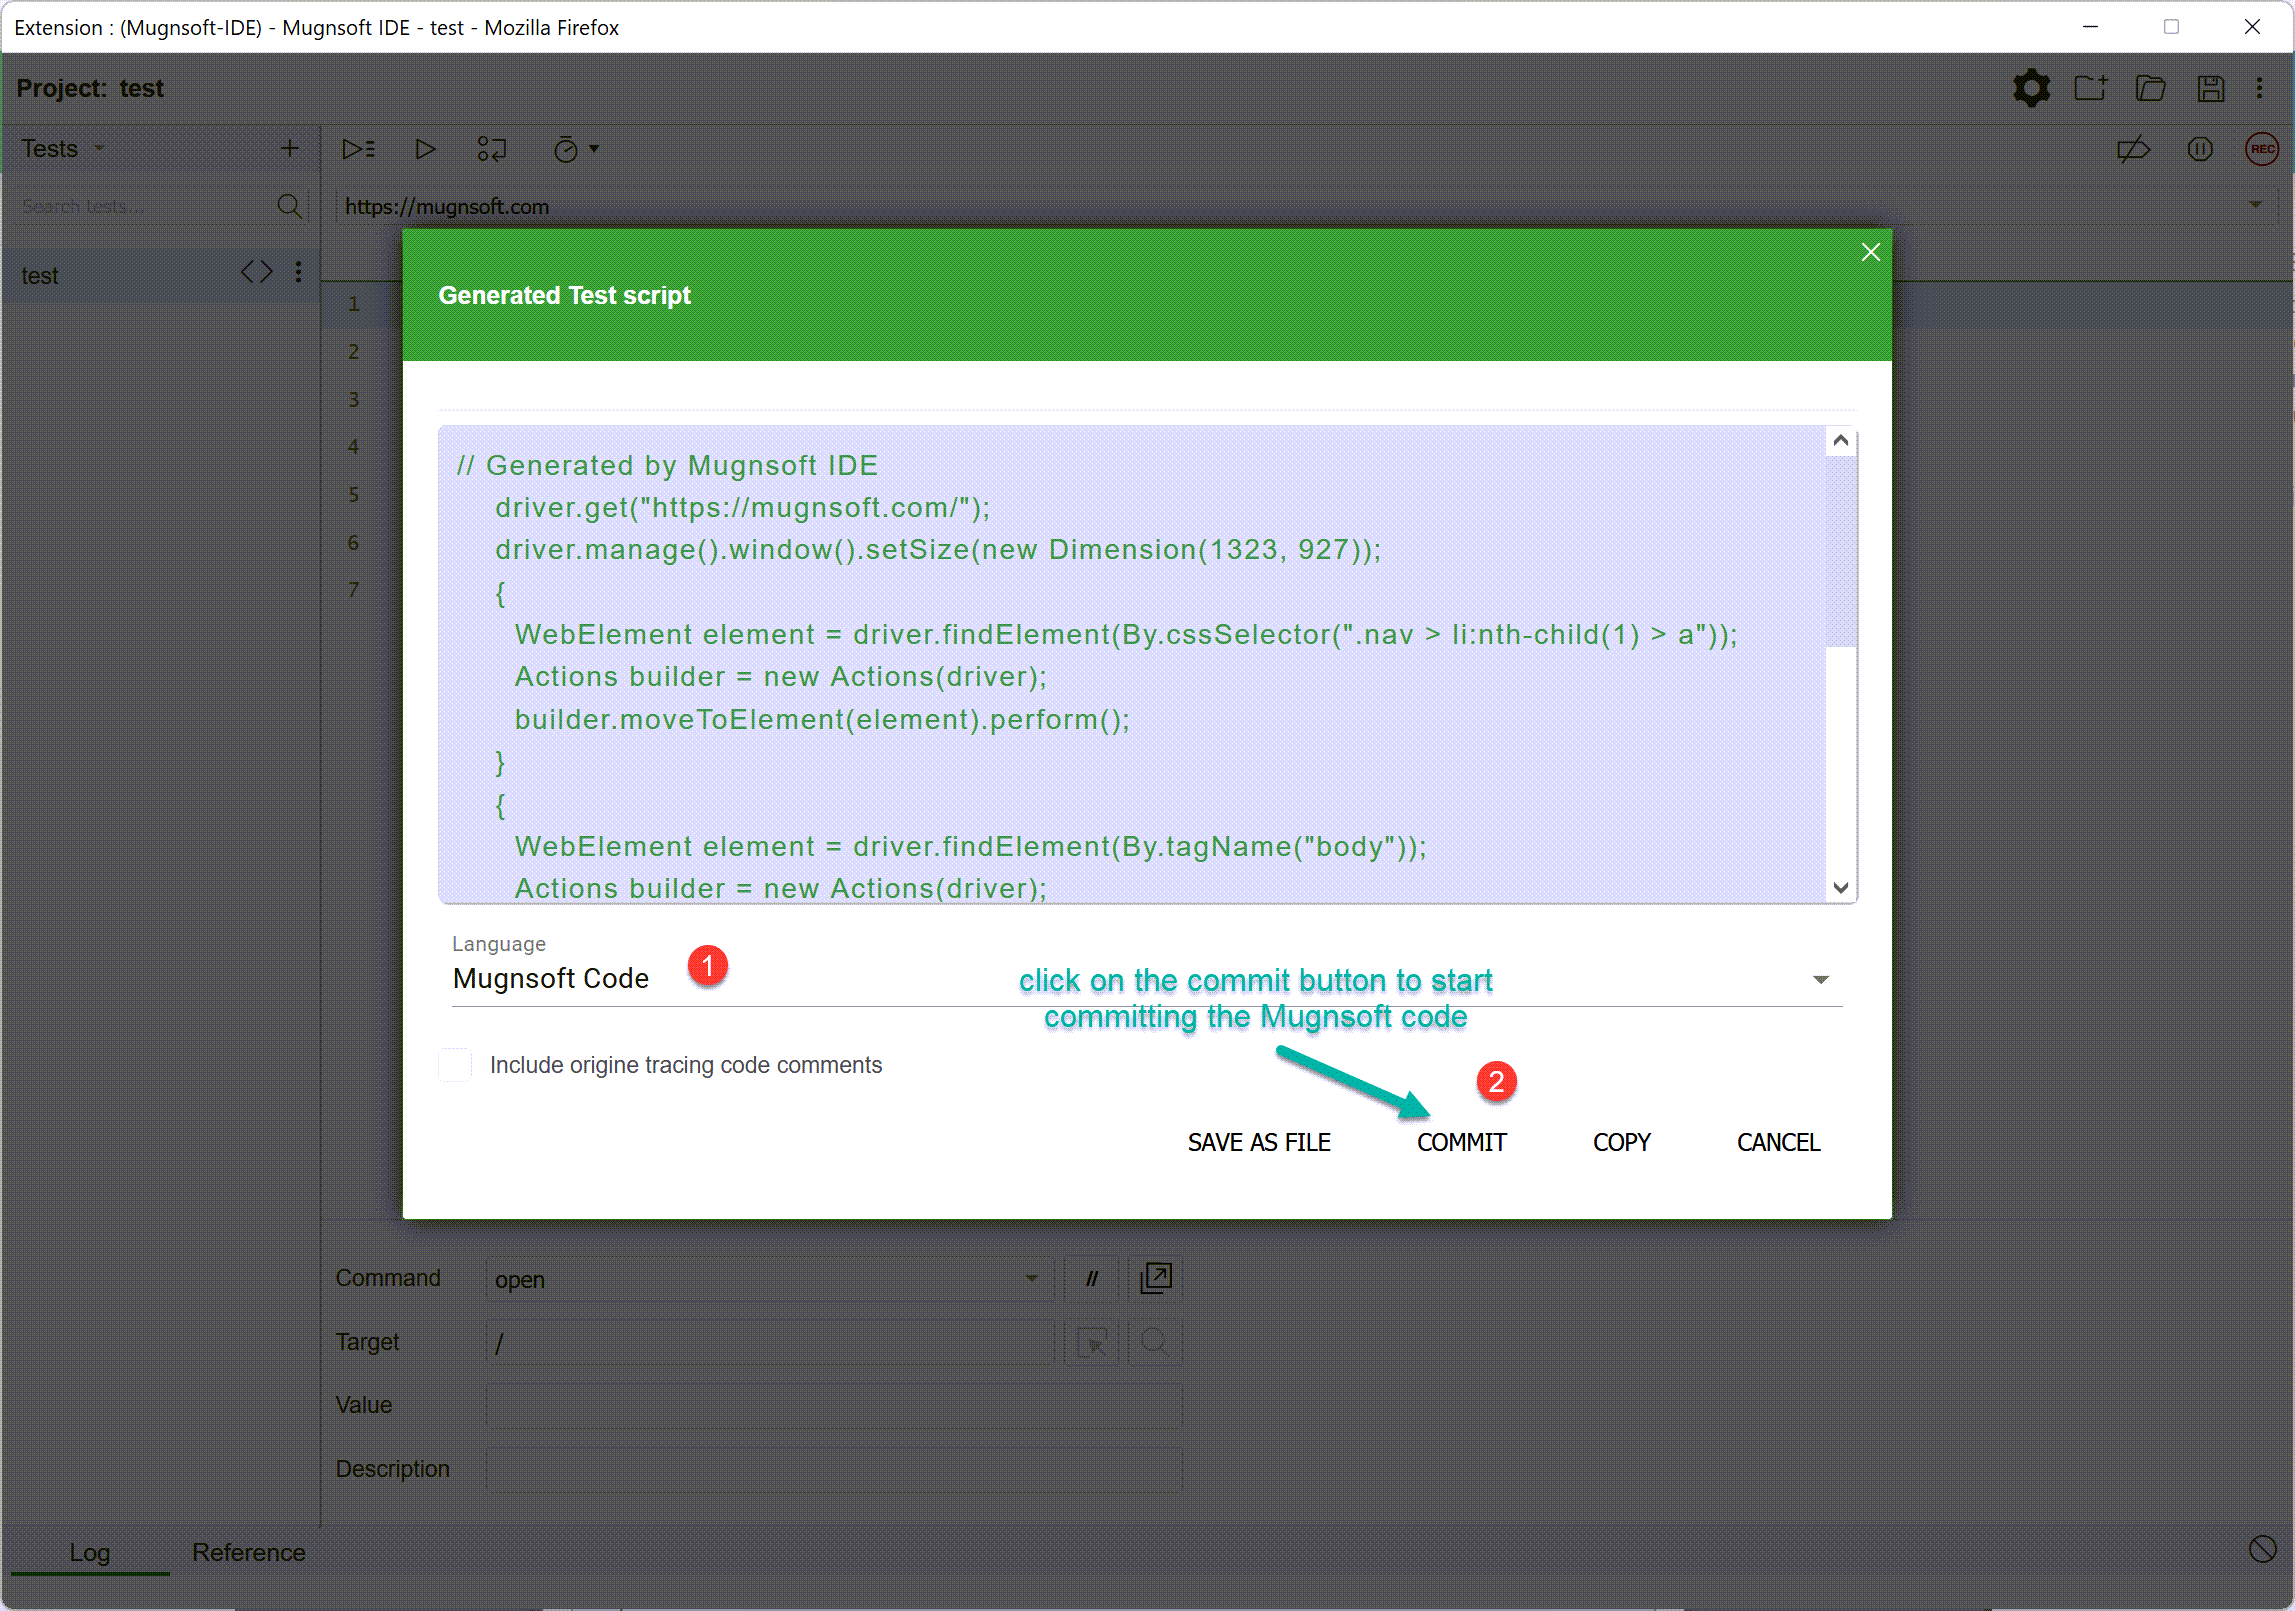
Once you have set the setting, you are all set to export and push the generated code to the back end (Mugnsoft’s webserver and Gitlab).
Push/commit your monitor’s definition
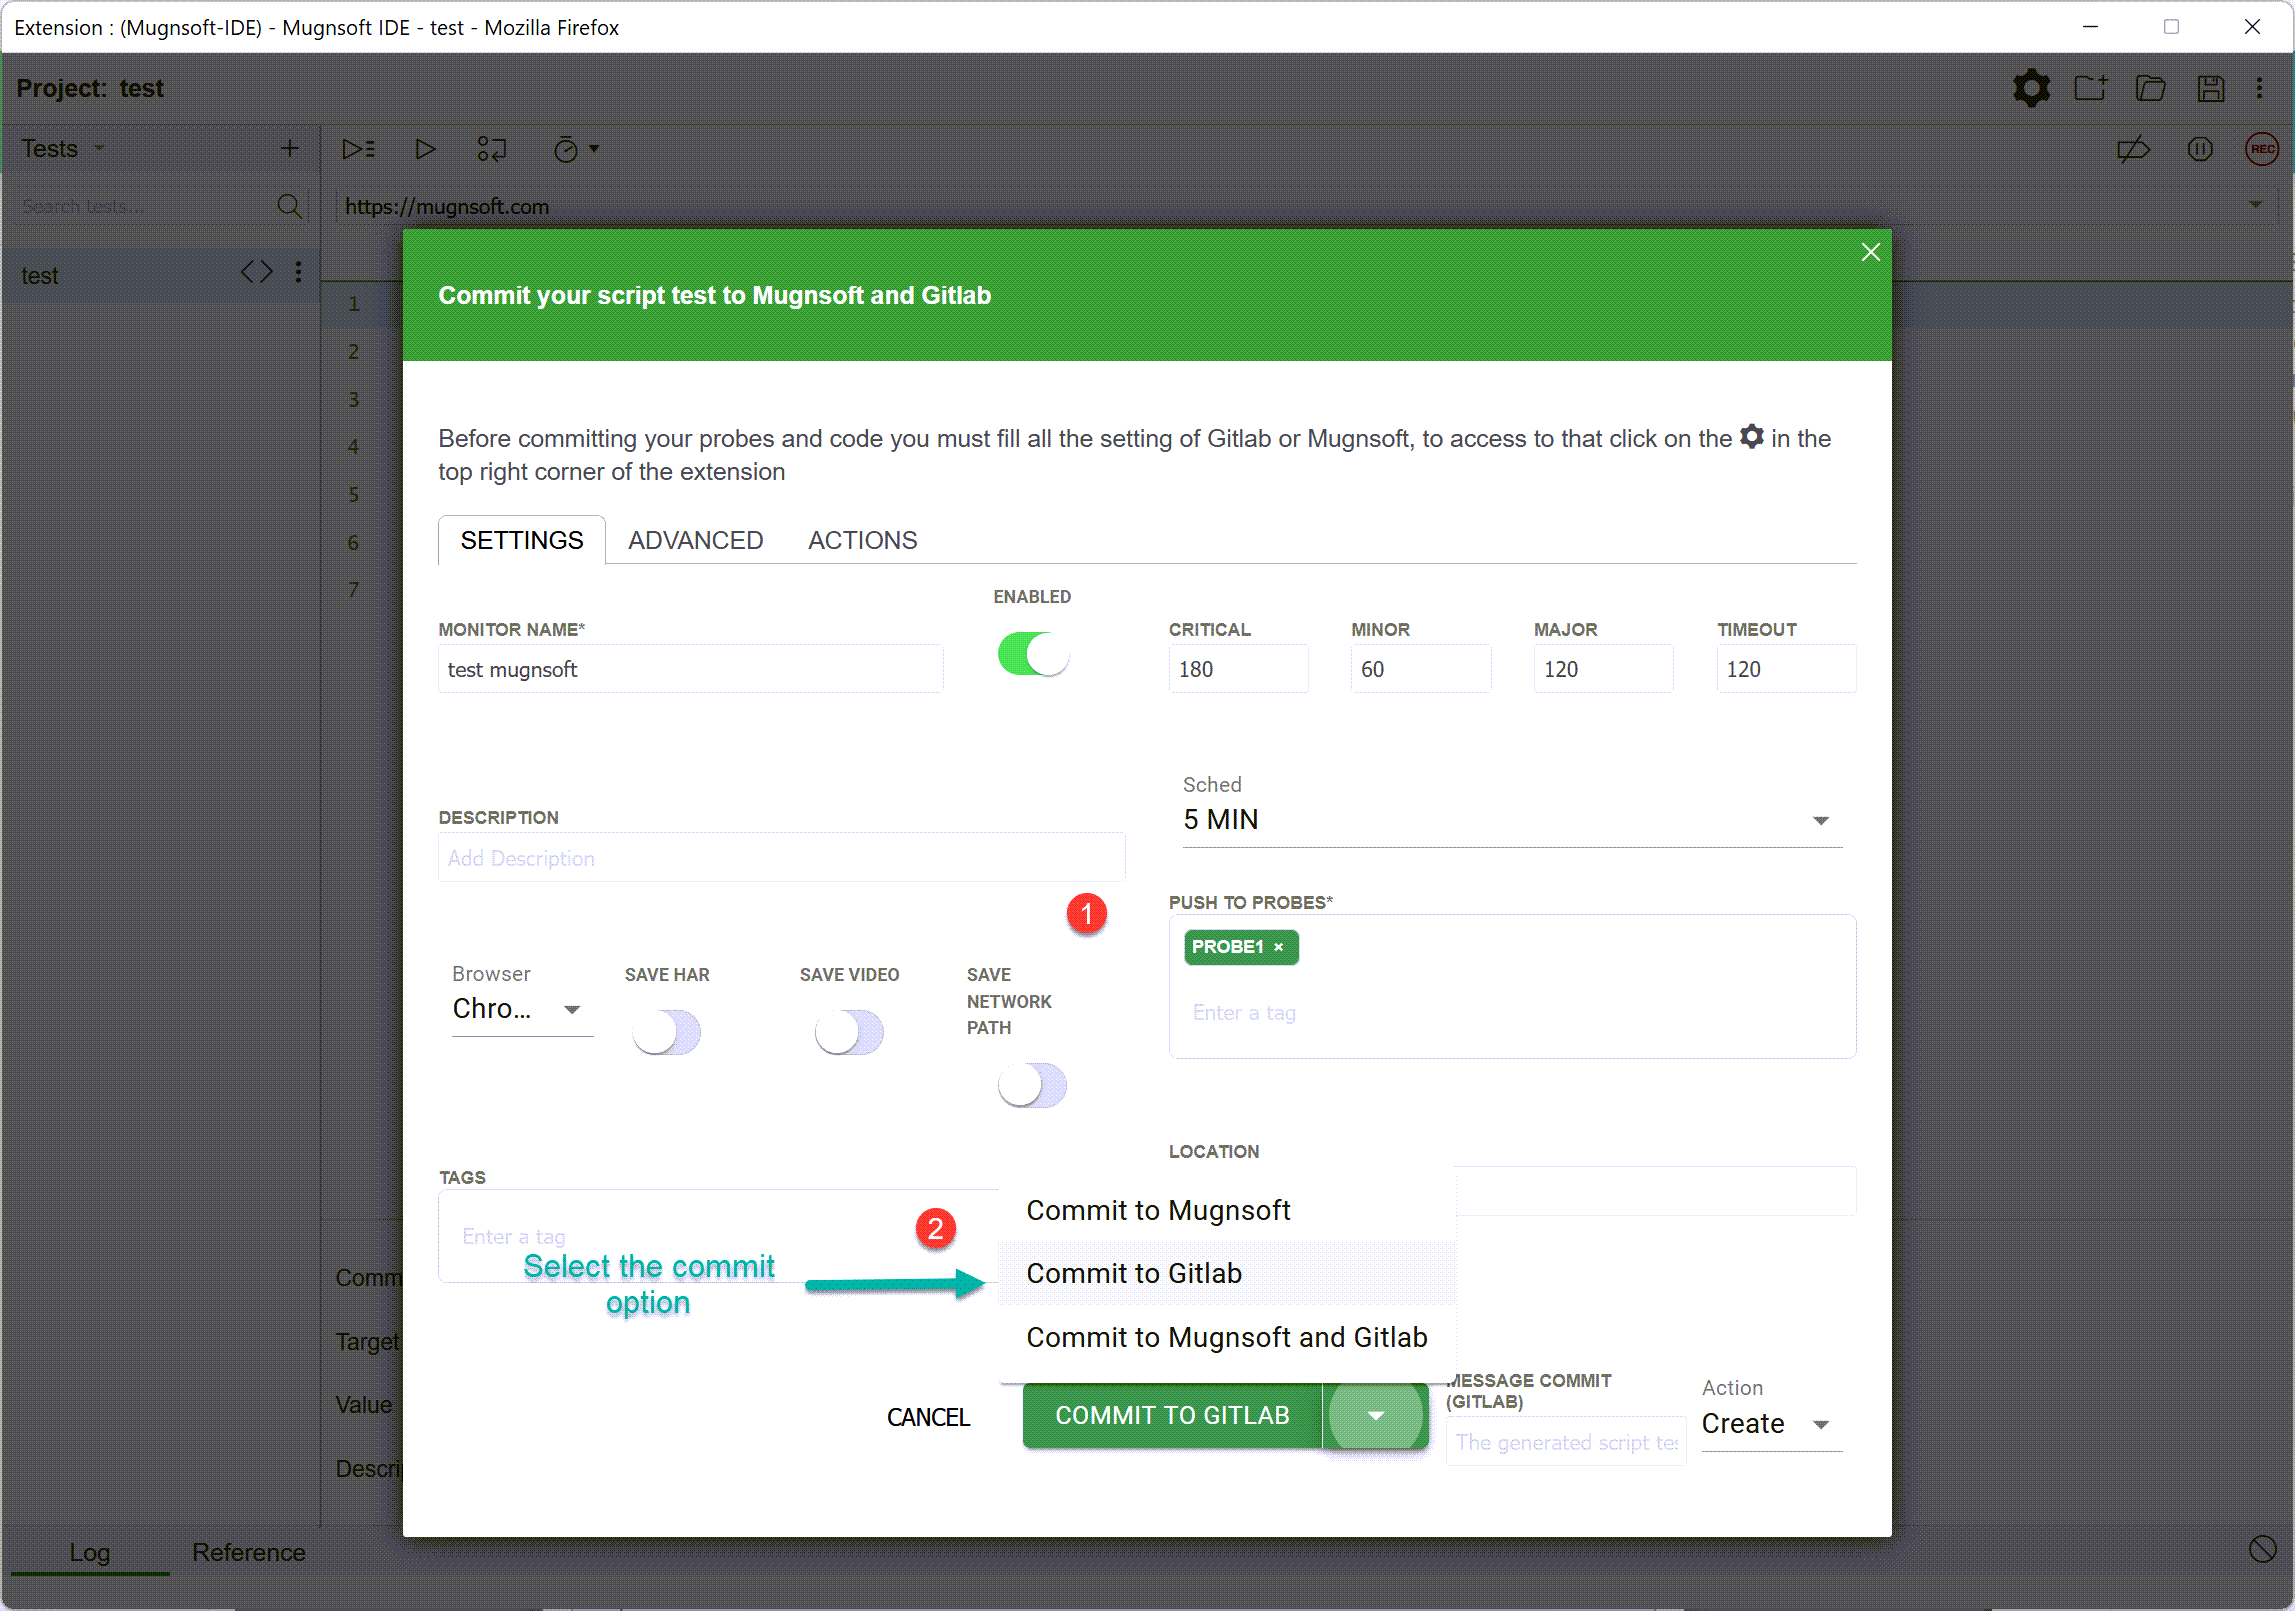
When you are happy with your monitor’s settings and code, you can start committing them to the back-end.
You are left with 3 choices:
- commit to Mugnsoft’s webserver API only
- commit to Gitlab only
- commit to both Mugnsoft’s webserver API and Gitlab
Commit your monitor setting to Mugnsoft
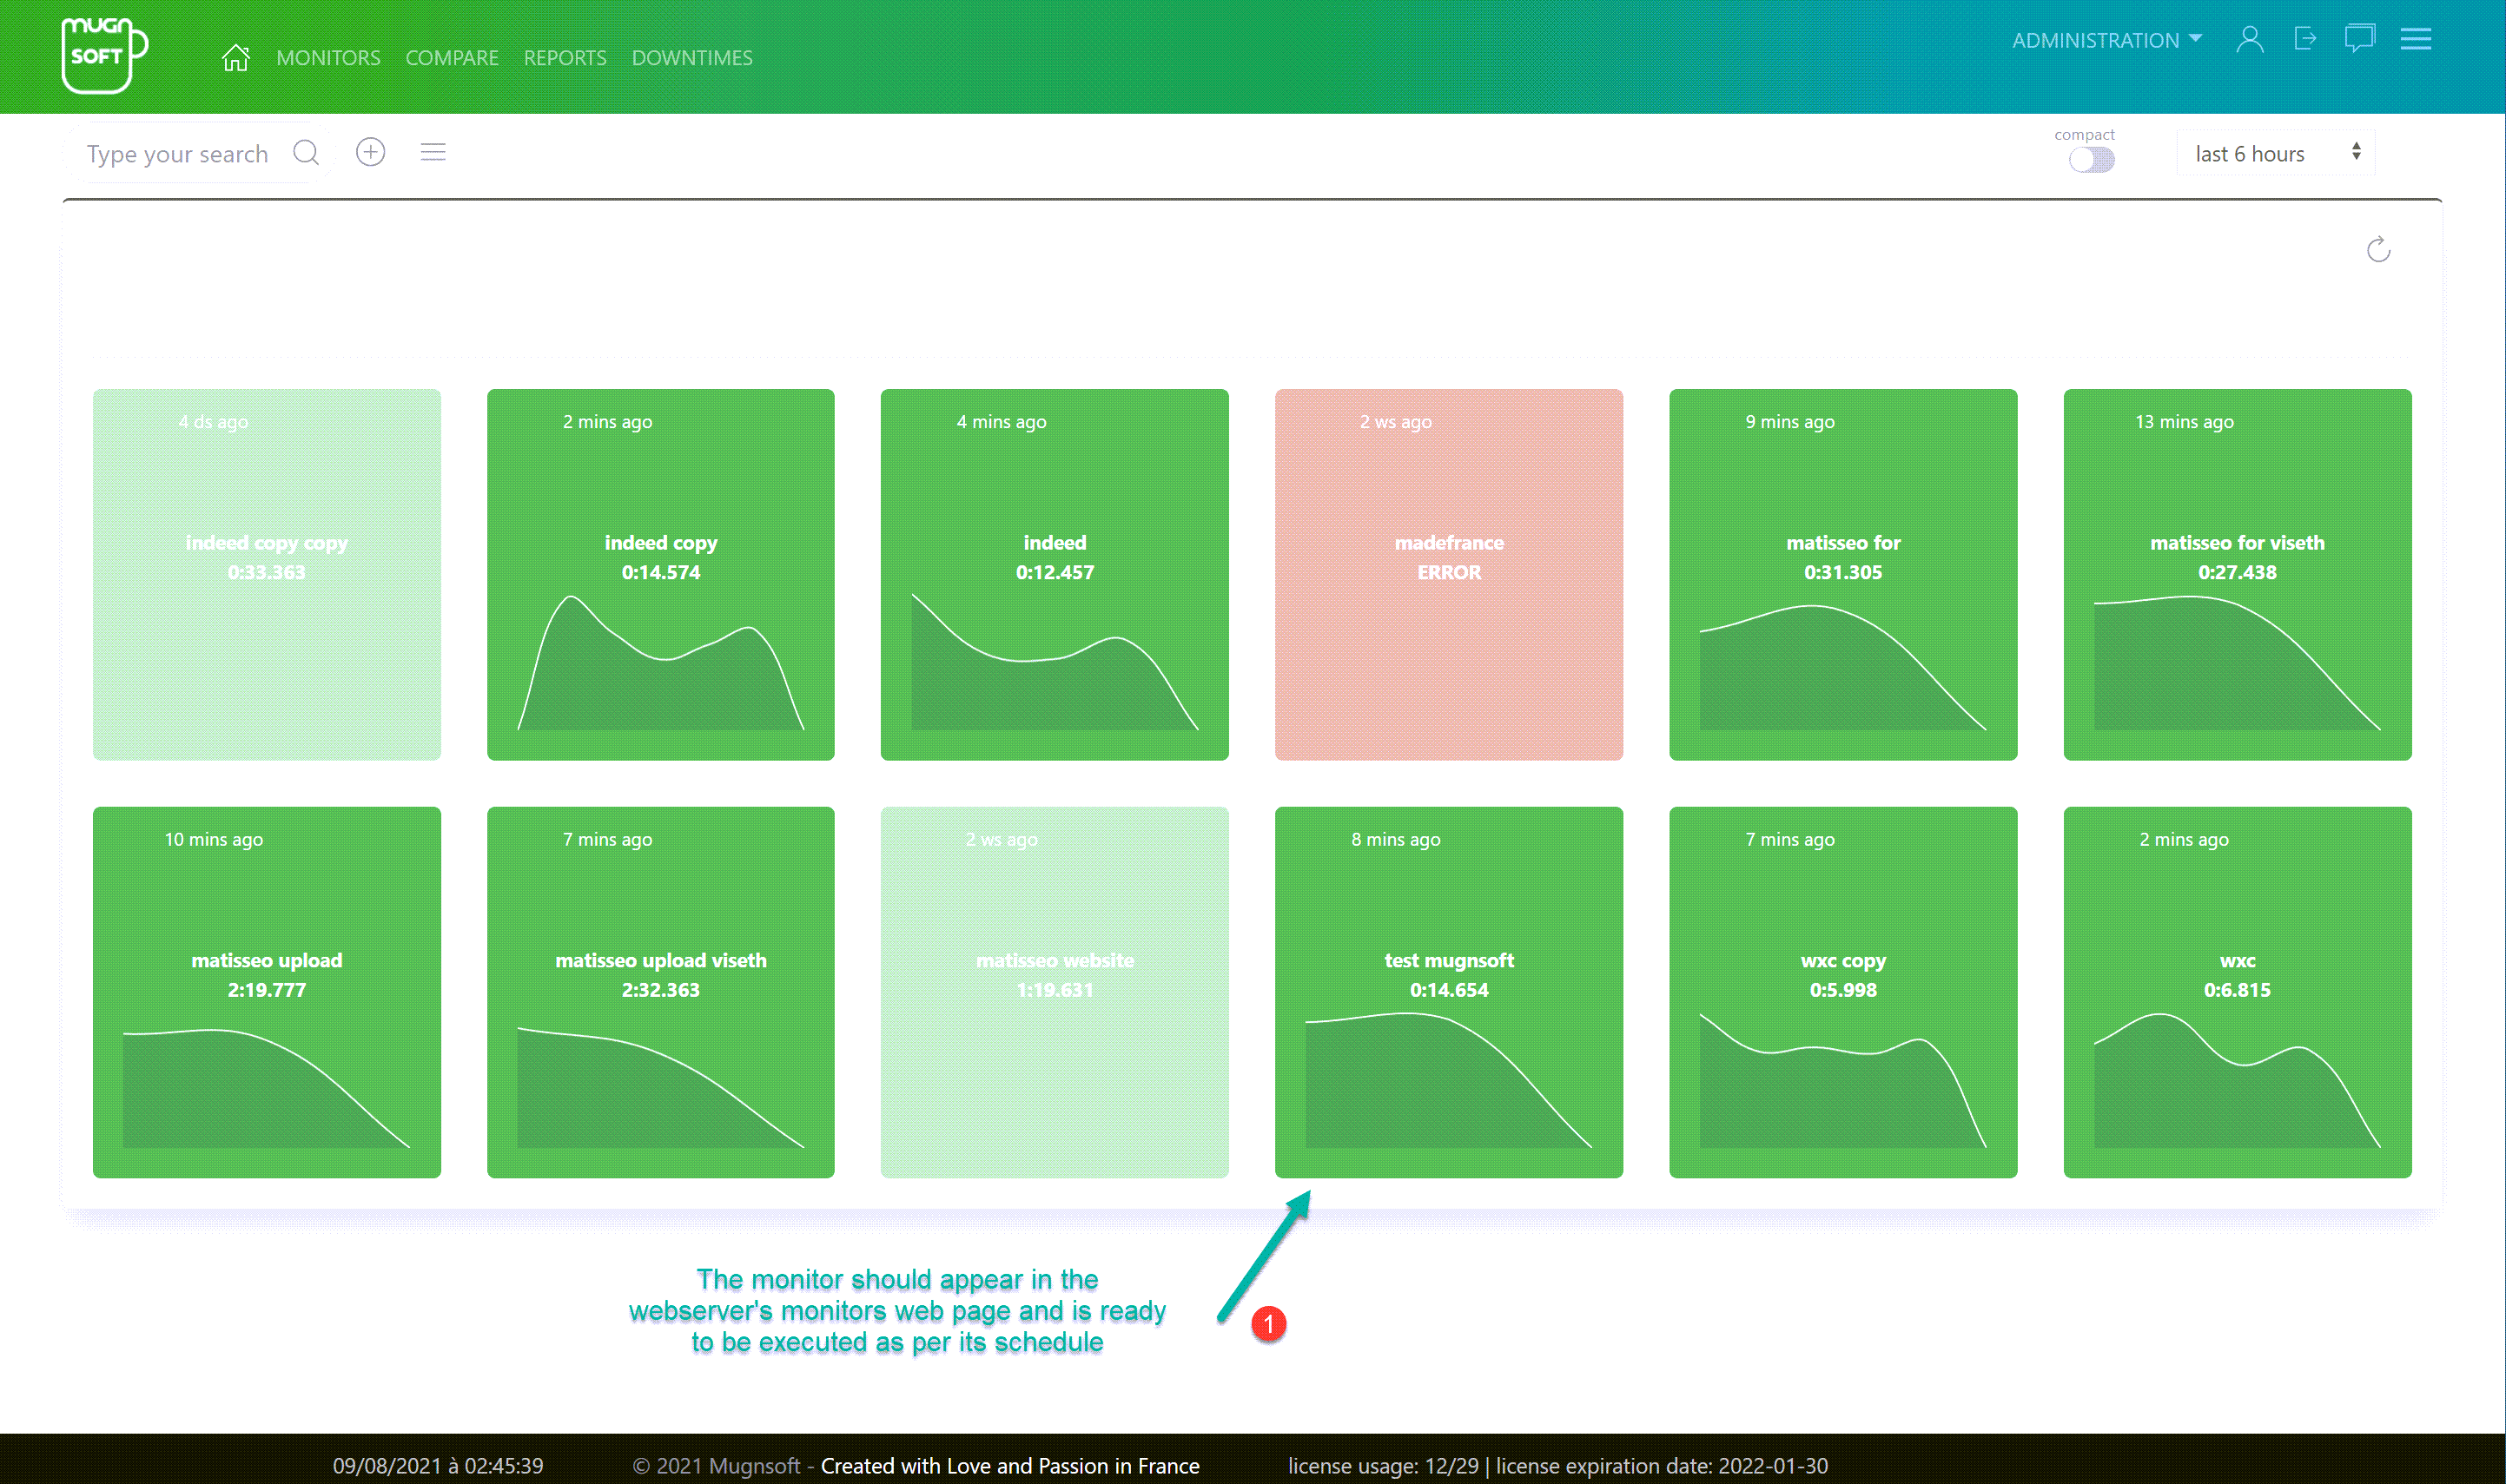
After you’ve finished setting up the monitor’s info, you can easily push it to the Mugnsoft’s webserver API, as shown below :

The monitor should be found in the monitors' listing
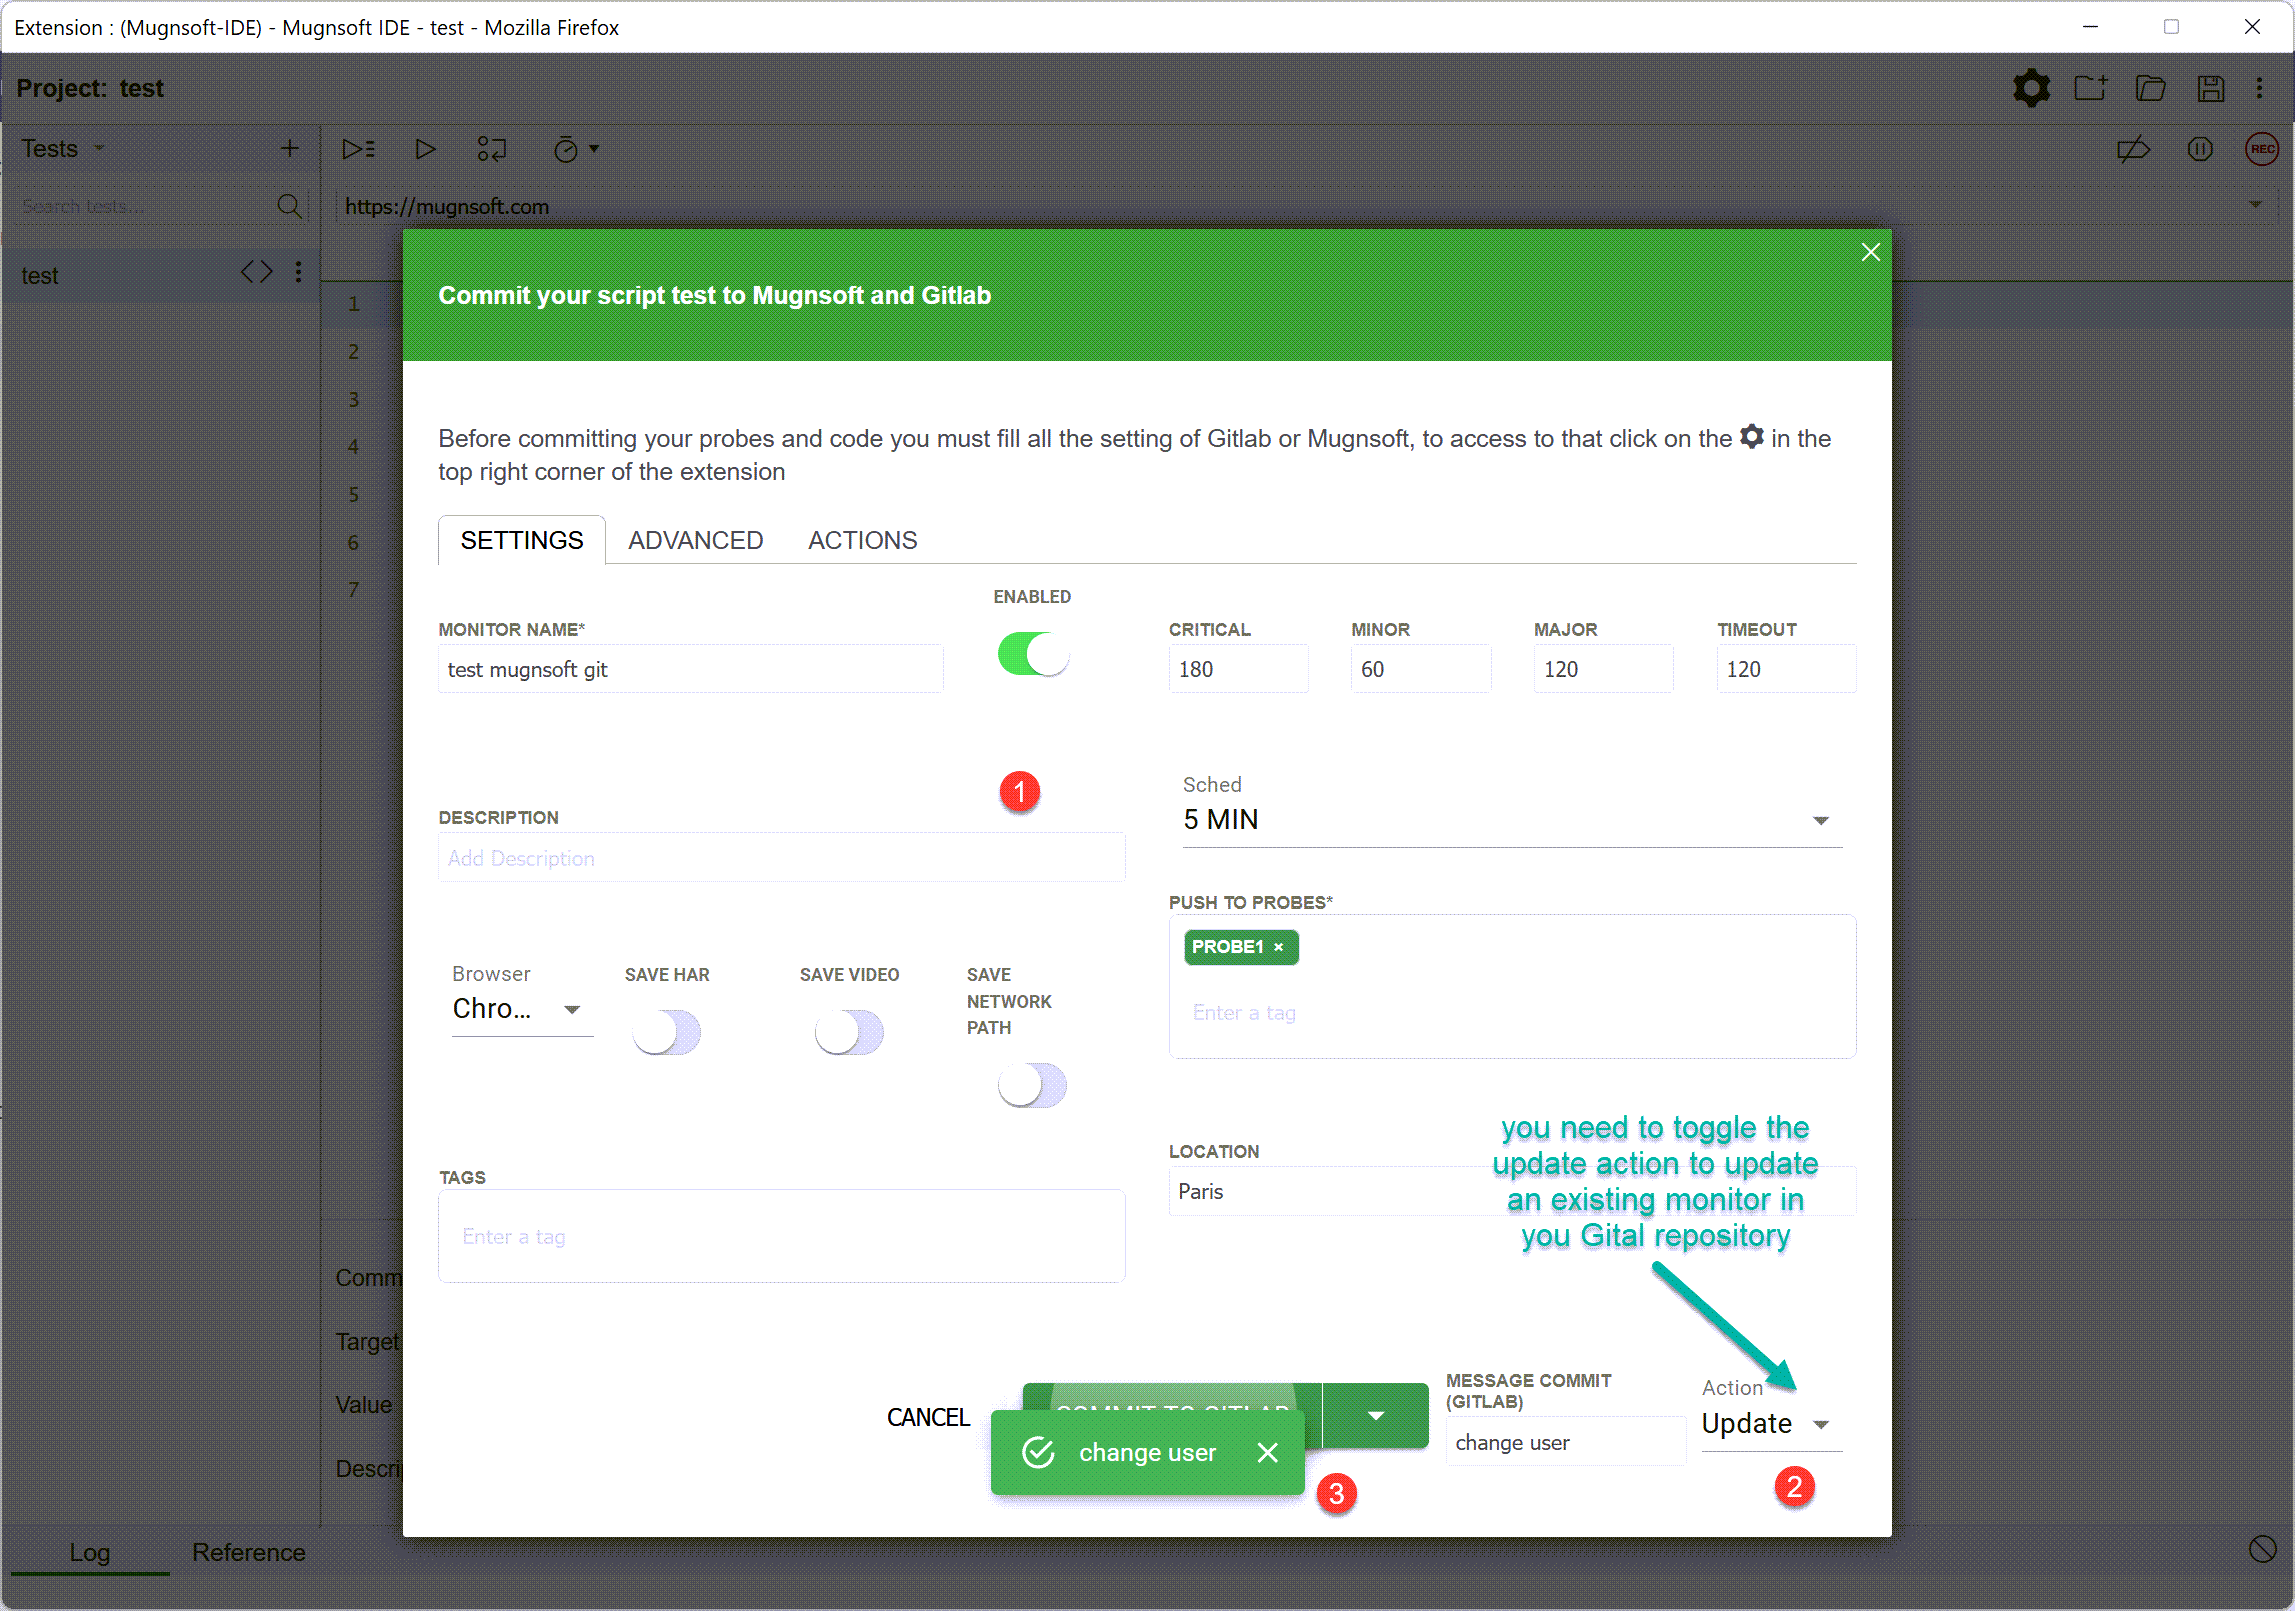
Commit your monitor setting to Gitlab
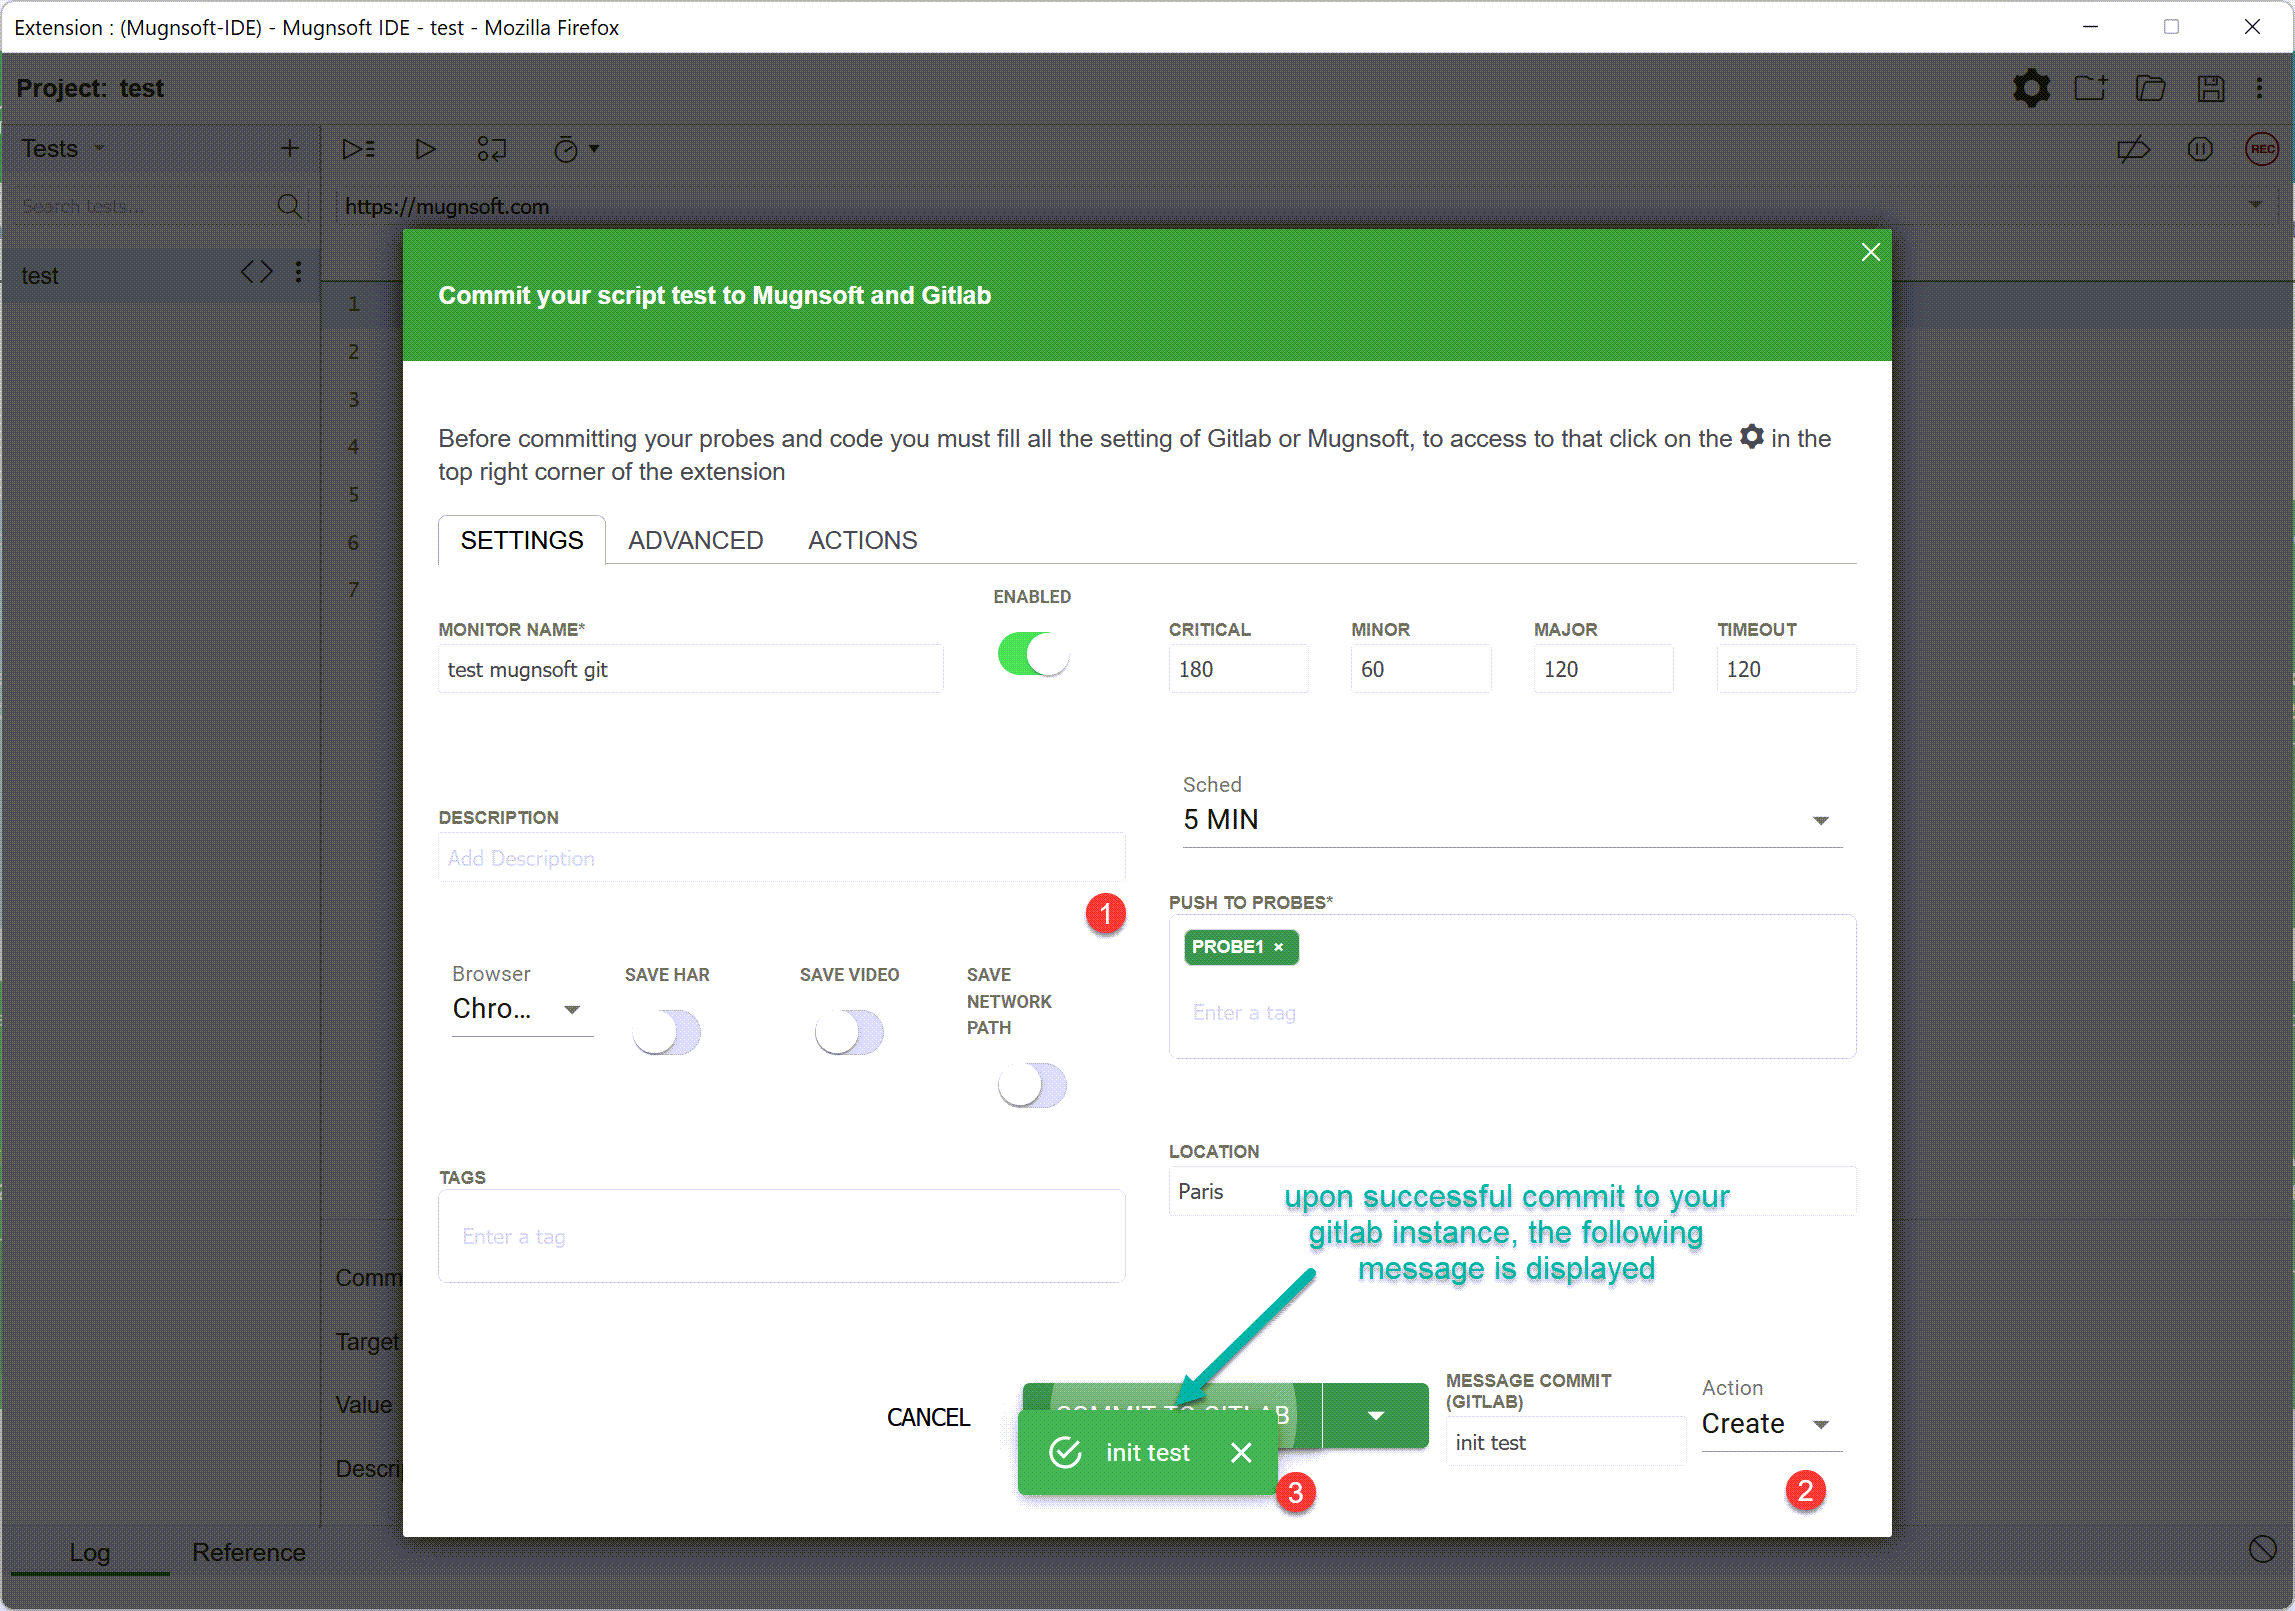
After you’ve finished setting up the monitor’s info, you can easily push it to your Gitlab’s “Mugnsoft-monitors” repository, as shown below :
A error message will be displayed if the monitor you are trying to push is already defined.
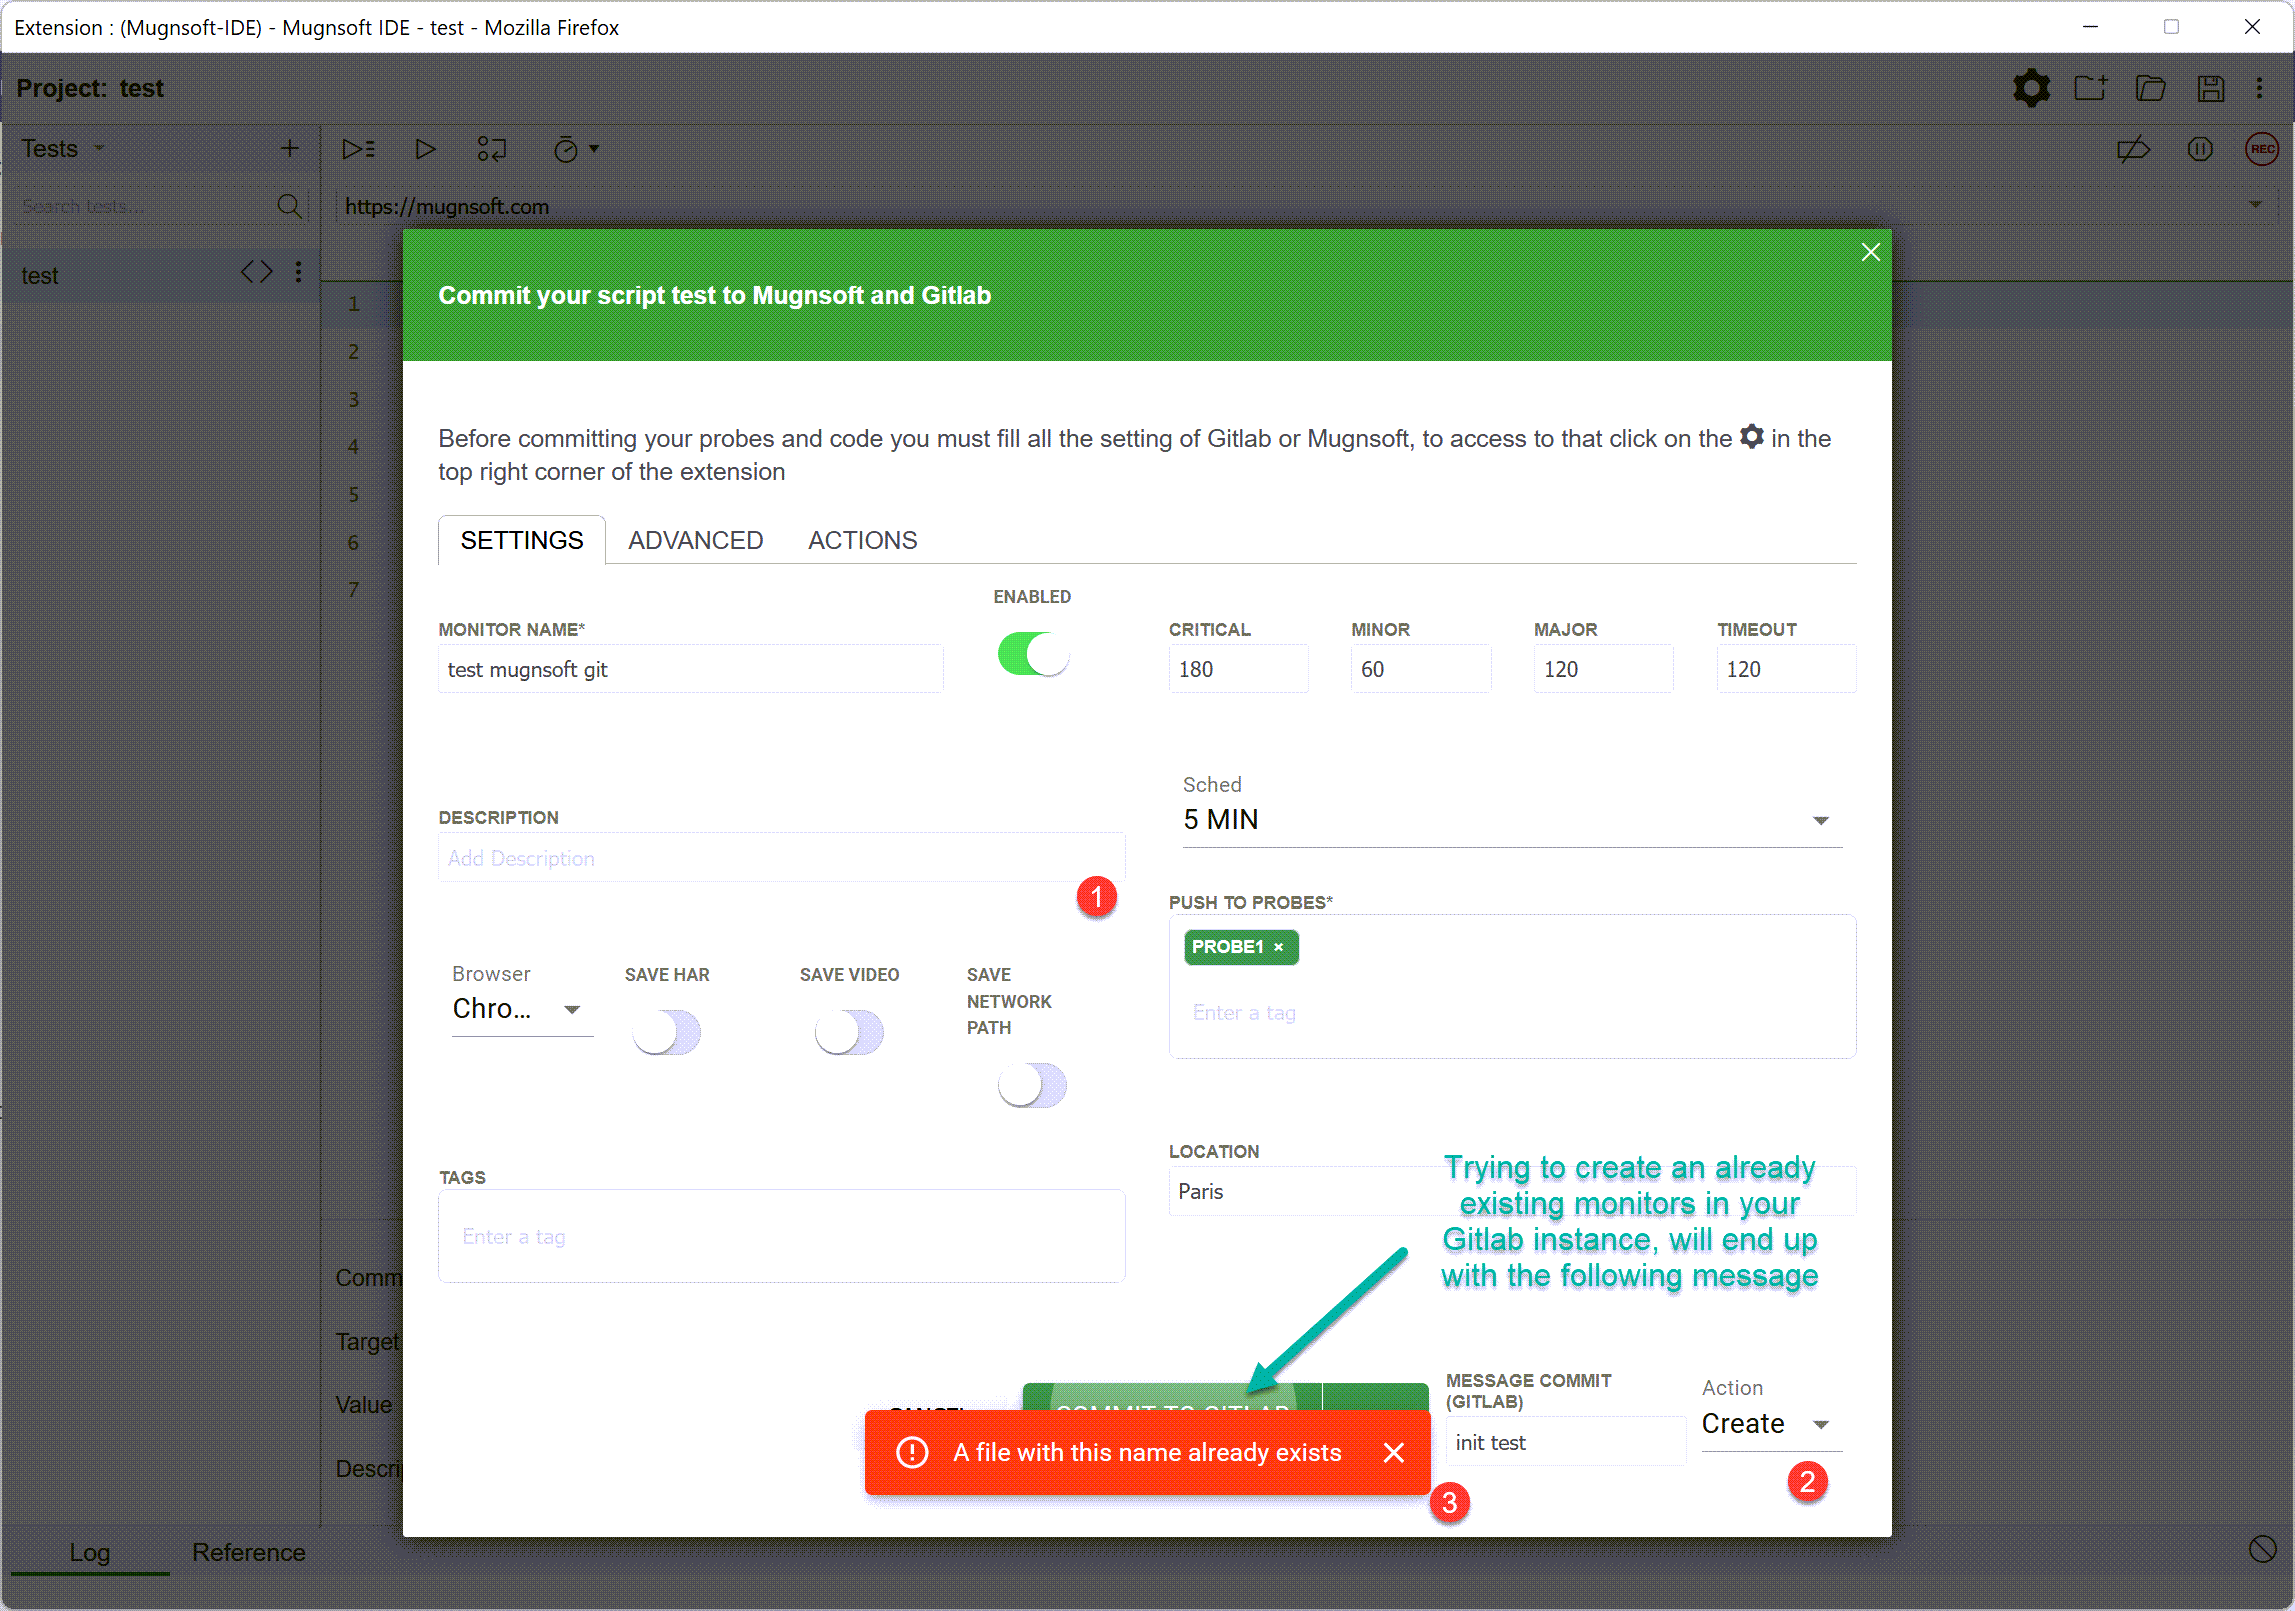
Alternatively you can push update to the monitor.
The monitor’s file should be found in your Gitlab repository along with the commit message as follow.

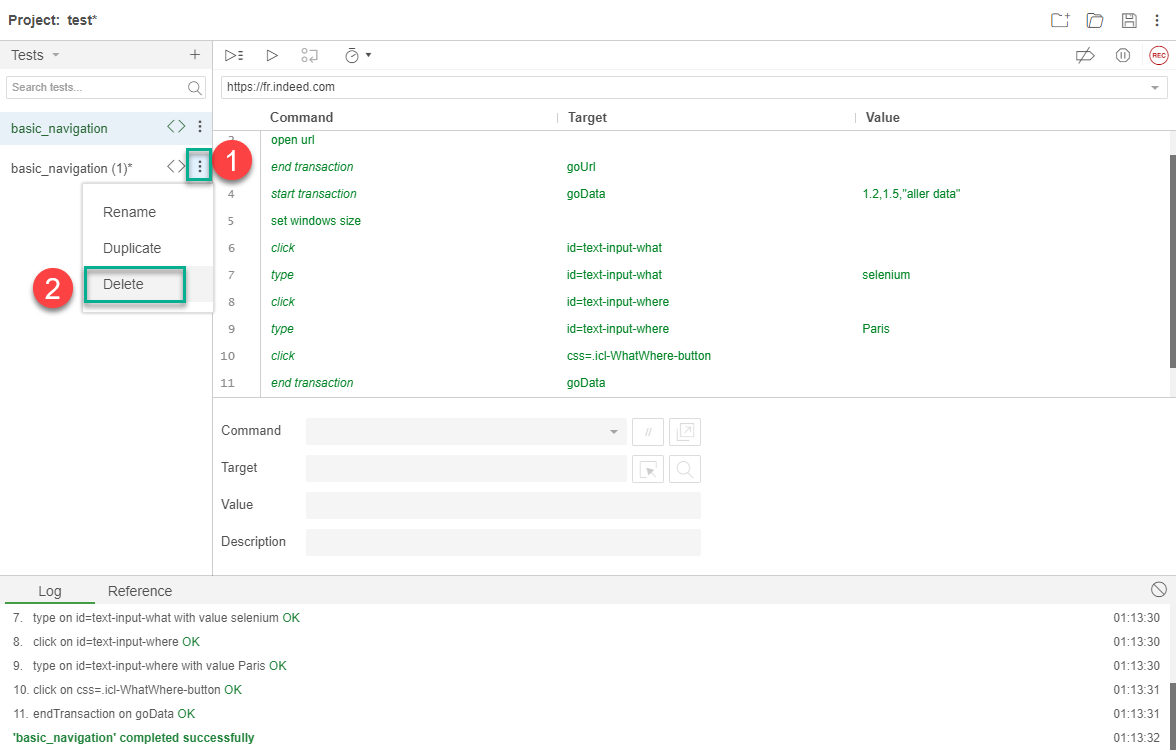
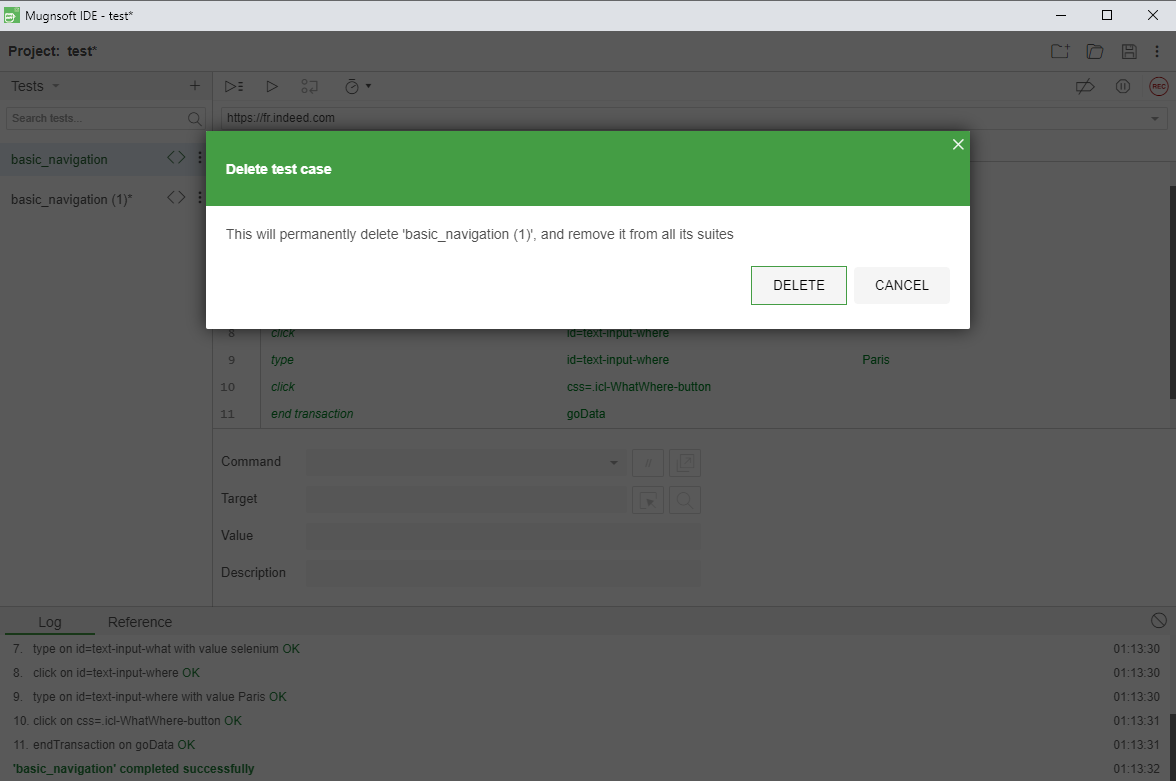
Delete a test
To delete a test, hover your mouse over the test and click the Delete button.
Save your project and work
To save everything you’ve just done in the IDE, click the save icon in the top-right corner of the IDE.
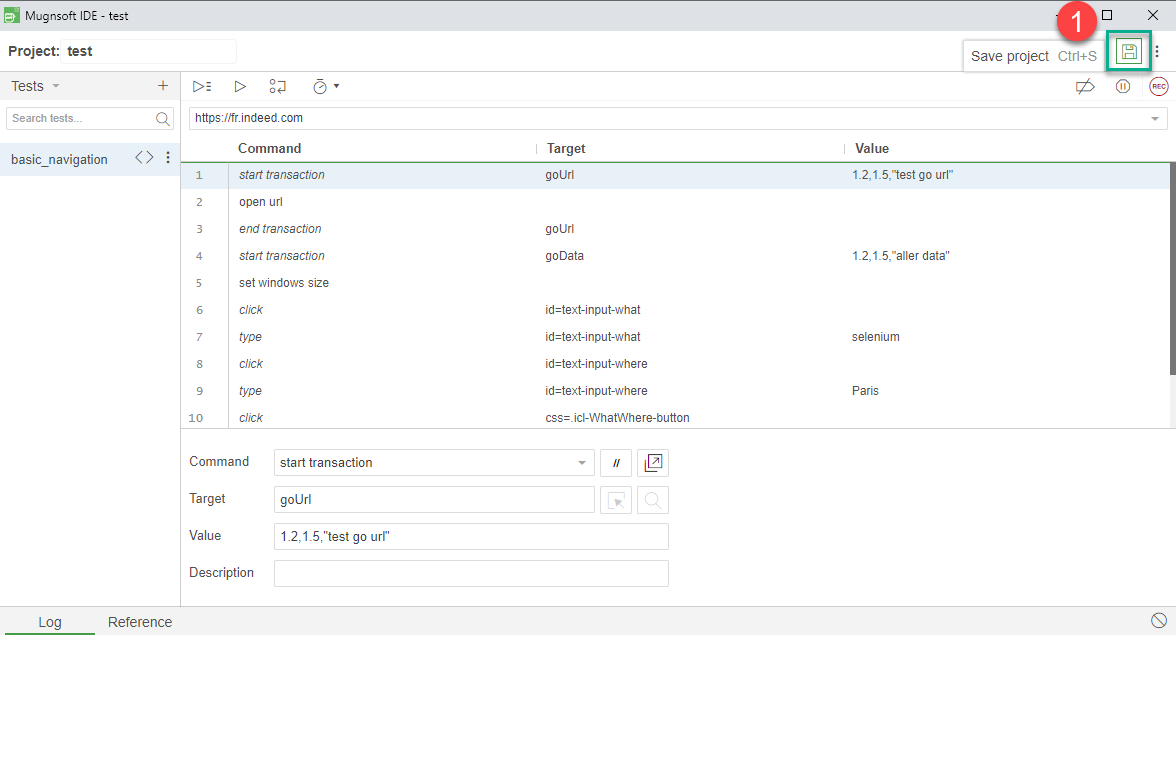
It will prompt you to for a location and name of where to save the project. The end result is a single file with a .side extension.
Playback
In-browser
You can play tests back in the IDE by selecting the test or suite you’d like to play and clicking the play button in the menu bar above the test editor.
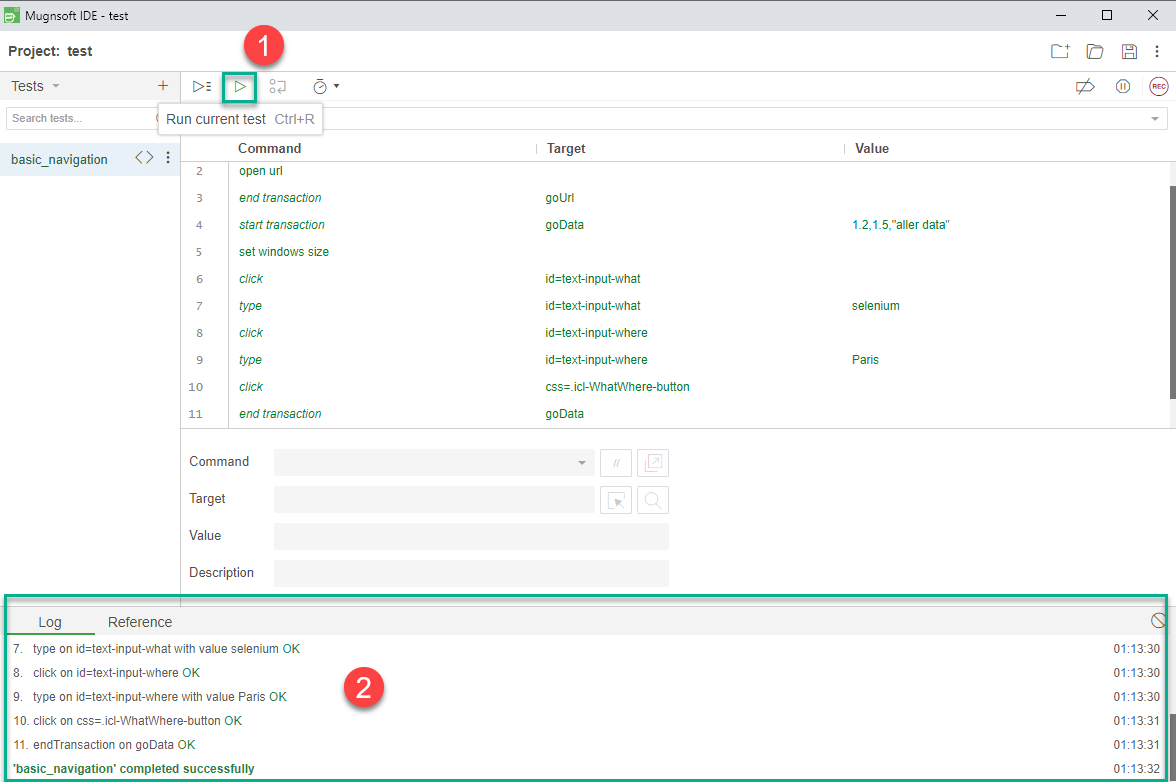
The test(s) will play back in the browser. If a window is still open from recording, it will be used for playback. Otherwise, a new window will be opened and used.