Code Export
In this section you will learn how to display the auto generated code as well as export it into a file or to other Selenium languages.
Exporting the generated code
You can show the auto generated code for your test in a modal window by simply clicking a button.

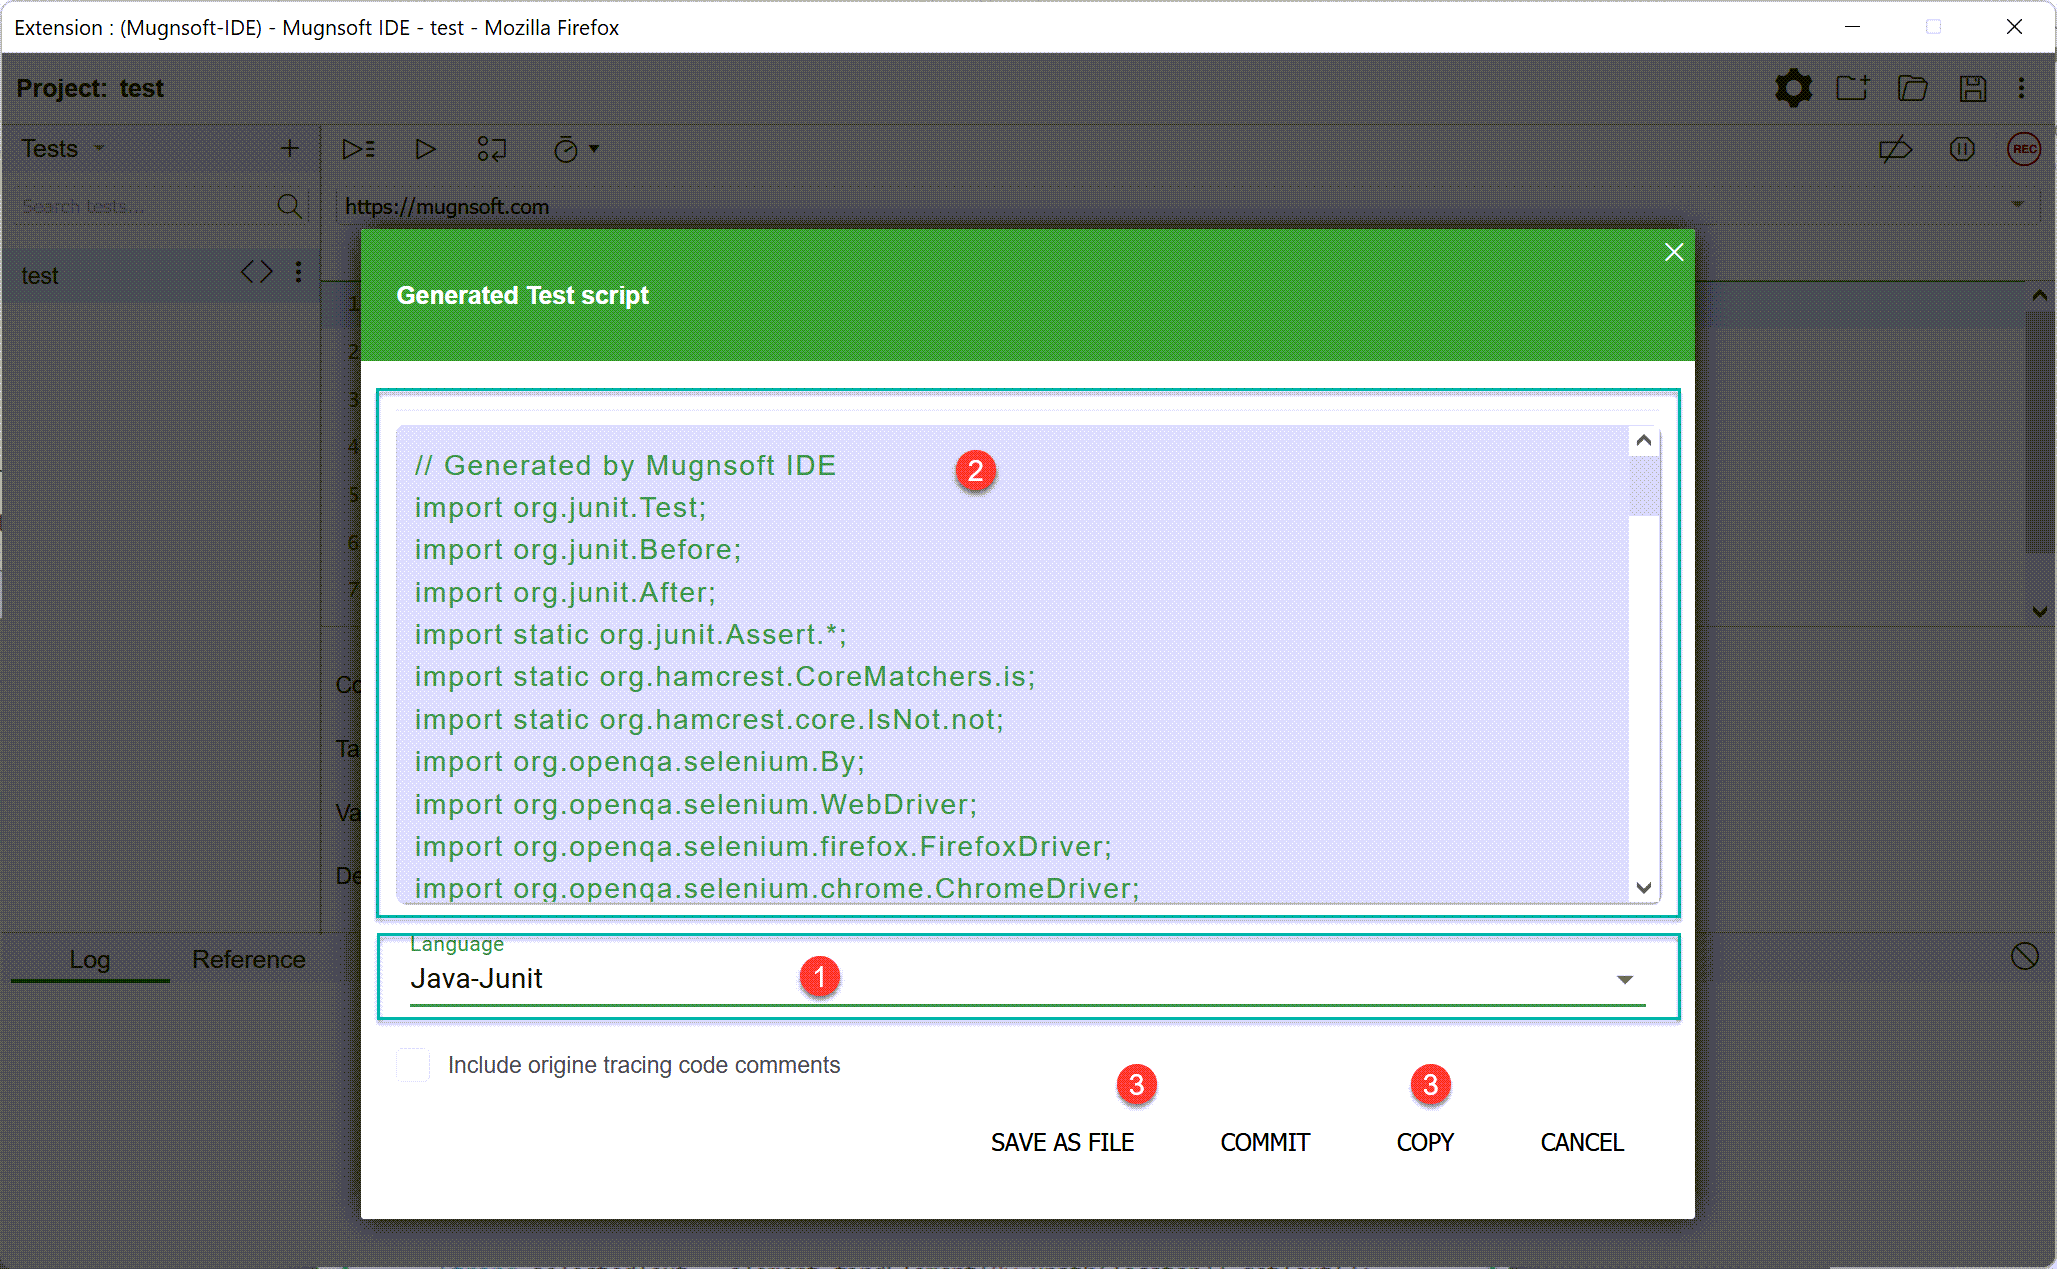
The expected code for Mugnsoft monitor will be displayed first in a modal window.
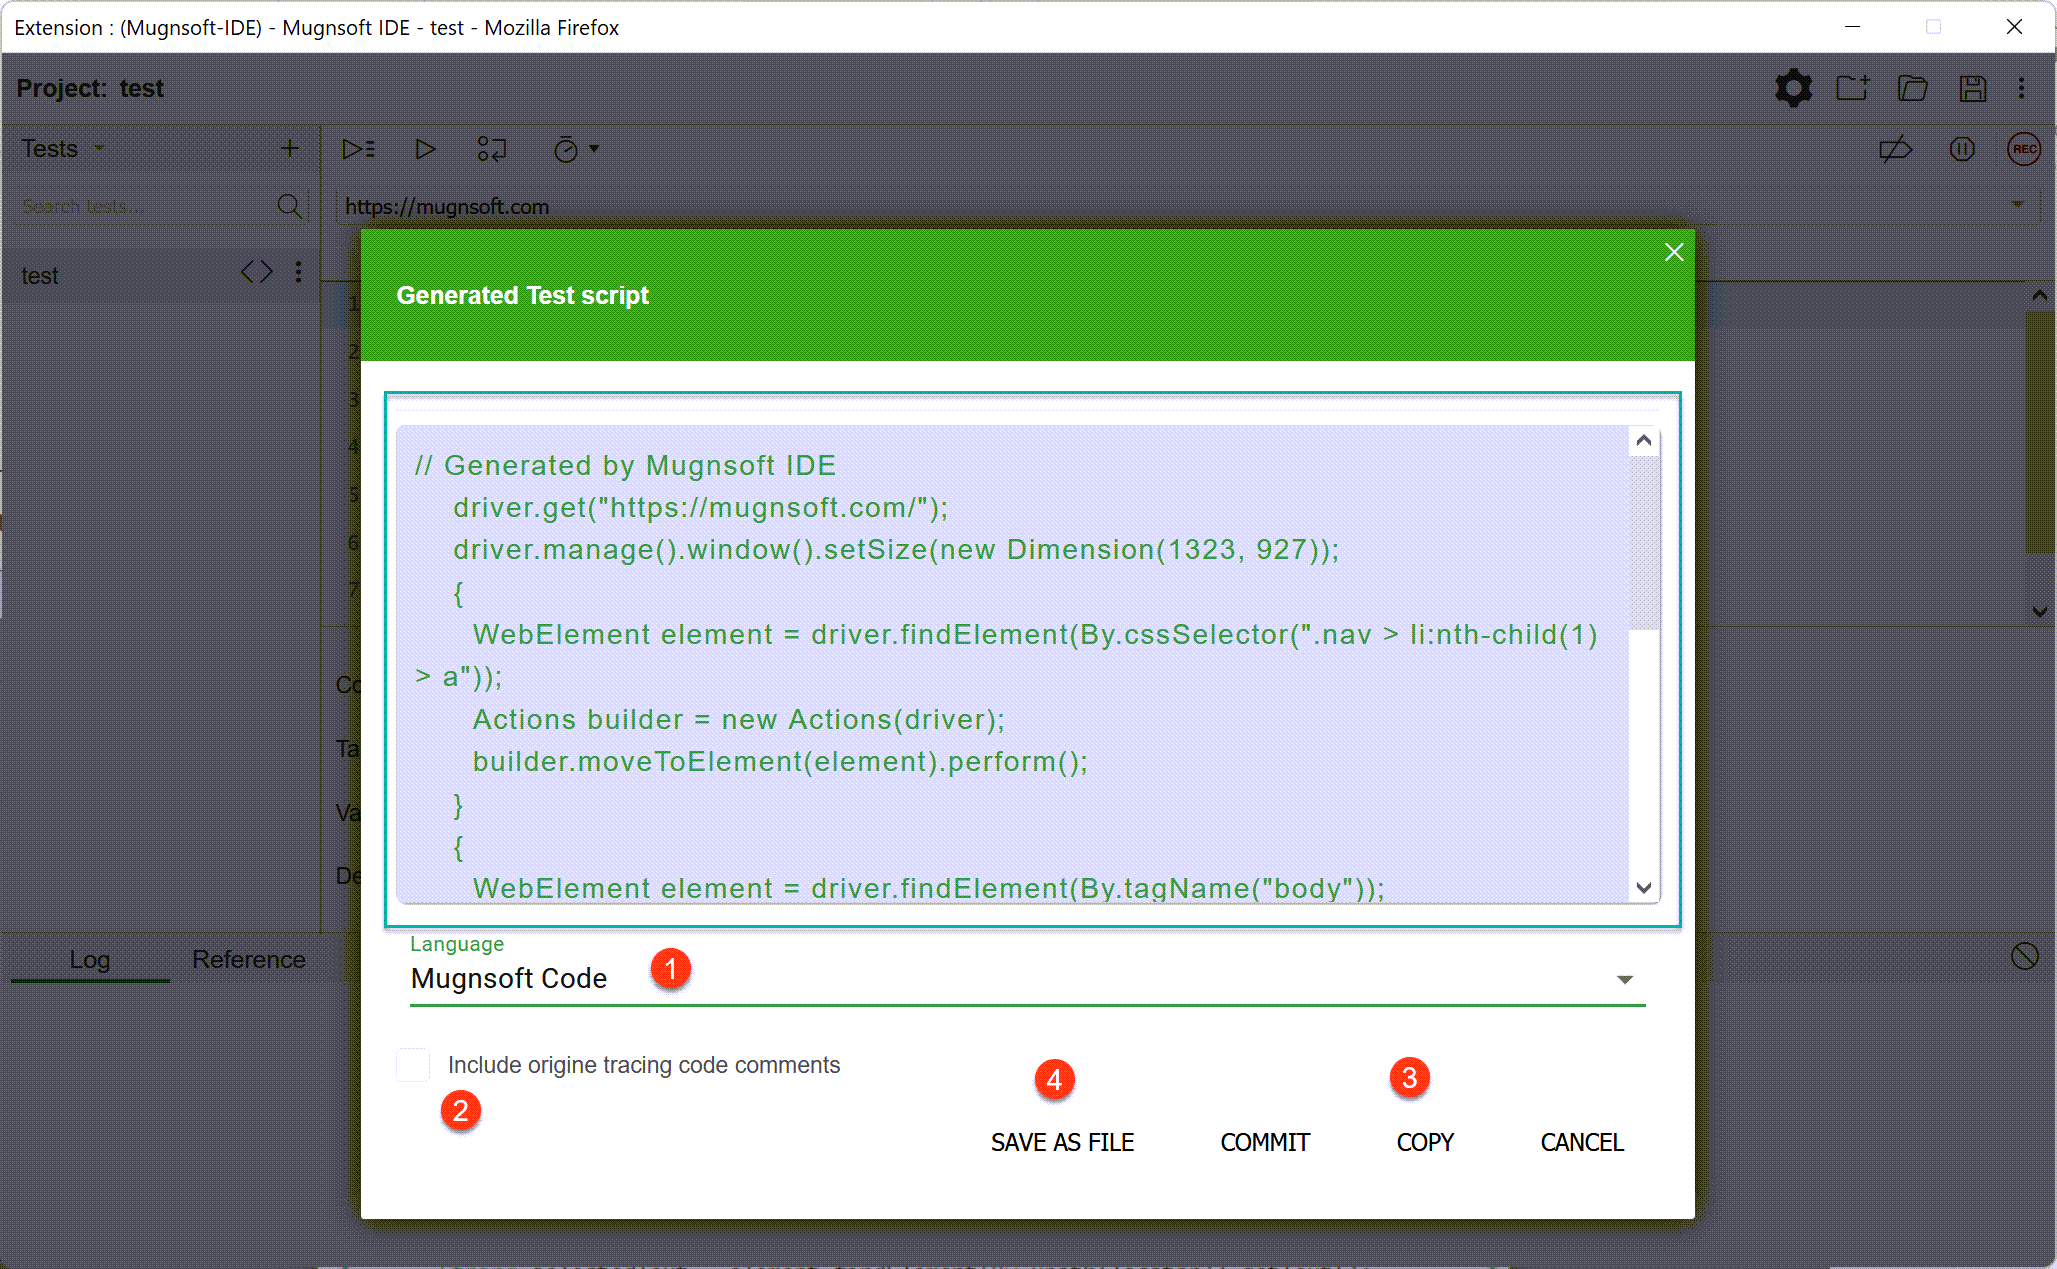
(1) The code language
(2) The toggle to include tracing and comments
(3) The button to copy the displayed code
(4) The button to export the displayed code into a file
Note:
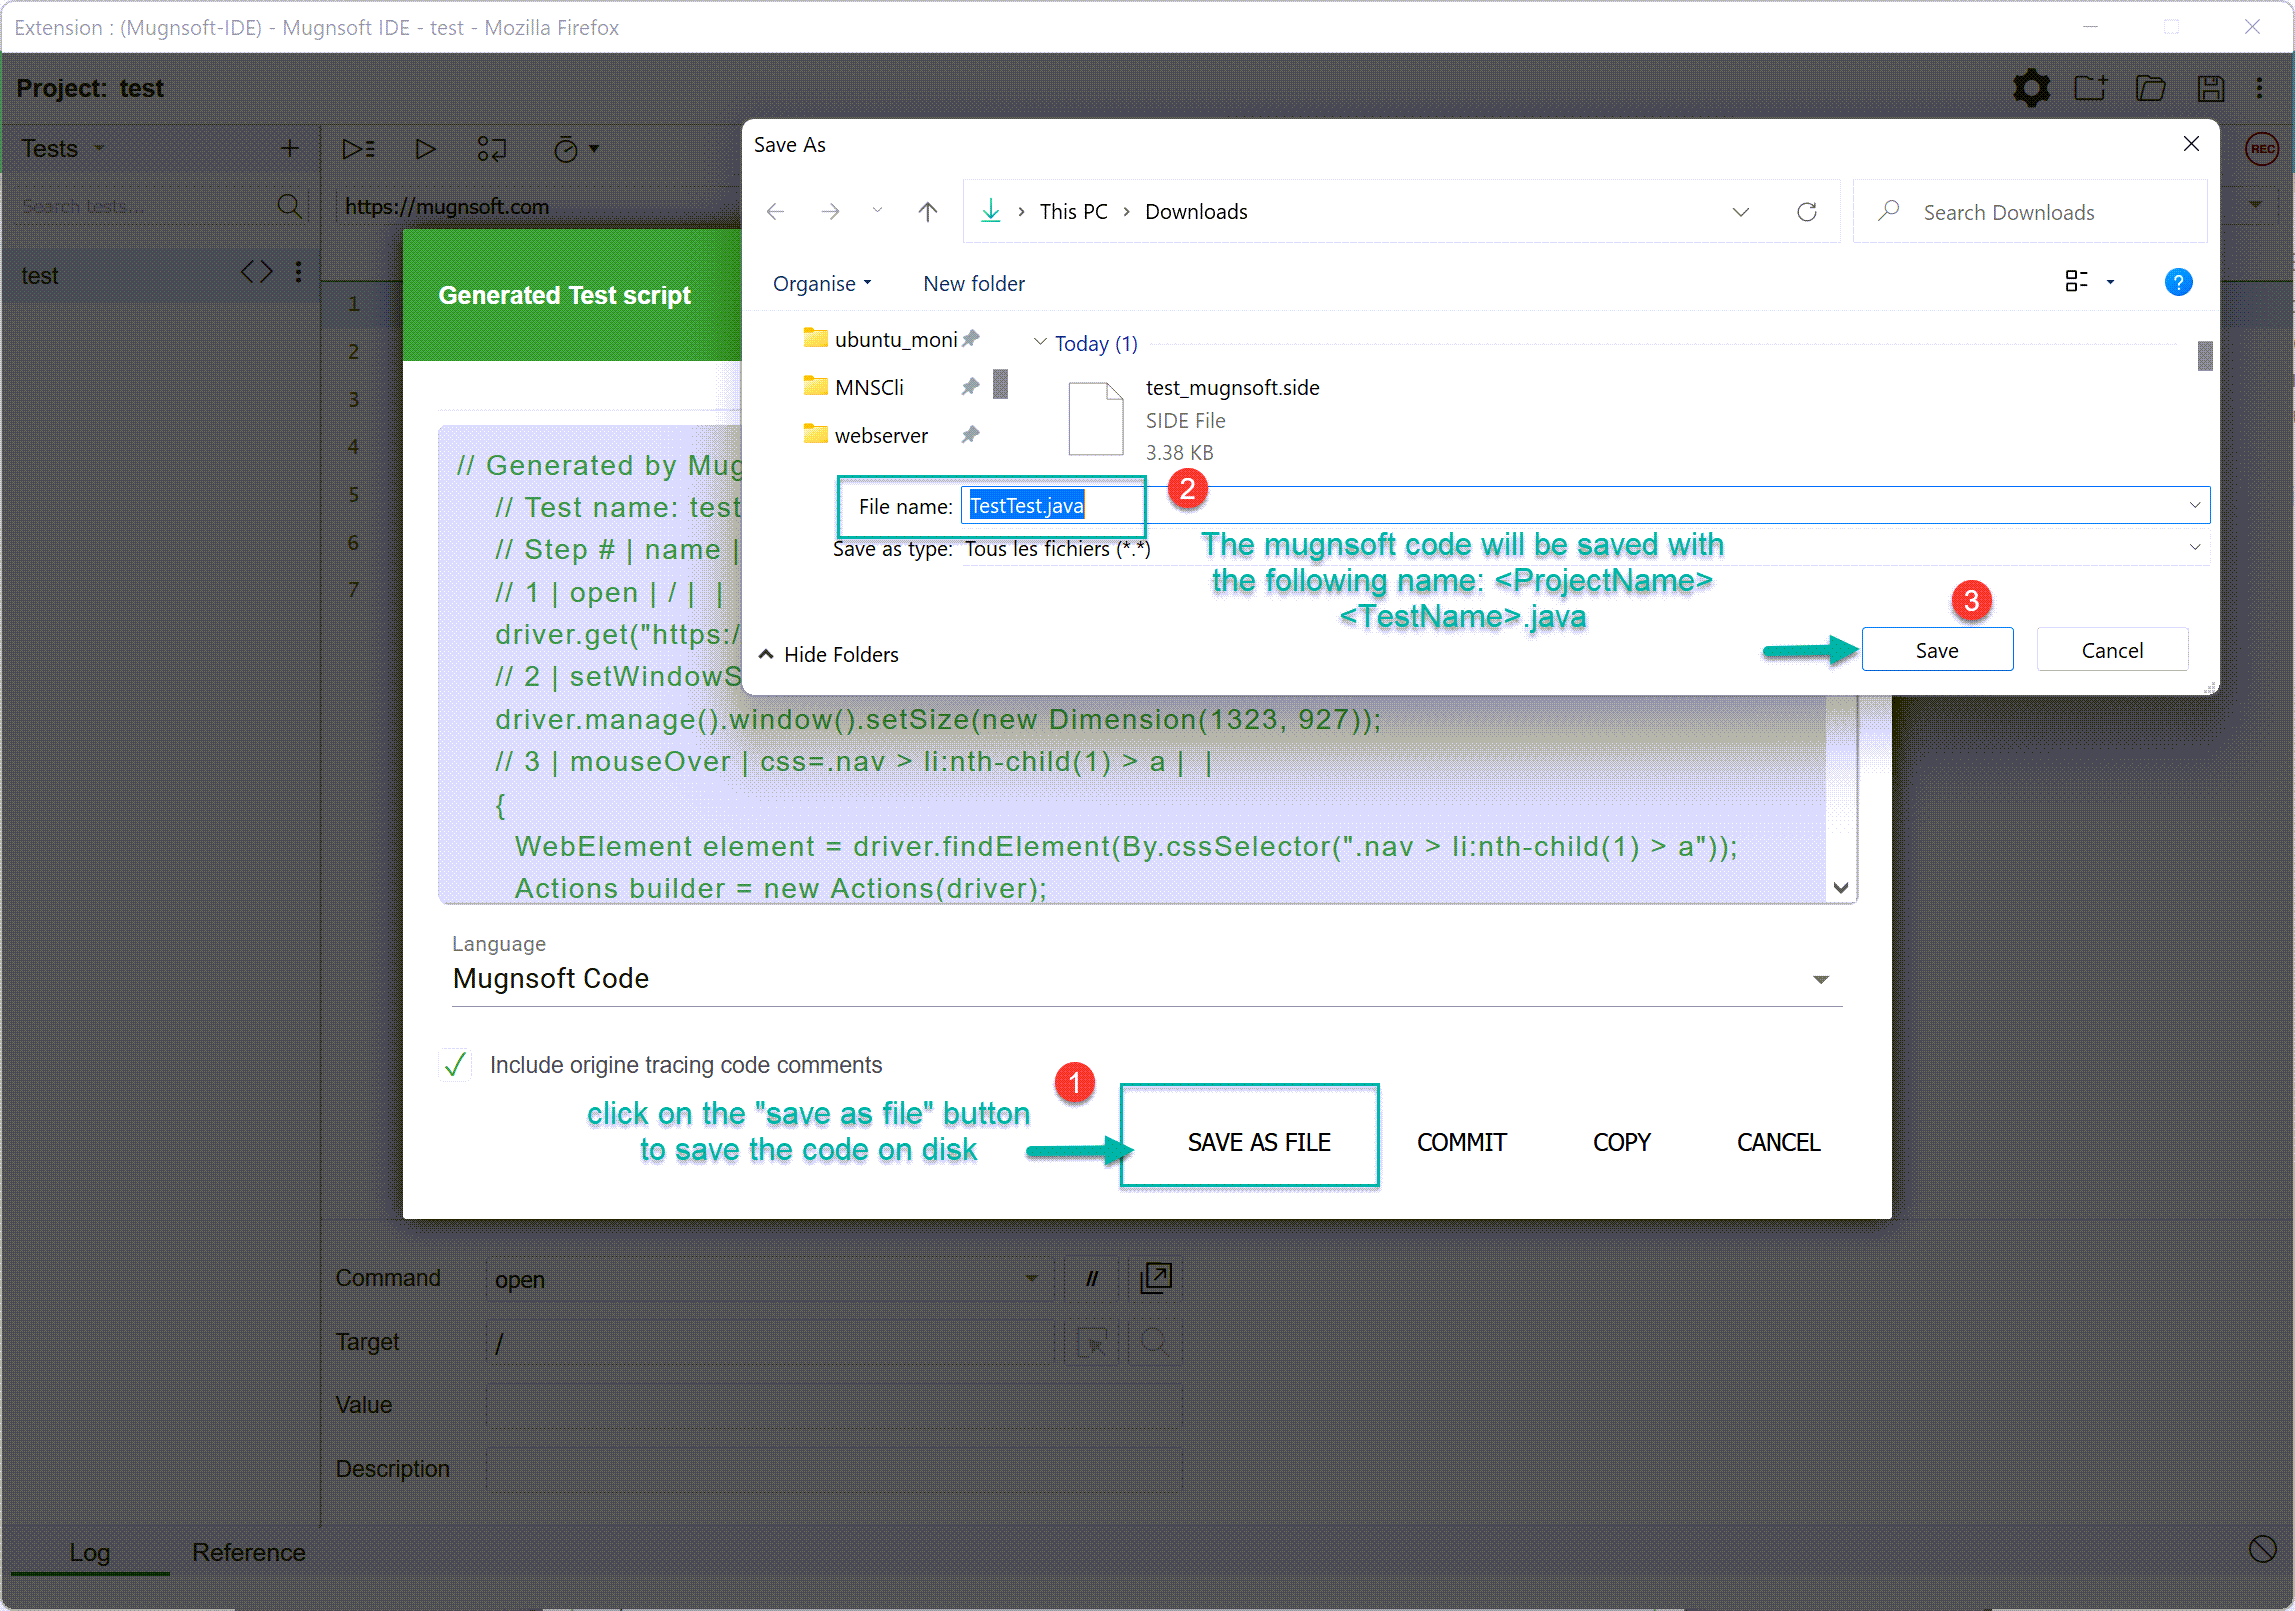
Saving locally the generated code
If you need to save that code into a file, click on the Save as file button. This will save a file containing the exported code for your target language to your browser’s download directory.
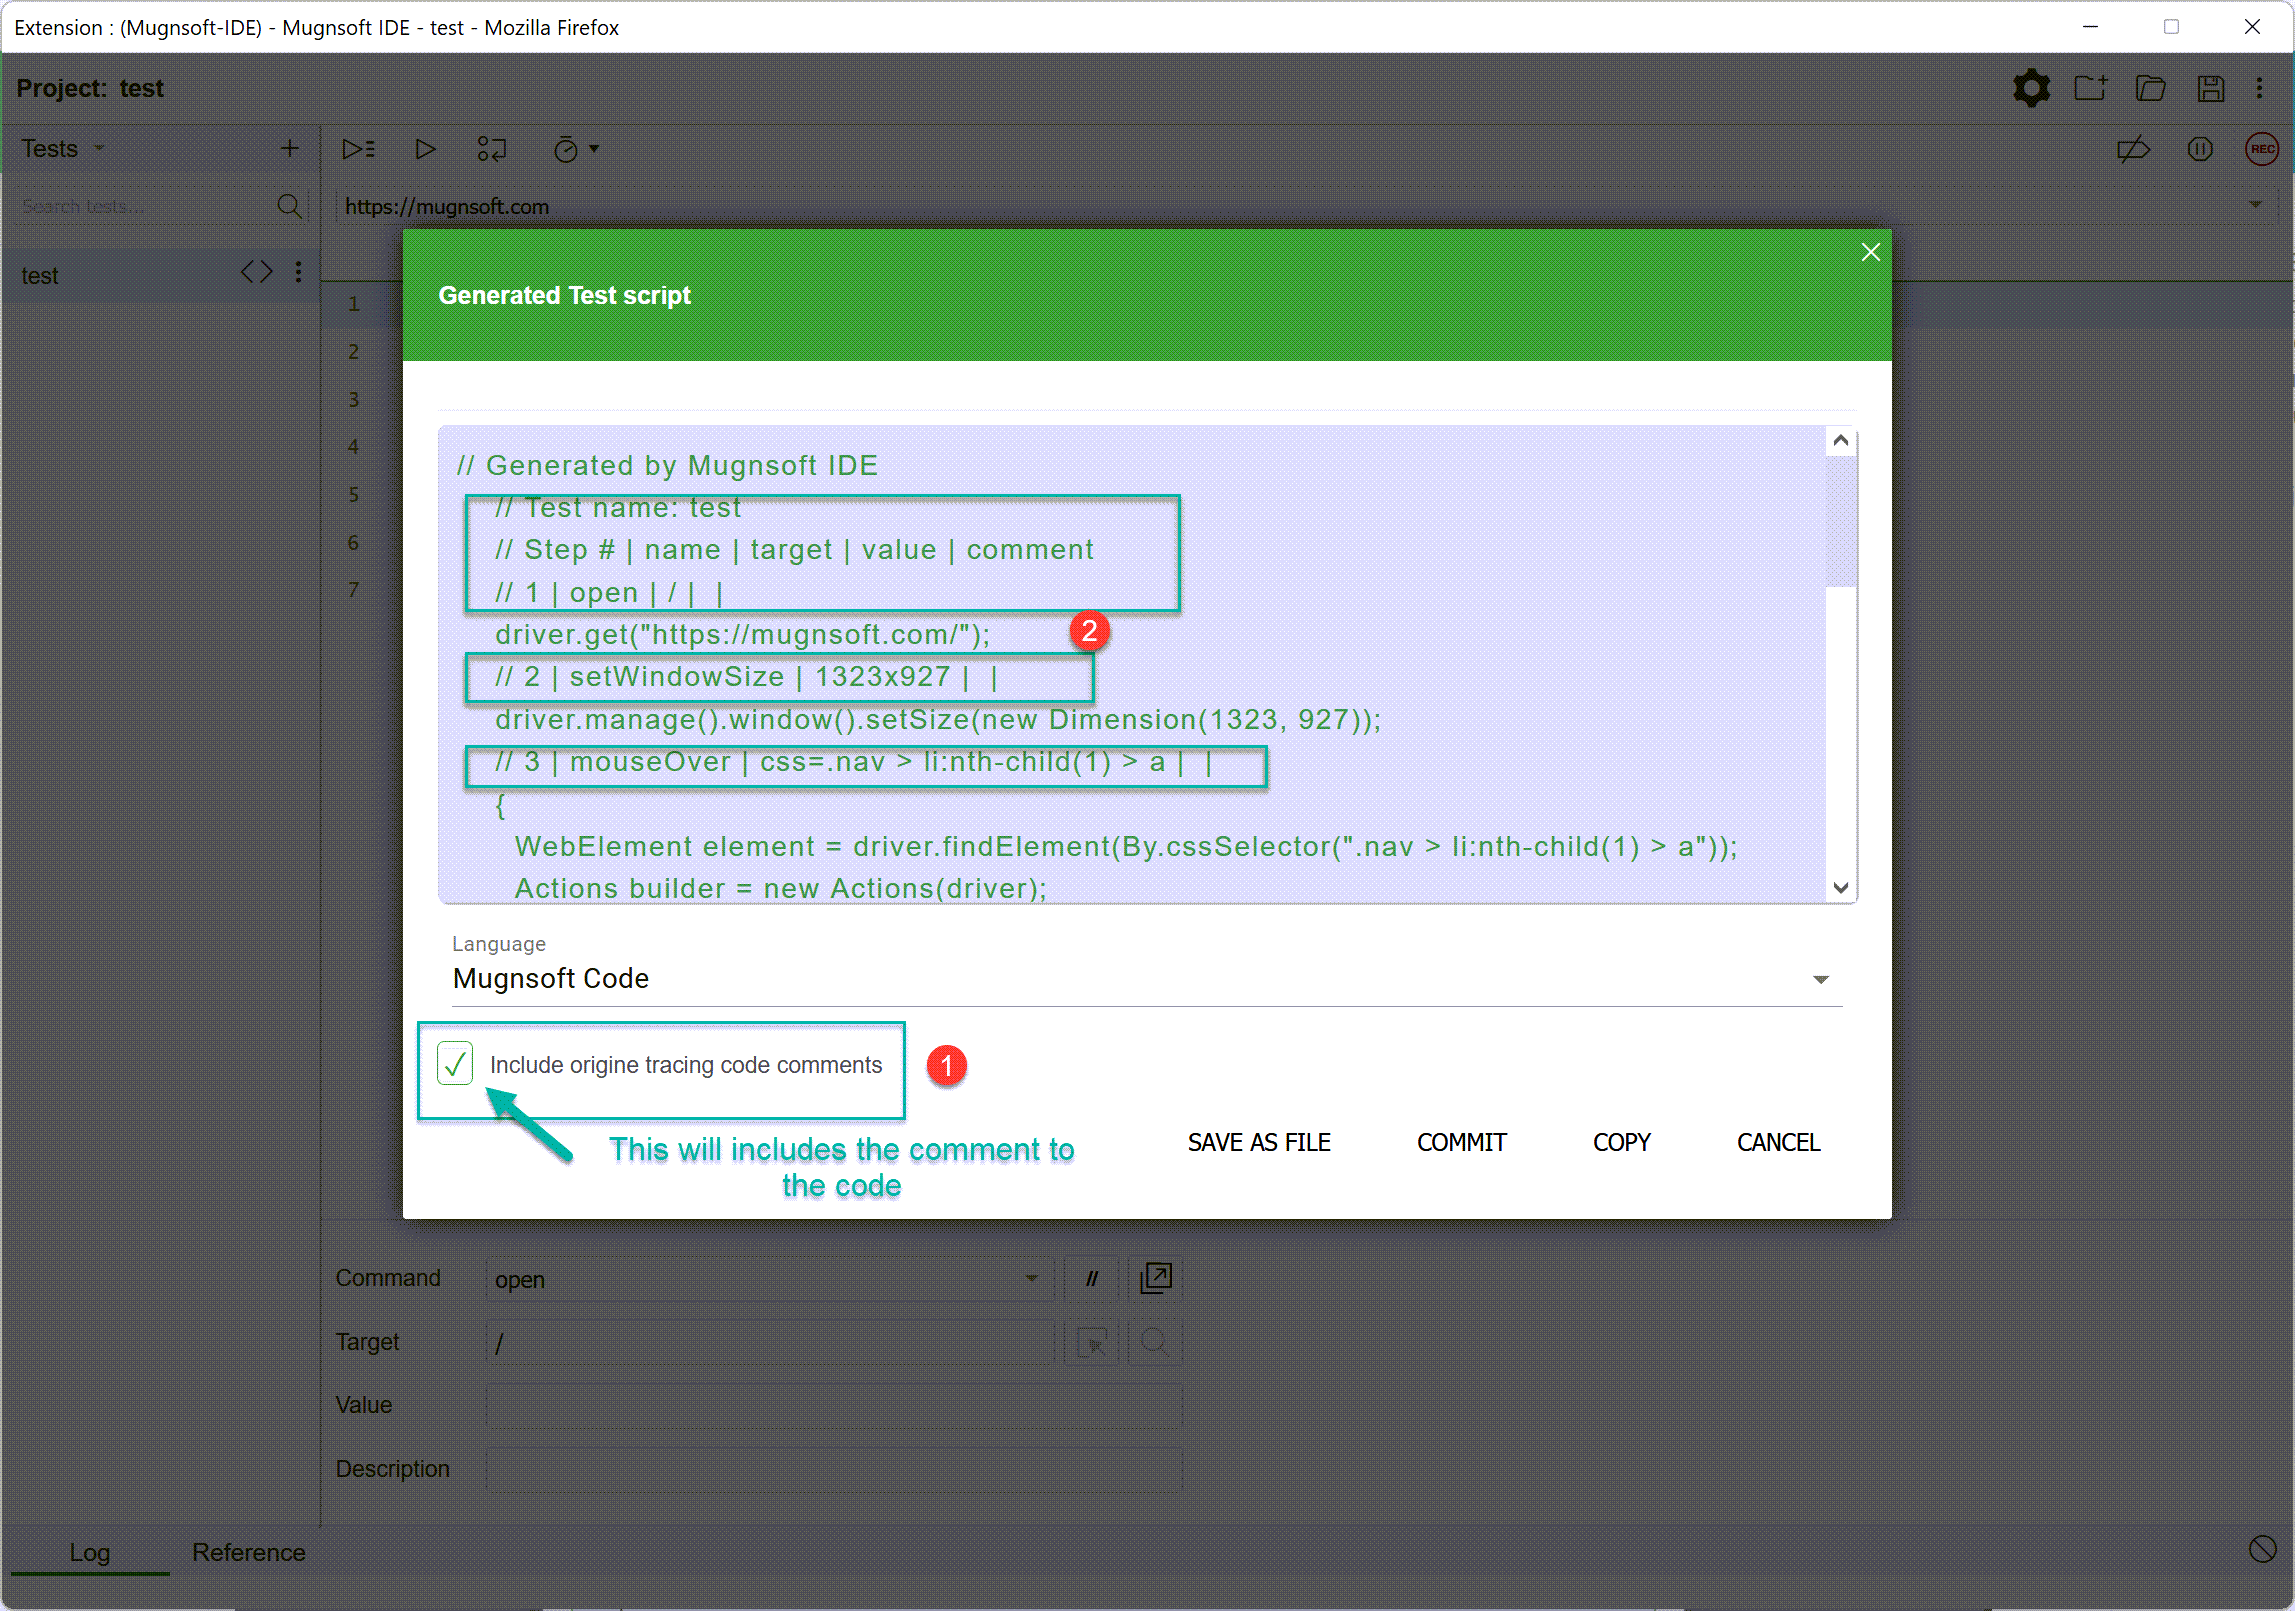
Adding tracing code comments
When exporting there is an optional toggle to enable origin tracing code comments.
This will place inline code comments in the exported file with details about the test step in Mugnsoft IDE that generated it.
Optionnally you can add auto-comments to the generated code.
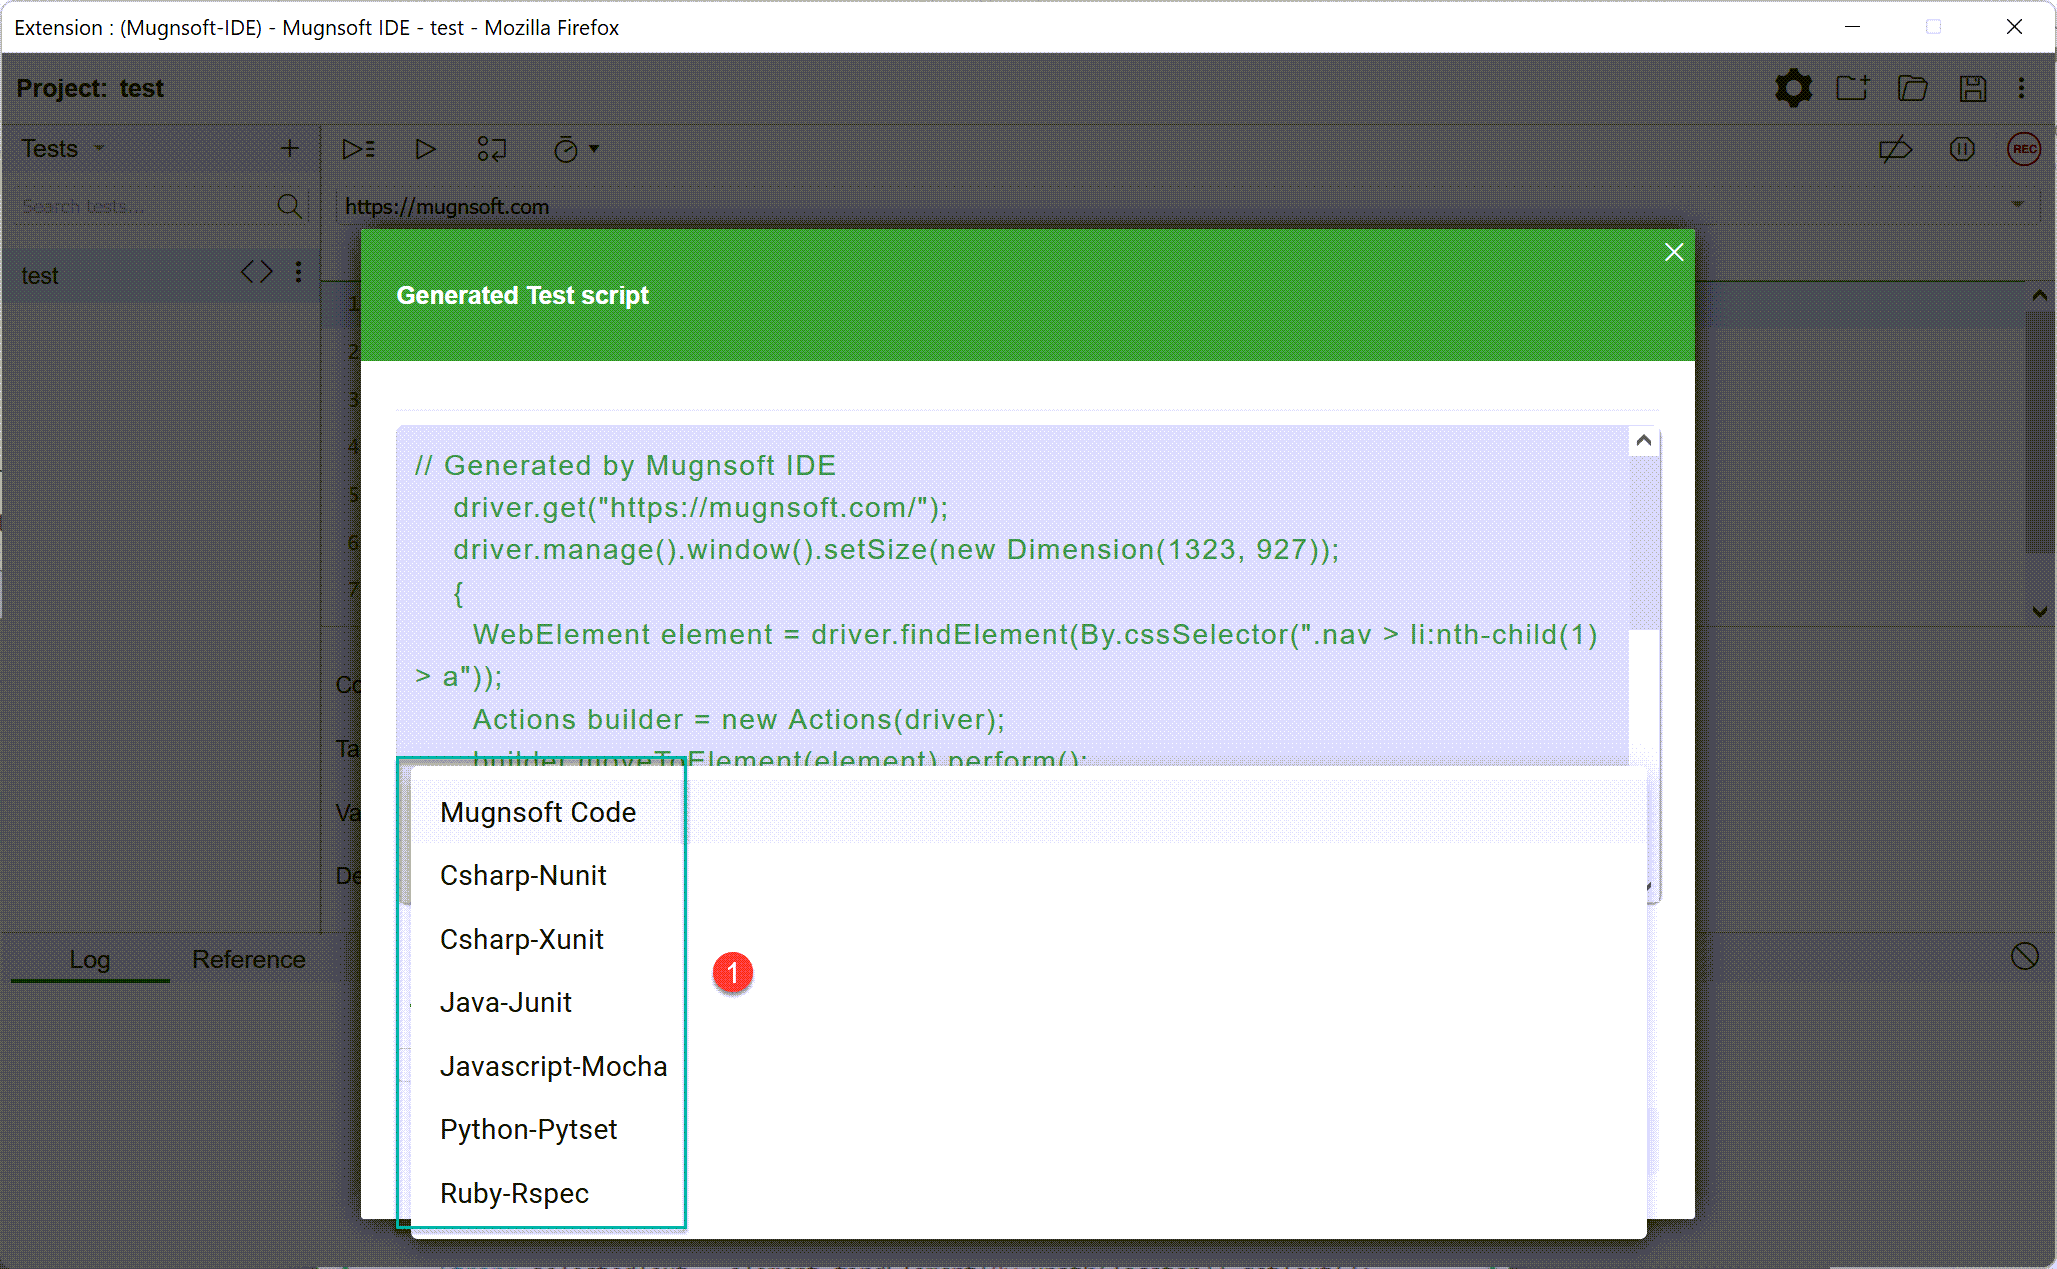
Supported Exports languages
Beside Mugnsoft Selenium code syntax, you can export to the following languages:
- C# NUnit
- C# xUnit
- Java JUnit
- JavaScript Mocha
- Python pytest
- Ruby Rspec
We support all of the officially supported programming language bindings for Selenium (e.g., C#, Java, JavaScript, Python, and Ruby) in at least one testing framework for each language.
C# NUnit
The exported code for C# NUnit is built to work with the .NET Core, NUnit 3.11, and the latest version of Selenium.
To create a new boilerplate project to work with NUnit use the dotnet new command.
dotnet new nunit -n NUnit-Tests --framework netcoreapp2.0
With the following .csproj file you can install the correct packages and versions by using the dotnet restore command.
<!-- filename: example.csproj -->
<Project Sdk="Microsoft.NET.Sdk">

  <PropertyGroup>
    <TargetFramework>netcoreapp2.0</TargetFramework>

    <IsPackable>false</IsPackable>
  </PropertyGroup>

  <ItemGroup>
    <PackageReference Include="nunit" Version="3.11.0" />
    <PackageReference Include="NUnit3TestAdapter" Version="3.13.0" />
    <PackageReference Include="Microsoft.NET.Test.Sdk" Version="16.0.1" />
    <PackageReference Include="Selenium.Support" Version="4.0.0-alpha03" />
    <PackageReference Include="Selenium.WebDriver" Version="4.0.0-alpha03" />
  </ItemGroup>

</Project>
> dotnet restore example.csproj
C# xUnit
The exported code for C# xUnit is built to work with C#, xUnit, and the latest version of Selenium.
Just like C# Nunit, you can install it with dotnet tools and run it after installing these dependencies (e.g., with either Install-Package Selenium.WebDriver or dotnet add package Selenium.WebDriver).
To create a new boilerplate project to work with xUnit use the dotnet new command.
> dotnet new xUnitTests
With the following .csproj file you can install the correct packages and versions by using the dotnet restore command.
<!-- filename: example.csproj -->
<Project Sdk="Microsoft.NET.Sdk">

  <PropertyGroup>
    <TargetFramework>netcoreapp2.0</TargetFramework>

    <IsPackable>false</IsPackable>
  </PropertyGroup>

  <ItemGroup>
    <PackageReference Include="xunit" Version="2.4.1" />
    <PackageReference Include="Microsoft.NET.Test.Sdk" Version="16.0.1" />
    <PackageReference Include="Selenium.Support" Version="4.0.0-alpha03" />
    <PackageReference Include="Selenium.WebDriver" Version="4.0.0-alpha03" />
  </ItemGroup>

</Project>
> dotnet restore example.csproj
Java JUnit
The exported code for Java JUnit is built to work with Java 8, JUnit 4.12, and the latest version of Selenium.
You should be able to take the exported Java file and place it into a standard Maven directory structure with a pom.xml file listing these dependencies and run it.
Here’s a sample pom.xml to help you get started.
<project>
  <modelVersion>4.0.0</modelVersion>
  <groupId>org.seleniumhq.selenium</groupId>
  <artifactId>Mugnsoft-ide-java-code-export</artifactId>
  <version>1</version>
  <url>http://maven.apache.org</url>
  <dependencies>
    <dependency>
      <groupId>junit</groupId>
      <artifactId>junit</artifactId>
      <version>4.12</version>
      <scope>test</scope>
    </dependency>
    <dependency>
      <groupId>org.seleniumhq.selenium</groupId>
      <artifactId>selenium-java</artifactId>
      <version>4.0.0-alpha-3</version>
    </dependency>
  </dependencies>
</project>
JavaScript Mocha
The exported code for JavaScript Mocha is built to work with Node 10, Mocha 6.1.x, and the latest version of Selenium.
You should be able to take the exported JavaScript file and run it after installing these dependencies (e.g., with npm install).
Here’s a sample package.json to help you get started.
{
  "dependencies": {
    "mocha": "^6.1.4",
    "selenium-webdriver": "^4.0.0-alpha.3"
  }
}
Python pytest
The exported code for Python pytest is built to work with Python 3, pytest 4.6.x, and the latest version of Selenium.
You should be able to take the exported JavaScript file and run it after installing these dependencies (e.g., with pip3 install).
Here’s a sample requirements.txt to help you get started.
pytest == 4.6.3
selenium == 4.0.0a1
> pip3 install -r ./requirements.txt
Ruby RSpec
The exported code for Ruby Rspec is built to work with Ruby 2.6.x, RSpec 3.9.x, and the latest version of Selenium.
Through the use of Bundler and the following Gemfile you can install the necessary dependencies.
# Gemfile
source 'https://rubygems.org'

gem 'selenium-webdriver'
gem 'rspec'
> gem install bunder
> bundle install